• If you are new to GiantScaleNews.com, please register, introduce yourself, and make yourself at home.

    We're 1st in Giant Scale RC because we've got the best membership on the internet! Take a look around and don't forget to register to get all of the benefits of GSN membership!

    Welcome!

The 'What did you do in your workshop tonight?' thread

Snoopy1

640cc Uber Pimp
Hey Fellas; I guess I am stuck at home today due to really "WET" weather. Ugh.. At least it is warm. Right at about 50 degrees and loving it. Spring will be here sooner than we think. Maybe I can get a few irons out of the fire today and maybe get a few things caught up. Got off yesterday at 2 so I decided I would get the ball rolling with that pesky broken muffler on the Baby Yak-Ster. I should have done this in the first place. I stalled for a long time trying to decide whether or not to cut the cowl for the stock muffler.

I hope I don't go overboard with all the information. As usual, I try to include as much information as possible to help some of the newer guys to the hobby. Most all of you fellas already know this stuff.

First, off with the spinner, prop and cowl. Nice to see things just as they were when I put the cowl on. Nice and clean and organized.

View attachment 101255

Well except for this....!!! Ugh!!!

View attachment 101256 View attachment 101257 View attachment 101258

Goofy as it may be, apparently the aluminum muffler just was too weak at the flange joint. Oh well, we're gonna rectify this. First though, a quick looksy at the double ringed piston. Clean and well lubed. Gotta love that Redline.

View attachment 101259

Also took a minute to double check the torque on all mounting hardware and bolts.

View attachment 101260 View attachment 101261

Ok, on to the header and canister install. First, a little clean up of the mounting flange on the DA 60 flex header with a flat file. Just making sure the surface is clean.

View attachment 101262

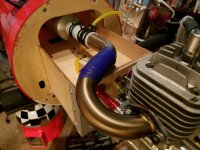
This is the intended replacement exhaust setup. DA 60 Flex Header and KS 60 canister. I may have to go to an MTW 75 for better flow, but I am going to try the KS 60 first.

View attachment 101263

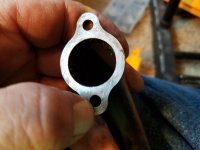
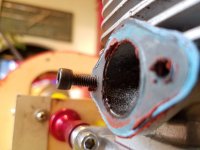
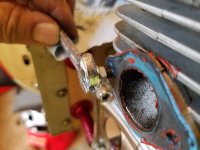
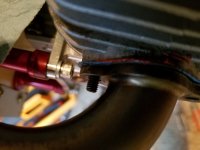
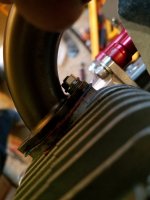
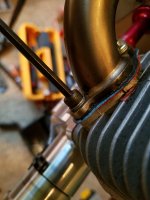
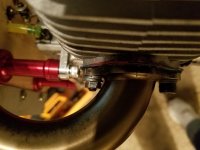
The first and only real hurdle in this setup is going to be the header mounting flange. The bend of the header as it exits the flange is just too sharp of a bend that it is next to impossible to get a bolt in there. Perhaps this is why the gent I bought the nearly new header from sold it so inexpensively? At any rate, even the shortest bolt I have is difficult to get in the flange. And even that will not facilitate inserting a hex wrench to tighten it. Not to mention, just way too few threads to feel comfortable with. I certainly don't want to strip the cylinder threads out.

View attachment 101264 View attachment 101265 View attachment 101266 View attachment 101267

Have to take a minute and attend to something. Back in few minutes with more of this header and canister install.

Why would you not put a stud in the cylinder head and then use a nut to tighten it down.
 

stangflyer

I like 'em "BIG"!
Ok, back now. Where were we? Ah yes, the flange bolt hurdle! My first thought was to "slot" the one side of the flange. As I have seen some headers designed this way, I figured I could do that with my cut off wheel on dremel.

20180109_155948.jpg

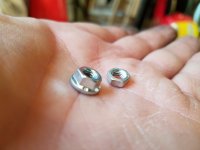
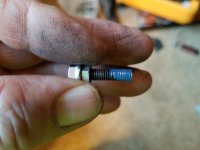
But I have an issue with that. I don't like "taking" away from the strength and the integrity of the flange. So my thinking is... I will simply install a longer than needed header bolt, cut the head off and use a "shoulder" nut. Hmm...this could work.

20180109_160416.jpg 20180109_161129.jpg

I chose the shoulder nut over the regular nut as I just feel the shoulder will offer more "meat" to the torque of the stud. Once I had cut off the bolt, I double nutted the stud to insert it. I used a little blue Loctite to help insure the stud will not back out once tightened. Usually, blue burns away with heat. But I have had some pretty good results as the "glue" of the blue Loctite usually "gums" the threads to keep the bolt or stud in place while not "seizing" the threads all together. Next I installed the header along with "Nord" locks and tightened that baby down. Was it a bear to get to that nut on the back side of the header in that tight and confined space? Oh you know it was. Ugh.... But I fashioned my own special little wrench to get into it and wahlaa.... It worked.

20180109_161857.jpg 20180109_161953.jpg 20180109_162048.jpg 20180109_162421.jpg 20180109_163623.jpg

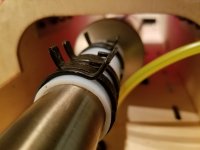
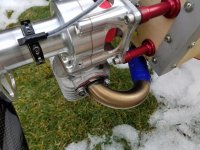
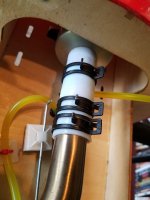
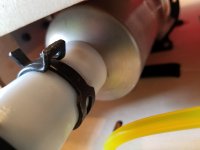
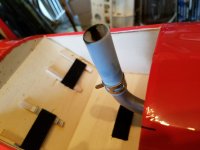
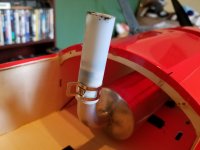
Next I installed the canister to get the proper alignment of the header and check the fit of the canister mount I will be using. Yes, I did choose to use (2) clamps on the header. Reason for this is I have had leakage before from a smooth header in the past so hopefully by using a double clamp setup it will help reduce that. If this does not do the trick, I will just go back to my reliable standby of using the screw type clamps.

20180109_213947.jpg 20180109_214006.jpg 20180109_214016.jpg

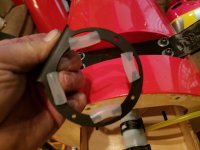
NEVER....ever toss or get rid of those things you "think" you will not be using. I discovered this little bit of knowledge some time back when I needed something and remembered I gave it to someone. That is why I hung on to this little guy. Exactly what the doctor was looking for.

20180109_214036.jpg

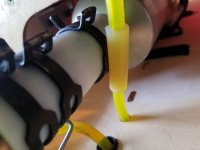
I had to cut new silicone tubes for the mount as it did not have any when I got it. You all know how hard it is to locate the proper size tubing for this type of application? Wow.... I finally located a supply place in Boise that can get me pretty much what I need. Thankfully, they had the right sized tubing.

With the mount "stationed" inside the canister tunnel, I could make my marks, remove it and bolt it into place.

20180109_222843.jpg

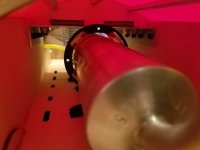
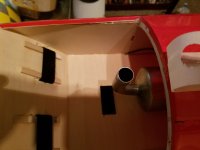
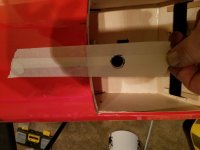
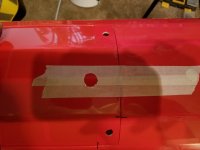
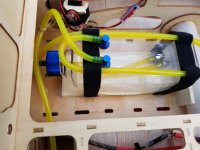
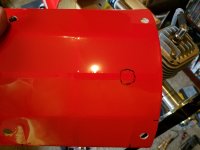
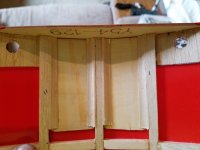
I had to remove the fuel tank inside the fuse to get to the area where I needed to put the mount bolts. That is ok though cuz I wanted to add a second clunk line for the fill/drain of the tank. I did not originally set it up this way and have found that I do not like having to tip my plane on the side to get all the fuel out when I drain the tank after flying. It is much easier for me to have two clunk lines in the tank. After the canister mount was bolted in place, I checked my canister outlet location. Looks pretty good. I will need to add an extension to that outlet however. The downspout sits too far up on the bottom of the fuse for proper exhaust ventilation. First though, I needed to mark the location of the exit so I know where to make an exit hole in the belly hatch. I did this by using regular masking tape over the belly of the fuse. Extending slightly past the outlet of the canister so I could mark the tape. I will then place the hatch back into place, lay the tape back down and mark the location on my belly hatch.

20180109_223529.jpg 20180109_223540.jpg 20180109_223606.jpg

"BEFORE".... I even go cutting this hole in the belly vent however, I am going to start this little animal an see how she runs with that canister. It would be my luck that I would cut the hole, install the belly hatch and then discover the KS 60 canister is just not enough. Of course then I would have to whack yet another hole for the MTW 75 canister if I have to go that way. LOL.

I am going to try to get a test run in this morning between rain showers to see how she runs. If all goes well, I will come back to this and finish it up with the hatch install and buttoning up of the canister install. And theeeeennnn.......on to the next project today. "Behemoth" Yak (2) canopy removal and replacement.

Will keep ya all posted on how the "canned" 62 runs.
 

Luchnia

70cc twin V2
The first and only real hurdle in this setup is going to be the header mounting flange. The bend of the header as it exits the flange is just too sharp of a bend that it is next to impossible to get a bolt in there. Perhaps this is why the gent I bought the nearly new header from sold it so inexpensively? At any rate, even the shortest bolt I have is difficult to get in the flange. And even that will not facilitate inserting a hex wrench to tighten it. Not to mention, just way too few threads to feel comfortable with. I certainly don't want to strip the cylinder threads out.

View attachment 101264 View attachment 101265 View attachment 101266 View attachment 101267

Have to take a minute and attend to something. Back in few minutes with more of this header and canister install.
Two ways basically, slightly shorter bolt that just fits and cut off the allen wrench to tighten (this was what I did and it worked great), or use a stud with a nut.
 

stangflyer

I like 'em "BIG"!
@stangflyer is this on that BE engine??? If so a couple of my buddies picked some up not long back. I will pass on the info about the stock muffler.
It is indeed. I had heard there were issues with the stock mufflers and actually this engine was sent out as a "review" engine whilst I was helping "FrankenKev" distribute them. @ChickenBalls and his cohert could never get the engine to run. Also, they said the muffler broke and I sent them a replacement. Now I see that even a couple of flights...3 to be exact was too much for the muffler. The perfect stock replacement would be a DA 60 muffler. :way_to_go:
 

stangflyer

I like 'em "BIG"!
Ok, here we go. Test run done and I am actually impressed. As expected, I did loose about 100 rpm off the top end. But that could be due to the fact that I had the BE 62 tuned to the stock muffler. I noticed after the test run that there was quite a bit of "splatter" on the bottom of the fuse and the bottoms of the stabs. From my experience, a canister set up usually runs a little richer than stock exhaust. So I will simply lean down the top end about 1/8" (screw drivers blade width) and she will be good to go. But definitely nothing wrong with the way the engine runs and the throttle transition. Very smooth and just as snappy with the canister as with the stock exhaust. I finally tuned in a throttle curve and it really evened the whole throttle swing. Much to my appreciation, no leak at the header and head, no leak from the re-plummed tank, no leak at the header/canister connection and no leak at the coupler/canister connection. Heck, even the extension stayed put.

20180110_094407.jpg 20180110_094437.jpg 20180110_094918.jpg 20180110_094925.jpg 20180110_094941.jpg 20180110_094950.jpg

I even added a section of silicone tubing to the "vent" line exit. Too many times I have seen engines die in the air because their vent line was laying up against the exhaust and it melted closed. Thus, not allowing the engine to draw fuel because of too much negative pressure in the fuel tank. Ask my buddy Tom about this. LOL. I will restrain the vent line away from the exhaust, but at least if it comes free, I don't need to worry about it getting melted.

20180110_095944.jpg

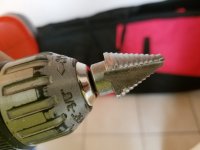
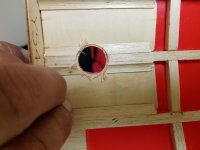
I am pleased enough that I moved forward with making the necessary hole accommodation for the canister exit. I like using my "hole auger" for jobs like this. It works pretty slick.

20180110_100004.jpg 20180110_102358.jpg 20180110_103038.jpg 20180110_103048.jpg

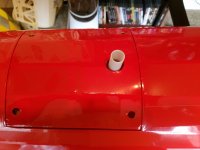
With my exit hole drilled and everything pretty much in place, I replaced the belly hatch and screwed her down. I think I can live with this.

20180110_110606.jpg 20180110_110616.jpg

All that is left to do now is re-install the cowl, prop and spinner cone and she is ready to "wail" again.
happy-nodding-smiley-face-emoticon.gif

Next up.... I expect my Dubro exhaust extensions for the Behemoth Yak (2) to arrive today. So I will be putting those on as well as replacing the cracked canopy. Grr.... Please fellas....remember those canopy bolts before you blast off. Doah!!!!
forehead-slap-smiley-emoticon.gif
 

Snoopy1

640cc Uber Pimp
@stangflyer is this on that BE engine??? If so a couple of my buddies picked some up not long back. I will pass on the info about the stock muffler.

Hi there can you help, on the drawing you sent me. Can you give a little more info on the motor specifications. You stated on the drawing a Outrunner 3592. Would you be so kind to recommend a watt required and the Kv of the motor with a prop size the plane will be flown with a 3s 2250 LiPo battery at 45 c. Thanks or if you had a particular motor in mind can specify please, thanks.
Ps from the weight on the drawing my guess would be around 600 to 700 watt.
 

Snoopy1

640cc Uber Pimp
Ok, here we go. Test run done and I am actually impressed. As expected, I did loose about 100 rpm off the top end. But that could be due to the fact that I had the BE 62 tuned to the stock muffler. I noticed after the test run that there was quite a bit of "splatter" on the bottom of the fuse and the bottoms of the stabs. From my experience, a canister set up usually runs a little richer than stock exhaust. So I will simply lean down the top end about 1/8" (screw drivers blade width) and she will be good to go. But definitely nothing wrong with the way the engine runs and the throttle transition. Very smooth and just as snappy with the canister as with the stock exhaust. I finally tuned in a throttle curve and it really evened the whole throttle swing. Much to my appreciation, no leak at the header and head, no leak from the re-plummed tank, no leak at the header/canister connection and no leak at the coupler/canister connection. Heck, even the extension stayed put.

View attachment 101284 View attachment 101285 View attachment 101286 View attachment 101287 View attachment 101288 View attachment 101289

I even added a section of silicone tubing to the "vent" line exit. Too many times I have seen engines die in the air because their vent line was laying up against the exhaust and it melted closed. Thus, not allowing the engine to draw fuel because of too much negative pressure in the fuel tank. Ask my buddy Tom about this. LOL. I will restrain the vent line away from the exhaust, but at least if it comes free, I don't need to worry about it getting melted.

View attachment 101290

I am pleased enough that I moved forward with making the necessary hole accommodation for the canister exit. I like using my "hole auger" for jobs like this. It works pretty slick.

View attachment 101291 View attachment 101292 View attachment 101293 View attachment 101294

With my exit hole drilled and everything pretty much in place, I replaced the belly hatch and screwed her down. I think I can live with this.

View attachment 101295 View attachment 101296

All that is left to do now is re-install the cowl, prop and spinner cone and she is ready to "wail" again.
View attachment 101297

Next up.... I expect my Dubro exhaust extensions for the Behemoth Yak (2) to arrive today. So I will be putting those on as well as replacing the cracked canopy. Grr.... Please fellas....remember those canopy bolts before you blast off. Doah!!!!
View attachment 101298

How much weight did this change add to the plane and did it effect the balance if so by how much.
 

stangflyer

I like 'em "BIG"!
Looking good Rob!
Tanks bro!happy-wink-smiley-emoticon.gif

How much weight did this change add to the plane and did it effect the balance if so by how much.
I am not too sure about weight. If I were to make a guess, I would say "even steven" for the header vs the stock exhaust. As for the canister and mount, really not much. The mount weighs like an ounce. The canister is very light. Probably six ounces. For the sake of an argument we'll call it 8 ounces added. Which is most definitely not an issue for the 62. Bringing total weight of the flight ready Yak-Ster to just over 20 pounds. Now as for balance? I would say it will change it a little but not too worried. The Yak was on the light side of nose neutral. Which means it should be slightly tail heavy now. Which I dig very much. Makes for some wild Pop-Tops and wicked knife edge snaps and lightening fast knife edge spins. It should help with parachutes and harriers too.
double-thumbs-up-smiley-emoticon.gif
 
Top