• If you are new to GiantScaleNews.com, please register, introduce yourself, and make yourself at home.

    We're 1st in Giant Scale RC because we've got the best membership on the internet! Take a look around and don't forget to register to get all of the benefits of GSN membership!

    Welcome!

The 'What did you do in your workshop tonight?' thread

Snoopy1

640cc Uber Pimp
I've been twiddling with the idea of getting one for years, and to be honest, I finally just said what the heck when I saw the article in the AMA magazine where a guy was talking about the CR-10. My decision to get the same style but improved was because there was a very large following online, although a bit more expensive than the cheap DIY brands (ANET 8, Tronxy X3), this one Creality CR-10S) seemed to have the best reviews as far a quality... and then to add free open source CAD (Onshape and Blender) and free open source Stitching software (Cura) to use really pushed me over the edge to get on board with the 3D printing revolution. I have always wanted to learn CAD and this is the fun way to learn with all the YouTube tutorials these days!!!
That’s great, keep us informed it will really make a difference when you are staying to scale out things.
 

AKNick

640cc Uber Pimp
So I just watched all the videos from the link you provided. What a completely kick ass machine. I wonder though... will it print me some more red headed 3w's? Seriously speaking, to be able to design and print and fly your own design plane.... How cool is that?

Maybe one day design my own plane... but honestly probably buy the plans and do one will be enough fun! I made a list of ideas and you are right about endless.... my mind is about to explode. XT60 mounts, battery trays, fuel line and vent holders, louvers, tool holders.... seriously pretty endless!!!

COOL!!!

If you have any questions, I might be able to help you out. I got a few 3D printers around the house:)

Way cool, Thanks a bunch. I'm sure you have some nice software too. Maybe there is already a thread started, It would be fun to just start one when I get mine up and running, it's going to take a little while coming from china.
 

stangflyer

I like 'em "BIG"!
I am going to attempt the canopy replacement on the Behemoth Yak (2) today. I did get the clamps on the exhaust extensions so that means I need to get busy with other things.

20180111_101810.jpg

Here is the reason I need to replace the canopy on the Behemoth Yak. Doah....

20180111_101831.jpg 20180111_101905.jpg 20180111_101914.jpg

As most of you may remember, this damage occurred at Huckfest last fall when "I" as the radio operator failed miserably to remember to install the canopy locks. Mr. Epley found it necessary to self eject in a simple aileron roll. Wow, what a scardy cat. LOL. Imagine if I had been doing a rolling harrier? Fortunately the damage was not too severe. But still costly enough that this incident is permanently etched into my frontal lobe of my brain.

The plan is to carefully remove the cracked canopy from the hatch frame. Then rebuild the rear canopy support and then to replace the canopy. Thankfully Tony (Pilot R/C) and his awesome team got me taken care of with the parts I needed for this repair.

20180111_102426.jpg 20180111_102527.jpg 20180111_102554.jpg 20180111_102657.jpg

While I have the canopy off, I am thinking I "may" cut some clear plastic covers to put over the instrument panels. Hopefully it will add a little "depth" to the cluster.

20180111_102720.jpg 20180111_102723.jpg 20180111_102754.jpg

Lastly, I want to try to save the signatures from the sides of the canopy so that I can transfer them to the new one.

20180111_104055.jpg

Well time is a wastin'. Best quit killing time and get busy. More later...
 

Snoopy1

640cc Uber Pimp
I am going to attempt the canopy replacement on the Behemoth Yak (2) today. I did get the clamps on the exhaust extensions so that means I need to get busy with other things.

View attachment 101322

Here is the reason I need to replace the canopy on the Behemoth Yak. Doah....

View attachment 101323 View attachment 101324 View attachment 101325

As most of you may remember, this damage occurred at Huckfest last fall when "I" as the radio operator failed miserably to remember to install the canopy locks. Mr. Epley found it necessary to self eject in a simple aileron roll. Wow, what a scardy cat. LOL. Imagine if I had been doing a rolling harrier? Fortunately the damage was not too severe. But still costly enough that this incident is permanently etched into my frontal lobe of my brain.

The plan is to carefully remove the cracked canopy from the hatch frame. Then rebuild the rear canopy support and then to replace the canopy. Thankfully Tony (Pilot R/C) and his awesome team got me taken care of with the parts I needed for this repair.

View attachment 101326 View attachment 101327 View attachment 101328 View attachment 101329

While I have the canopy off, I am thinking I "may" cut some clear plastic covers to put over the instrument panels. Hopefully it will add a little "depth" to the cluster.

View attachment 101330 View attachment 101331 View attachment 101332

Lastly, I want to try to save the signatures from the sides of the canopy so that I can transfer them to the new one.

View attachment 101333

Well time is a wastin'. Best quit killing time and get busy. More later...

I know the feeling when ever I need to do something that is difficult and or like you get one chance to get it right and if not you need buy new parts or start over. In those situations I will procrastinate look at it and over think it and try to avoid doing it.
 

stangflyer

I like 'em "BIG"!
I know the feeling when ever I need to do something that is difficult and or like you get one chance to get it right and if not you need buy new parts or start over. In those situations I will procrastinate look at it and over think it and try to avoid doing it.
Hee hee....you smat man. How'd ya know what I have been thinking? LOL. Yes, procrastinate...yes. LOL
 
Well yesterday my switch showed up for the Edge 540. I went ahead and got it installed today. I went with the Booma RC hidden switch. I decided to go with dual batteries as I was going to use a single 2100mah but found two 1100mah that together saved a tiny amount of weight. I really like the way this switch installs and the safety features it provides.
 

Attachments

  • 20180111_143028.jpg
    20180111_143028.jpg
    2.9 MB · Views: 247
  • 20180111_143016.jpg
    20180111_143016.jpg
    2.6 MB · Views: 264
  • 20180111_141046.jpg
    20180111_141046.jpg
    1.2 MB · Views: 282

stangflyer

I like 'em "BIG"!
Wow, this is turning into more of a task than I first imagined. I am making progress though. Here are some photos and a simple explanation to each photo as I have been proceeding. First, the tools! A couple of dental picks, a fresh #11 blade in the xacto knife, trim tool and my sealing iron. I used my sealing iron set at just below medium heat to warm the covering on top of the front lip of the canopy. Just enough to warm the adhesive so that I could gently and ever so carefully lift the covering from the canopy lip. Then, using the trim tool, (also set to low heat) I seated the covering on the hatch around the parameter of the lip of the canopy. Gently pull it back to get it out of the way and wahlaa....

20180111_123128.jpg 20180111_123153.jpg 20180111_124727.jpg 20180111_124737.jpg 20180111_124828.jpg

Once the forward edge of the covering was lifted from the lip of the canopy, I used my sealing iron to warm the exterior edges of the canopy where it is glued to the hatch frame. Inserting and sliding my xacto along the frame of the hatch made it really easy to lift the original canopy from the hatch.


20180111_125655.jpg 20180111_131235.jpg 20180111_131243.jpg

I am now ready to remove the broken rear canopy support and clean that mating surface up. Then on to building the new support.

20180111_131249.jpg 20180111_131318.jpg

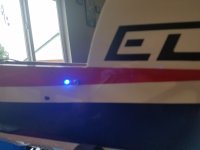
As mentioned earlier, I wanted to cut some clear plastic to fit over the instrument cluster. In hopes of giving the gauges a more defined look with more depth. I really don't think it makes much of a difference. What do you guys think? You can see the forward panel, (the one with 3w on it) is bare with no clear lens. The rear panel has the clear lens temporarily setting against it. Not too much of a difference. Can any of you see much of a difference?

20180111_134407.jpg 20180111_134448.jpg 20180111_134531.jpg

Ok, now I have the rear support removed from the hatch frame. Time to build the new support.

20180111_135254.jpg 20180111_135305.jpg

Before going further, I wanted to iron back down the covering that lays on top of the canopy frame. It was showing some heat wrinkles. Figured now is a really good time to get that taken care of.

20180111_141019.jpg 20180111_141023.jpg

Now the parts fit and building. Not too much to this. Trial fit, glue, trim, sand. That is about it. I had to put a 45 degree angle on the bottom of the support to give it the right angle once glued into place.

20180111_141625.jpg 20180111_145257.jpg 20180111_145315.jpg 20180111_145341.jpg

And finished. The rear canopy support is now built, sanded and covered and ready to install.

20180111_154156.jpg 20180111_154211.jpg

Next, I will lay wax paper over the fuse and place the canopy into position, insert the canopy locks to hold it into place then install the support and tack glue it into place. After that, I should be ready to install the canopy and tape it to hold it while the RC 56 glue canopy glue cures. By the way, does anyone know if canopy glue goes bad? I have not used mine for some time...well, since the Jtec Pitts build. (Last winter) I hope it is still useable. More of the Behemoth Yak (2) canopy replace to come.
 

AKNick

640cc Uber Pimp
I think the glass panel looks good either way, a bit shiny though and I think it lost the depth perspective, but looks clean. So either way works in my opinion. I wonder if clear ultra cote would be better because it would show some lines where the cutout paper instruments are.

I've had some canopy glue on the shelf for maybe 4 years, used it last month and it works just as good as new, mind you it was in a cool dry place out of the sun it's whole life.
 

stangflyer

I like 'em "BIG"!
I think the glass panel looks good either way, a bit shiny though and I think it lost the depth perspective, but looks clean. So either way works in my opinion. I wonder if clear ultra cote would be better because it would show some lines where the cutout paper instruments are.

I've had some canopy glue on the shelf for maybe 4 years, used it last month and it works just as good as new, mind you it was in a cool dry place out of the sun it's whole life.
Awesome. That's good to know. Thank you for your opinion. I think I'm going to leave well enough alone and forget the clear cover.

Stared :trance: at this tonight trying to figure how to mount it for a test run for my buddy. He's in to warbirds now.....:).

View attachment 101369
Know what I would do? Keep :trance: at it. Lol. That's going to be quite the installation. But I know you. You will make it look great.
 
Top