• If you are new to GiantScaleNews.com, please register, introduce yourself, and make yourself at home.

    We're 1st in Giant Scale RC because we've got the best membership on the internet! Take a look around and don't forget to register to get all of the benefits of GSN membership!

    Welcome!

The 'What did you do in your workshop tonight?' thread

acerc

640cc Uber Pimp
Well at this time not building anything so I had some time to figure out how to figure out how to balance a air craft by weight balance. A lot of the info out there is not very accurate and does not explain to get to the end point. Got all the calculations figure out and the spreadsheet is working. So tomorrow going to test it out on a plane. Trying to get the CG figured out on larger planes.
The spread sheets tell how to do it so what did you have to figure out. Not being sarcastic, genuinely want to know as maybe I have been doing something wrong.
 

Snoopy1

640cc Uber Pimp
The spread sheets tell how to do it so what did you have to figure out. Not being sarcastic, genuinely want to know as maybe I have been doing something wrong.
Can you show me the one you are using love to go through it.
 

acerc

640cc Uber Pimp
I don't know how to load an Excel spreadsheet here but I can attach it to an email. I believe I just sent you and the Mrs. a copy.
 

WMcNabb

150cc
Well at this time not building anything so I had some time to figure out how to figure out how to balance a air craft by weight balance. A lot of the info out there is not very accurate and does not explain to get to the end point. Got all the calculations figure out and the spreadsheet is working. So tomorrow going to test it out on a plane. Trying to get the CG figured out on larger planes.

I’ve seen several articles written on this approach, but this one is the most illustrative.

https://www.rcscalebuilder.com/tutorials/c-of-g-v2.pdf

Critical parts - make sure the plane is level and get the measurements right.
In the photo below, I’m using the leading edge of the lower wing as the datum, along with a laser to assist with the distance from there to the center of the main wheels.
Then, while keeping the plane level with various blocks and boards, I read the weights of all three wheels, one at a time, since I only had one scale.

A5E26C2A-F89D-4B27-981E-999130621747.jpeg
 
Last edited:

Snoopy1

640cc Uber Pimp
I’ve seen several articles written on this approach, but this one is the most illustrative.

https://www.rcscalebuilder.com/tutorials/c-of-g-v2.pdf

Critical parts - make sure the plane is level and get the measurements right.
In the photo below, I’m using the leading edge of the lower wing as the datum, along with a laser to assist with the distance from there to the center of the main wheels.
Then, while keeping the plane level with various blocks and boards, I read the weights of all three wheels, one at a time, since I only had one scale.

View attachment 108614
Yes I did see this one. It is only the first step it does not tell the amount of weight required at any location which is the important part. All you can do with this article is know if you are nose heavy or tail heavy but you do not know how much weight to,add at what location. All you can do is add weight and and keep redoing the weighing until the plane balances.
 

Snoopy1

640cc Uber Pimp
I don't know how to load an Excel spreadsheet here but I can attach it to an email. I believe I just sent you and the Mrs. a copy.
Wow thanks for that I belive it works perfectly. Put some numbers in that I was working with yesterday and it gave the same answers. Should have asked you a couple of days ago would have saved me a lot of work and getting that old brain of mine working again. It’s amazing how quick you start to forget things that you do not use everyday. actually the way he has done it quite handy you stick the scale under the tail wheel and start moving things around until you have the desire reading. Like it.
 

49dimes

Damn I'm hungry
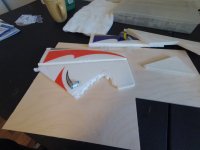
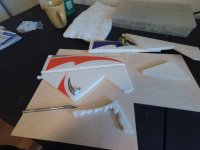
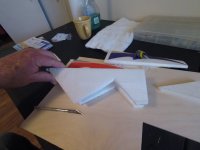
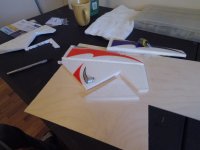
I finally did something today. Can I get a pay raise now? :rolleyes:

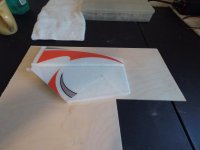
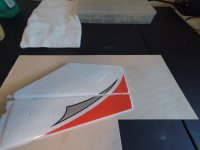
Boy when it comes to my chunk O foams the "little QQ300 that could" has handled my abuse the best. Another battle scar but yet it remains an attractive plane to me o_O.
One thing for sure....5 min epoxy would be best for repairs such as this. I used "Foam contact cement" this time out and it actually gets to hot curing and starts melting the EP foam. I had to go over the seam with baking soda and ca to make it rigid again. It worked though.

GOPR0467.JPG GOPR0468.JPG GOPR0469.JPG GOPR0470.JPG GOPR0471.JPG GOPR0472.JPG
 

acerc

640cc Uber Pimp
Wow thanks for that I belive it works perfectly. Put some numbers in that I was working with yesterday and it gave the same answers. Should have asked you a couple of days ago would have saved me a lot of work and getting that old brain of mine working again. It’s amazing how quick you start to forget things that you do not use everyday. actually the way he has done it quite handy you stick the scale under the tail wheel and start moving things around until you have the desire reading. Like it.
Good to hear.
I know I have used it a lot, having these bigger planes I just don't like hanging them.
 

Snoopy1

640cc Uber Pimp
I finally did something today. Can I get a pay raise now? :rolleyes:

Boy when it comes to my chunk O foams the "little QQ300 that could" has handled my abuse the best. Another battle scar but yet it remains an attractive plane to me o_O.
One thing for sure....5 min epoxy would be best for repairs such as this. I used "Foam contact cement" this time out and it actually gets to hot curing and starts melting the EP foam. I had to go over the seam with baking soda and ca to make it rigid again. It worked though.

View attachment 108625 View attachment 108626 View attachment 108627 View attachment 108628 View attachment 108629 View attachment 108630
That looks good again ready for some more abuse.
 
Top