• If you are new to GiantScaleNews.com, please register, introduce yourself, and make yourself at home.

    We're 1st in Giant Scale RC because we've got the best membership on the internet! Take a look around and don't forget to register to get all of the benefits of GSN membership!

    Welcome!

Trailers, Toy Haulers, Etc!

vegasking

70cc twin V2
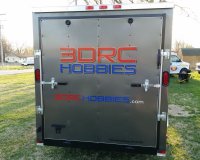
Nice looking trailer Enterprise! I'm starting to add the outside finishing touches to mine, just about ready to hit the circuit starting with Joe Nall. Still need to add the small multi colored stripes and do the sides to somewhat match our shirts.

trailer logo.jpeg 3DRC Pitshirt 2.jpg
 
I have not even started to think about the outside look yet. I wanted to wrap my old snowmobile trailer to look like a shuttlecraft as it sort of looked like one.
 
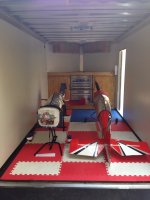
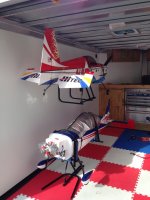
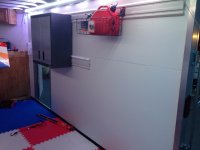
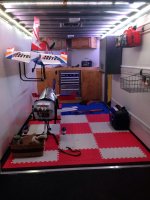
Some pictures from today. Picked the trailer up from Patrick with the front cabinets mostly done. Still looking for latches for the front cabinets. You would not believe how hard that is. The bevel is proving to be a issue.

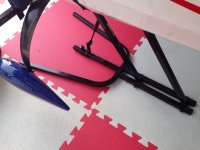
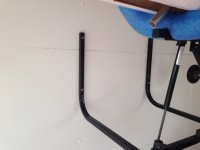
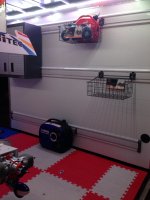
Anyway installed Gladiator track system on the right wall and the EZ Riders on the left. I am going to try the 3 airplane configuration for a while and see how I feel. I still have the back of the truck for 40cc and below.

I have not totally figured out the right wall yet.

Electrical system still needs to be finished, but I have a decent idea of what I want to do and how to get there.

ImageUploadedByTapatalk1397524902.582392.jpg

ImageUploadedByTapatalk1397524911.446764.jpg

ImageUploadedByTapatalk1397524923.967201.jpg

ImageUploadedByTapatalk1397524931.117163.jpg

ImageUploadedByTapatalk1397524941.175510.jpg

ImageUploadedByTapatalk1397524949.698535.jpg

ImageUploadedByTapatalk1397524956.312682.jpg
 
Looks really nice Matt! Love the organization

Agree, Matt's trailer looks sweet and I especially like what was done at the front. We put 110 in our trailer this past weekend. It plugs in to an extension cord from the generator or whatever out on the trailer tongue and comes in through the floor. A couple outlets, a couple flourescent lights a small flat screen for watching video off of the camera so far. But, with the "V" shape in the front, it was too challenging to think I wouldn't waste like 4 sheets of expensive plywood trying to build shelves in that shape. I wanted some shelves up there but gave up.

Any hints on how to get a good template?
 
[MENTION=3092]Lovemyxtra[/MENTION] did all the wood work. I think he just measured and trial fitted over an over again.

I did see a tip on the 8 million post long FG thread about using some scrap piece 4x8 foam material like wall insulation and making the template out of that.

We installed a 110 exterior plug I found from the same thread and we sealed it with RTV. It feeds the DJ power strip on the bench. I am going to run one plug to the deep cell battery charger, one to the power strip on the side of the tool chest, one to feed the power supply I will eventually hard mount, and probably use #4 to run a power strip in the back of the trailer for use at the field.

On the DC side Patrick is going to rig up a shelf system behind the tool chest for 3 deep cell batteries. I have a convoluted system to be able to rig up 24V charging, but I think my dad will rewire it at Nall. He has 20 years in the USN and USCG fixing DC powered equipment.

I am going to make a jumper panel so that I can do various things with the batteries.
My current thought is to wire the charger and LEDs to battery 1. This battery will have 2 sets of banana plugs.
Battery 2 and Battery 3 will have just 1 set of plugs.

I can run jumpers from red to red and black to black so that I can wire them up in parallel. The first set of jumpers will be so that I can hook the charger up to this and have all 3 batteries feeding at 12V. This is also the configuration it will be in when I run the charger.

When I want 24V I will remove the jumpers and run one jumper from battery 2 black to battery 3 red (or vice versa) and hook the charger up to the other two plugs to get 24V. This way I don't fry the LEDs and still have 12V available from battery 1 for more pedestrian charging.

I am sure there is a slicker way to do this, but that is the limit of my DC electrical knowledge.
 

Lovemyxtra

New to GSN!
What I did for shelving was measure the front width of v nose in trailer, on edge of ply mark that distance. Mark the center point of this first distance on the plywood, then measure distance of v depth in trailer. With t square lay that out distance of the v depth on center on your ply. Next measure width at rear of v nose, and mark out 1/2 that distance from center both ways on ply with t square, and connect 4 end points with straight edge. Used 1 piece of ply and 3 cutts to do it...
 
Last edited by a moderator:

dth7

3DRCF Regional Ambassador
[MENTION=3092]Lovemyxtra[/MENTION] did all the wood work. I think he just measured and trial fitted over an over again.

I did see a tip on the 8 million post long FG thread about using some scrap piece 4x8 foam material like wall insulation and making the template out of that.

We installed a 110 exterior plug I found from the same thread and we sealed it with RTV. It feeds the DJ power strip on the bench. I am going to run one plug to the deep cell battery charger, one to the power strip on the side of the tool chest, one to feed the power supply I will eventually hard mount, and probably use #4 to run a power strip in the back of the trailer for use at the field.

On the DC side Patrick is going to rig up a shelf system behind the tool chest for 3 deep cell batteries. I have a convoluted system to be able to rig up 24V charging, but I think my dad will rewire it at Nall. He has 20 years in the USN and USCG fixing DC powered equipment.

I am going to make a jumper panel so that I can do various things with the batteries.
My current thought is to wire the charger and LEDs to battery 1. This battery will have 2 sets of banana plugs.
Battery 2 and Battery 3 will have just 1 set of plugs.

I can run jumpers from red to red and black to black so that I can wire them up in parallel. The first set of jumpers will be so that I can hook the charger up to this and have all 3 batteries feeding at 12V. This is also the configuration it will be in when I run the charger.

When I want 24V I will remove the jumpers and run one jumper from battery 2 black to battery 3 red (or vice versa) and hook the charger up to the other two plugs to get 24V. This way I don't fry the LEDs and still have 12V available from battery 1 for more pedestrian charging.

I am sure there is a slicker way to do this, but that is the limit of my DC electrical knowledge.

Great Matt. "Safety officer" reporting! I didn't see or read anything about fire extinguishers! Lots about deep cycle batts, 24v charging, jumpers, etc. I'd suggest an extinguisher at the "shop end" and in the back on the wall/ floor corner. Allowing quick response from the "business end or source" and the "toy end" save the toys! Also would act as a quick access at the field for any flight line incidents. Just sayin!
Can't wait to park next to it and "rent" some DC power. What is your mAh rate $ ?lol
 
Top