• If you are new to GiantScaleNews.com, please register, introduce yourself, and make yourself at home.

    We're 1st in Giant Scale RC because we've got the best membership on the internet! Take a look around and don't forget to register to get all of the benefits of GSN membership!

    Welcome!

3D Viper-ST 100-120cc scratch build......it continues!

Terryscustom

640cc Uber Pimp
I didn't get a lot done today on the Viper but I am ready to install my root ribs and tip stock tomorrow. I took a bit of time and shaped the stock I applied yesterday, sanded over the wings again and shaped the LE. One quick tip on sanding the LE and TE stock on the surfaces. I use a line of the el'cheapo making tape as a guide to ensure that I don't gouge into the sheeting with my planer while rough shaping the edge stock. I stop just before I get to the tape and sand the rest with a long sanding block with 100 grit sticky back paper.

The tape also helps if you have any bubbles of glue that break off, they don't ride under the sanding block and make huge gouges in your sheeting.
_DSC0438.JPG
 

Attachments

  • _DSC0437.JPG
    _DSC0437.JPG
    78.8 KB · Views: 223

tylerzx9r

100cc
Oops, Terry asked for pictures of anyone trying the bagging process in his other thread, I got it confused with this one, He does such a great job on all of them,:sorry: Sorry Terry! Here is what I wanted to post on this one, If Terry, and the Law are willing to take pics and post them of my first build, I would be fine with that! Showing all of you who are wondering..... is it really that simple? As stated in a post long ago on this forum, I have mostly been an ARF guy, If I can do this you can too! GET YOUR ORDER IN NOW... OR YOU"LL KICK YOURSELF LATER! Thanks Terry, Looking forward to my first full build!:fist_pump:
 

Terryscustom

640cc Uber Pimp
LOL, if I did not know better......I'd guess you are pretty pumped up. Thanks man, it'll be fun. Depending on how much chitty chat we have you will be surprised what we can hammer out in a weekend. LAW said she'd even help.....she must like you, she usually does not offer to help me during my builds:(
 

Terryscustom

640cc Uber Pimp
OK, had to take a few days off for work and holiday but hit it hard today.

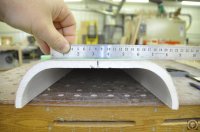
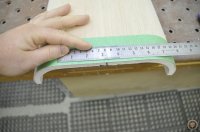
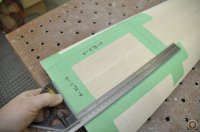
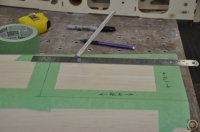
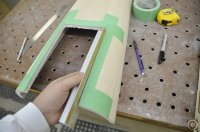
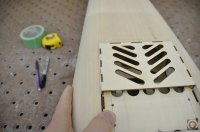
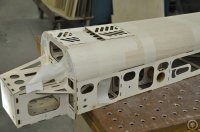
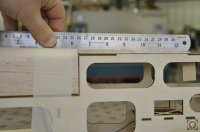
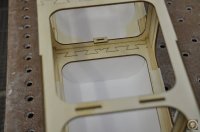
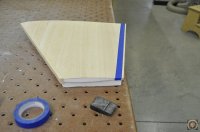
So, it's time to install the belly pan. The sheeting was sanded staying a little ways away from all edges. First we need to cut out the hole for the landing gear plate. I use a straight edge and carefully find the middle of the flat area on the belly pan. Mark the center and then mark out the area to be cut out by measuring and drawing the outline with masking tape.

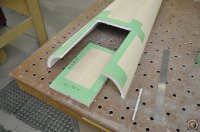
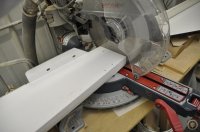
Start to cut the area out with a fresh hobby knife blade scoring several times until you have cut through the sheeting layer. Then cut with the knife at a steep angle to the surface to get the best cut. Fine tune the cutout with a sanding block.

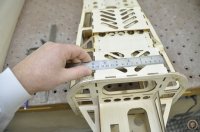
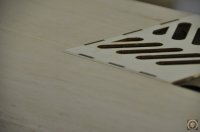
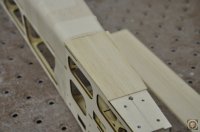
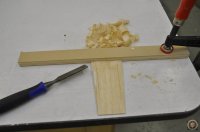
***Now, the measure of a true craftsman is their ability to hide their mistakes. I learned this when learning to build furniture, but it completely follows through to airplane building. I managed to make my slot .05" or so off center. So I sanded more on the long side and added some 1/16" balsa to the other side of the gear box with CA.

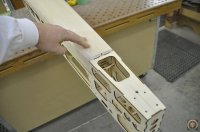
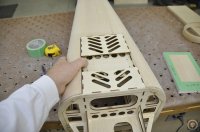
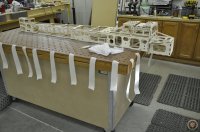
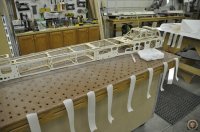
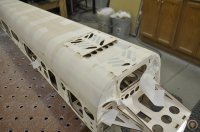
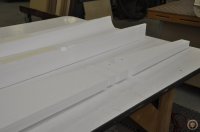
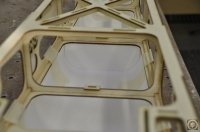
Once you are happy with the fit, apply and smooth a bead of glue along the long edges of the fuse, on the back side of F-1 and around the landing gear box. I start by taping and "pulling" the belly pan against F-1. Next put 5-6 pieces of tape on each side working from side to side and pulling the belly an out flush with the fuse sides. Push the belly pan down hard and pull the tape tight. Follow up with a few more pieces as needed to securely hold it in place. Lastly put a couple of pieces across the gear plate area. Let dry.

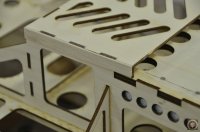
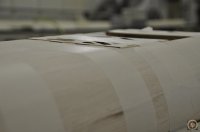
Note: The back edges of the landing gear box will be slightly above the belly pan because of the curve of the belly pan, this will be address later just make sure that it is minimal and straight across the very bottom.

_DSC0471.JPG
 

Attachments

  • _DSC0452.JPG
    _DSC0452.JPG
    121.4 KB · Views: 277
  • _DSC0453.JPG
    _DSC0453.JPG
    86.8 KB · Views: 285
  • _DSC0454.JPG
    _DSC0454.JPG
    57.3 KB · Views: 294
  • _DSC0455.JPG
    _DSC0455.JPG
    92.5 KB · Views: 253
  • _DSC0456.JPG
    _DSC0456.JPG
    75.1 KB · Views: 262
  • _DSC0457.JPG
    _DSC0457.JPG
    81.4 KB · Views: 254
  • _DSC0458.JPG
    _DSC0458.JPG
    84.3 KB · Views: 257
  • _DSC0459.JPG
    _DSC0459.JPG
    63.4 KB · Views: 272
  • _DSC0460.JPG
    _DSC0460.JPG
    105 KB · Views: 293
  • _DSC0461.JPG
    _DSC0461.JPG
    88.3 KB · Views: 273
  • _DSC0462.JPG
    _DSC0462.JPG
    109.7 KB · Views: 258
  • _DSC0463.JPG
    _DSC0463.JPG
    71.8 KB · Views: 463
  • _DSC0464.JPG
    _DSC0464.JPG
    86 KB · Views: 261
  • _DSC0465.JPG
    _DSC0465.JPG
    65.8 KB · Views: 281
  • _DSC0466.JPG
    _DSC0466.JPG
    67.8 KB · Views: 515
  • _DSC0467.JPG
    _DSC0467.JPG
    41.7 KB · Views: 266
  • _DSC0468.JPG
    _DSC0468.JPG
    115.7 KB · Views: 259
  • _DSC0469.JPG
    _DSC0469.JPG
    123 KB · Views: 261
  • _DSC0470.JPG
    _DSC0470.JPG
    84.5 KB · Views: 275
  • _DSC0472.JPG
    _DSC0472.JPG
    92.8 KB · Views: 285
  • _DSC0473.JPG
    _DSC0473.JPG
    38.8 KB · Views: 243
Last edited:

Terryscustom

640cc Uber Pimp
Next there is a plate by the rear landing gear. For production models the rear of the belly pan will be 1/8" taller and 3/8" stock will be used. That also requires very little sanding will be blended into the plywood sides. This being the first test model with CNC cut foam it is just that......a test run, so I'm rolling with it and have installed a 1/4" plate. Same procedure is done. I put the plate on the fuse, drew the outline, and cut it to rough shape. Then I hollowed out the bottom since this plate serves no structural purpose. Then glue it in place and clamp as required.

The inside part of the belly pan that is basically garbage can be used to make one or more ribs to add strength to the belly pan. I like to do this because I hang planes from the ceiling in my garage when they are "out of rotation" for what's in the trailer. This is also nice for general handling and does in fact add some structural strength with no real weight penalty.

I use my miter saw and I like to put a 1-1.5" rib under the former that is directly under the front of the turtle deck. Install with non-hardening wood glue or a small amount of gorilla quick poly glue.
_DSC0478.JPG
_DSC0483.JPG
 

Attachments

  • _DSC0475.JPG
    _DSC0475.JPG
    59.6 KB · Views: 270
  • _DSC0476.JPG
    _DSC0476.JPG
    68.8 KB · Views: 280
  • _DSC0477.JPG
    _DSC0477.JPG
    62.3 KB · Views: 287
  • _DSC0479.JPG
    _DSC0479.JPG
    92.5 KB · Views: 275
  • _DSC0480.JPG
    _DSC0480.JPG
    48 KB · Views: 264
  • _DSC0481.JPG
    _DSC0481.JPG
    65.8 KB · Views: 252
  • _DSC0482.JPG
    _DSC0482.JPG
    59.5 KB · Views: 274
Top