You are using an out of date browser. It may not display this or other websites correctly.
You should upgrade or use an alternative browser.
You should upgrade or use an alternative browser.
Sport JTEC RADIOWAVE 26% Pitts Model 12
- Thread starter stangflyer
- Start date
Jetpainter
640cc Uber Pimp
Spraying primer in the mold before laying down the glass seems to cut down the pinholes quite a bit, but I am no expert on moulding glass parts. I have painted a lot of fiberglass cowls and fuselages and the pinholes here seem quite excessive, but are certainly doable.
stangflyer
I like 'em "BIG"!
[/QUOTE]All I can say is that cowl looks VERY familiar. . . . . . .. My buddy sent me a picture of his and the two cowls look like twins (minus the louvers). I will tell you the same thing I told my Buddy. Don't let it get you down. Just think about the AWESOME plane you will have when everything is finished. You're already well on your way to getting your cowl ready for the purple part. . . . .
.
One more thing BTW. You SHOULD have gone flying. . . . . . .
Oh I know I'll get it. I don't ever give up. I may get pissy but I don't ever let anything get the best of me. By the way, I "DID" go flying. Lol
The odd thing to me is, truthfully....I've painted a butt load of cowls. Some repaints, some brand new. All of them have needed a little light sanding. All of them were not perfect. Even the ones I purchased many years ago for my Goldberg Sukhoi's. Including the cowls for my Ohio RC Giles'. Had a 300 and a 202. But in all the years in this hobby, I have "NEVER", ever seen one this miserably bad and poor. I've sprayed primer in the past when a guy could still get the matching paint for Ultracote or Monokote. The cowls then had maybe a blemish or two. But never an entire cowl so pot marked it looked like the pimple faced boy you "DON'T" want dating your daughter. But then again...no daddy wants "ANY" boy even close to his little girl. Right?Spraying primer in the mold before laying down the glass seems to cut down the pinholes quite a bit, but I am no expert on moulding glass parts. I have painted a lot of fiberglass cowls and fuselages and the pinholes here seem quite excessive, but are certainly doable.
stangflyer
I like 'em "BIG"!
Ok, so where were we before I had melt down number 2? Oh yeah, working on the Pitts cowl paint. Took some time this evening to knock off all the spot putty and get her whipped into shape. I started with 220 "Wetordry". I sanded dry. Then went to 400 grit "Wetordry" and did this one under warm running water. Near as I can tell, it is "MUCH" better than it was.
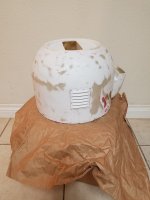
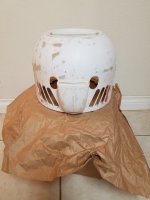
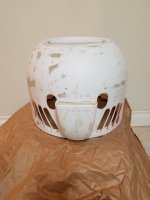
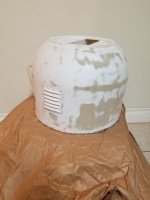
Next up, I will shoot the primer again to see how much I accomplished.


Next up, I will shoot the primer again to see how much I accomplished.
stangflyer
I like 'em "BIG"!
Another warm bath and Alcohol rub down, the cowl is ready for some primer. Before doing so, I brought my thermostat up to 70 degrees. I usually keep it around 60 but figured if I let the cowl and the primer sit in a warmer environment, perhaps it might aid in any attempts to get a better finished product. Don't really know if it had much affect, but the results are only about 1000% better than my first attempt.
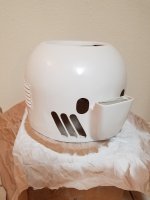
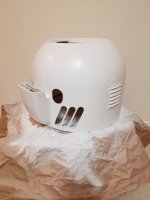
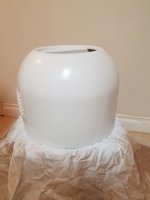
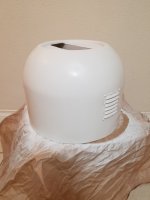
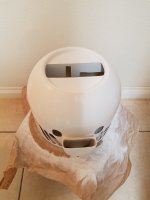
I am actually a tad bit much happier with the outcome this evening than I was earlier today.

This I can handle. I still see "really" up close one spot on the bottom of the cowl that I missed. Not a pin hole pot mark. More like a void in the fiberglass layup. And one tiny spot right on the folded lip of the front face right near the top. But all in all, "I'll take it"! I am probably going to do another real light wet sand with 400. One more shot of primer, then one more "really" light 600 grit wet sand before the paint application.
At this point, I am still a little leary of the automotive base coat paint. But if the cowl looks really good after the final priming and sanding, there is no reason it shouldn't turn out at least passable.
Thank you all...everyone of you, for the encouragement and moral support. And especially @Jetpainter for your advise and direction in getting this thing turned around. Your continued assistance with this phase of the Pitts build is greatly appreciated.


I am actually a tad bit much happier with the outcome this evening than I was earlier today.
This I can handle. I still see "really" up close one spot on the bottom of the cowl that I missed. Not a pin hole pot mark. More like a void in the fiberglass layup. And one tiny spot right on the folded lip of the front face right near the top. But all in all, "I'll take it"! I am probably going to do another real light wet sand with 400. One more shot of primer, then one more "really" light 600 grit wet sand before the paint application.
At this point, I am still a little leary of the automotive base coat paint. But if the cowl looks really good after the final priming and sanding, there is no reason it shouldn't turn out at least passable.
Thank you all...everyone of you, for the encouragement and moral support. And especially @Jetpainter for your advise and direction in getting this thing turned around. Your continued assistance with this phase of the Pitts build is greatly appreciated.
Last edited:
stangflyer
I like 'em "BIG"!
I guess I need to start figuring out how to mask off the different sectors for the paint scheme. According to the full scale "Miss Maggie", It looks like I need to lay down the white first, then the Pearl Purple and finally the Flame Red. Ugh, Not looking forward to this. LOL

Anyone have some suggestions on proper procedure? Umm....Uh, @Jetpainter? What say you?
Anyone have some suggestions on proper procedure? Umm....Uh, @Jetpainter? What say you?
Snoopy1
640cc Uber Pimp
Well this far it was not you, not the paint, just a bad cowl that needed to be fixed to make it look good. And the fixed cowl looks great. What know about painting I believe you and I are in the same class. But I am following with great interest, because my turn will be soon. Thanks for sharing and @Jetpainter help.
stangflyer
I like 'em "BIG"!
Before heading out to work this morning, I paused momentarily to peek at the Pitts cowl. Lookin' pretty good. The one spot I mentioned last night must have been a reflection. As it is now not there. The other on the bottom is definitely a flaw in the cowl. Somehow I missed it. But easily taken care of. I also noticed on top of the cowl, there is a cluster of tiny little pin holes. Missed those last night. And one vent hole that I plugged has a slight crevis. So a dab of putty on the 3 spots and out the door to work I go. Hopefully my paint shows up today. But after the remaining minor imperfections that need to be addressed are taken care of, I will probably finish those up and let the cowl sit so the primer has plenty of time to cure before I start shooting the paint. Maybe try for later this week. We'll see how it goes.


