• If you are new to GiantScaleNews.com, please register, introduce yourself, and make yourself at home.

    We're 1st in Giant Scale RC because we've got the best membership on the internet! Take a look around and don't forget to register to get all of the benefits of GSN membership!

    Welcome!

Scale 1/3 Scale Extra 330L Build.

Snoopy1

640cc Uber Pimp
The problem with any wood is that it will compress under pressure. The trick is to tighten the bolts just enough to hold the engine but not enough to compress the wood. The pull from the engine is not enough to compress the wood unless it has already been started. Also need to make sure the bolt hole is a snug fit so as to not get any side play from vibration. The standoffs can also play a role in this as the bigger the engine the bigger the standoff's diameter needs to be. I cut my own from dowels and can range from 1" to 1-1/2". Since going to the larger dowels instead of the tiny aluminum ones I can also tighten the bolts up a little more without compressing the wood. On the back side of the firewall I use two extra thick fender washers one size smaller on the bolt hole and drill it to fit tight.
Thanks for the info.
 

Snoopy1

640cc Uber Pimp
Ok worked on the firewall got the holes drilled for the motor and just have to assemble it and it will be ready when I get the fuselage to that stage.
E3B256F5-B762-4D8B-BE9A-3150020CE1B3.jpeg
 

Snoopy1

640cc Uber Pimp
:sneaky: I just knew that fire wall question was "LOADED". Pun intended Snoops :laughing:.

I just did not know what people do to make firewalls last. I thought the method that I do people would think I was a little nuts. I tried this about 3 years ago on my DA150 and all I can say is that I am happy with the results up to now. It takes a little doing but when done it seems to work.
 

Snoopy1

640cc Uber Pimp
Was flying Wednesday great weather all ready for summer and man has the weather turned around temperature in the low thirties and having freezing rain right now and predict 4 inches of snow tonight. So back to building laid out the fuselage and made a start. Picture shows how far I am.

230CCA12-081B-4B6D-93DA-CFAC73FB92A5.jpeg
 
Sorry folks, late to this thread, but as you can see from my avatar, I have this exact same aircraft. It took me four years on and off to build it, but it has been flying for about eight years and two motors now. Just thought it might be nice to address some of the issues that have been raised (although I am too late to offer advice on some as you are already past that point).

The quality of the kit is not great, being that it is mostly die cut (and I think I got mine towards the end of the run where there was more compression cutting than actual cutting of some parts). The quality of the sheeting throughout was poor and the matching was even worse. I took the time to match left to right and top to bottom to ensure no twisting of the build. You also need to get the softest sheet for the centre of the top fuselage sheeting otherwise it will split and cause all sorts of issues.

Some things I noted from my build:
- The AUW of mine initially was 11.75kg (25.85lb). I flew it on a Fuji BT-86 Twin magneto setup. Not lots of power but would do all the basic aerobatics bar snaps on the upline. I have since upgraded to a Hobby King 111cc (essentially a DLE-111 V2) and it is much more sprightly, just had to move some batteries forward to get the CG correct.
- I stuck with using the bolts through the joiner tube to keep both the stabs and wings on. I have never had an issue with this. I remove the stabs for transport and storage to avoid hangar rash.
- I chose to add the counterbalance to the rudder and in my opinion it adds the brilliant knife edge that this aircraft is capable of. I can easily go the length of the field on its side with minimal elevator or aileron compensation.
- I noted that you were concerned with the bevels only being on the aileron and not the back of the wing. I stuck with the kit on this and I was able to get plenty of throw and it is quite spritely with the amount of throw you can get.
- I used two aileron servos per aileron to avoid the issue of the aileron flexing. The stock size aileron does allow plenty of authority though, so I would have suggested that you not add the additional 1" to it.
- While I like the modifications that you made to the wing, you don't really need them. I stuck with the kit design and have never had an issue, even after putting quite some stress on them through some of my flying. As I said above, I have been flying mine for about eight years and it has been my go to plane for most of that so has been very well used.
- In regards to the wing tube, it does not go all the way out to the end of the wing tubes. Utilising the bolts through the tubes ensures that it cannot slide around so there is no issue with it moving in flight. As you have chosen an alternative method of keeping your wings on, I would suggest that you update to a tube that does go the full length so you get an even distribution of stress in both wings and the tube does not slide around.
- In regards to the right thrust in the firewall, I built mine with it included and have never had an issue, even across two different motors. I do not have to program a throttle to rudder mix to deal with it which simplifies the set up. Down thrust is a personal choice, but I included it and do not regret it.
- I covered mine entirely in monokote.

Happy to provide some other thoughts as you go through the fuselage build.

My current set up is (noting the age of the aircraft):
Hobby King 111cc (cheap, but runs well and as I am not into IMAC it is plenty to undertake basic 3D, inverted flat spins being a favourite)
Smart-Fly Power Expander with fibre optic ignition kill switch (Has the regulator and servo matching)
2 x 3000mAh 2S LiPo receiver batteries
1 x 1800mAh 2S LiPo ignition through a voltage regulator
2 x JR DS8611 for the rudder, mounted in the rear of the fuselage
2 x JR DS8611 for each aileron
1 x JR DS8611 for each elevator half
1 x JR DS811 for the throttle

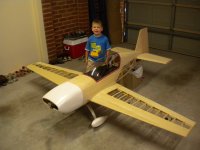
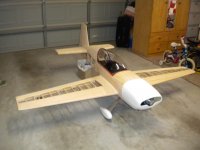
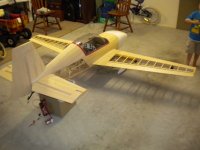
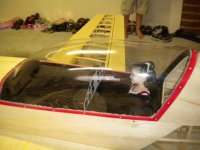
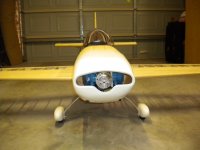
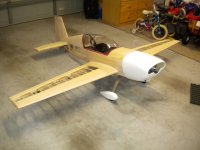
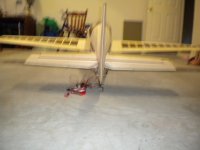
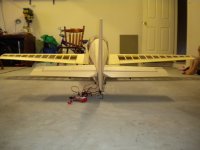
Here is a photo of the completed, but uncovered aircraft with my son in the background.
 

Attachments

  • DSCN7335.JPG
    DSCN7335.JPG
    2 MB · Views: 398
  • DSCN7336.JPG
    DSCN7336.JPG
    2 MB · Views: 416
  • DSCN7337.JPG
    DSCN7337.JPG
    2.1 MB · Views: 367
  • DSCN7338.JPG
    DSCN7338.JPG
    2.1 MB · Views: 391
  • DSCN7339.JPG
    DSCN7339.JPG
    1.9 MB · Views: 401
  • DSCN7340.JPG
    DSCN7340.JPG
    2.1 MB · Views: 442
  • DSCN7341.JPG
    DSCN7341.JPG
    2 MB · Views: 404
  • DSCN7342.JPG
    DSCN7342.JPG
    2.1 MB · Views: 366
  • DSCN7344.JPG
    DSCN7344.JPG
    2 MB · Views: 374

WMcNabb

150cc
Sorry folks, late to this thread, but as you can see from my avatar, I have this exact same aircraft. It took me four years on and off to build it, but it has been flying for about eight years and two motors now. Just thought it might be nice to address some of the issues that have been raised (although I am too late to offer advice on some as you are already past that point).

The quality of the kit is not great, being that it is mostly die cut (and I think I got mine towards the end of the run where there was more compression cutting than actual cutting of some parts). The quality of the sheeting throughout was poor and the matching was even worse. I took the time to match left to right and top to bottom to ensure no twisting of the build. You also need to get the softest sheet for the centre of the top fuselage sheeting otherwise it will split and cause all sorts of issues.

Some things I noted from my build:
- The AUW of mine initially was 11.75kg (25.85lb). I flew it on a Fuji BT-86 Twin magneto setup. Not lots of power but would do all the basic aerobatics bar snaps on the upline. I have since upgraded to a Hobby King 111cc (essentially a DLE-111 V2) and it is much more sprightly, just had to move some batteries forward to get the CG correct.
- I stuck with using the bolts through the joiner tube to keep both the stabs and wings on. I have never had an issue with this. I remove the stabs for transport and storage to avoid hangar rash.
- I chose to add the counterbalance to the rudder and in my opinion it adds the brilliant knife edge that this aircraft is capable of. I can easily go the length of the field on its side with minimal elevator or aileron compensation.
- I noted that you were concerned with the bevels only being on the aileron and not the back of the wing. I stuck with the kit on this and I was able to get plenty of throw and it is quite spritely with the amount of throw you can get.
- I used two aileron servos per aileron to avoid the issue of the aileron flexing. The stock size aileron does allow plenty of authority though, so I would have suggested that you not add the additional 1" to it.
- While I like the modifications that you made to the wing, you don't really need them. I stuck with the kit design and have never had an issue, even after putting quite some stress on them through some of my flying. As I said above, I have been flying mine for about eight years and it has been my go to plane for most of that so has been very well used.
- In regards to the wing tube, it does not go all the way out to the end of the wing tubes. Utilising the bolts through the tubes ensures that it cannot slide around so there is no issue with it moving in flight. As you have chosen an alternative method of keeping your wings on, I would suggest that you update to a tube that does go the full length so you get an even distribution of stress in both wings and the tube does not slide around.
- In regards to the right thrust in the firewall, I built mine with it included and have never had an issue, even across two different motors. I do not have to program a throttle to rudder mix to deal with it which simplifies the set up. Down thrust is a personal choice, but I included it and do not regret it.
- I covered mine entirely in monokote.

Happy to provide some other thoughts as you go through the fuselage build.

My current set up is (noting the age of the aircraft):
Hobby King 111cc (cheap, but runs well and as I am not into IMAC it is plenty to undertake basic 3D, inverted flat spins being a favourite)
Smart-Fly Power Expander with fibre optic ignition kill switch (Has the regulator and servo matching)
2 x 3000mAh 2S LiPo receiver batteries
1 x 1800mAh 2S LiPo ignition through a voltage regulator
2 x JR DS8611 for the rudder, mounted in the rear of the fuselage
2 x JR DS8611 for each aileron
1 x JR DS8611 for each elevator half
1 x JR DS811 for the throttle

Here is a photo of the completed, but uncovered aircraft with my son in the background.

Welcome to GSN!!!
 

Snoopy1

640cc Uber Pimp
Hi Muttsyflyer, well thanks for taking the time to write all that up. Sorry say as you have said a little late to the show but that does not matter. Can add the counter balance to the rudder is easy but the ailerons are staying as is. The wing Changes i would have done anyway the design is flawed. Have to agree with you not the greatest kit and yes the wood is just plain bad and so is the drawing scale. But as I proceed your help and comments and guidance will be appreciated. Have not decided on all the equipment going into the plane but I do believe the engine will be a Da120.
Does the plane build tail or nose heavy. Depending on your answer it is still possible to move the engine forward or back in the plane to compensate for the CG. Would like to put two servos in the tail for the rudder same as you have done. Did the two servos clear one another or did you need to make some changes to make them fit. Do you like the flying characteristics of the plane generally. The plane will be flown as a 3D machine in general.
 
Top