You are using an out of date browser. It may not display this or other websites correctly.
You should upgrade or use an alternative browser.
You should upgrade or use an alternative browser.
Scale 35% Krill Extra 330SC....CUSTOM-ARF!!!
- Thread starter Pistolera
- Start date
Pistolera
HEY!..GET OUTTA MY TREE!
DA120:
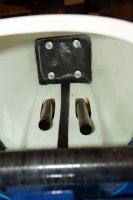
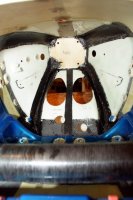
The Krill fuse has some CF reinforcement inside the motor dome area....specifically on the back of the mount and a single strip running down the middle towards the landing gear area. I added a 3/16" ply doubler over the CF motor mounting area and then glassed in some strips of CF cloth from each corner back to the main fuse structure. I do not want any flexing or fatigue issues here. The larger Krill (41%) has the entire inside of the motor dome area reinforced with CF.
Here's the stock inside view... and after the additions. Also had to open up the first cutouts for the headers to be able to slide the tuned pipes in.
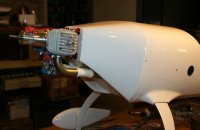
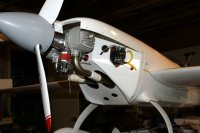
Tried and true DA120 bolted in place. This engine was in my Beast and is a powerhouse....even more so on pipes!!!
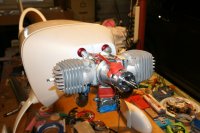
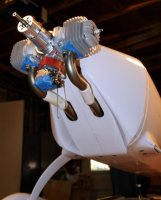
The Krill fuse has some CF reinforcement inside the motor dome area....specifically on the back of the mount and a single strip running down the middle towards the landing gear area. I added a 3/16" ply doubler over the CF motor mounting area and then glassed in some strips of CF cloth from each corner back to the main fuse structure. I do not want any flexing or fatigue issues here. The larger Krill (41%) has the entire inside of the motor dome area reinforced with CF.
Here's the stock inside view... and after the additions. Also had to open up the first cutouts for the headers to be able to slide the tuned pipes in.


Tried and true DA120 bolted in place. This engine was in my Beast and is a powerhouse....even more so on pipes!!!


Bartman
Defender of the Noob!
I have deviated from scale with a couple of things....primarily splitting the ailerons. I'll get into those shortly. ...........
would like to do that to my big Cap when I get moving with it. will you do multiple mixes for flaps and crow as well as 3D and IMAC aileron throws?
Pistolera
HEY!..GET OUTTA MY TREE!
Yep...that's the plane Bart. I've flown a friends Extreme Flight 104 Extra with splits and used just the outboards for IMAC. Crazy "walking speed" slow flight with flaps....and that was NOT in a harrier! Didn't try crow as he didn't have that set up, but will be playing with that on the Krill.
Terryscustom
640cc Uber Pimp
Splits are the BOMB! I know I flew IMAC sportsman with my Viper and just the outside and liked it. I can't seem to snap real well but I have my ailerons cut for 3D so they are pretty narrow at the tip. I'm building wings for my 91" EF and changing the airfoil as well as splitting the ailerons (and it became 92.5"). Looking forward to it!!! Got the idea from Earl......really glad I did it.
Pistolera
HEY!..GET OUTTA MY TREE!
Pipes:
Krill provides some room for installing pipes....but not much! The stock FG interior tray/bulkhead has round openings in the rear so I decided to use this area for the rear support of the KS 1060 pipes. Again, some CF/balsa laminate and silicone rubber bushings did the trick here. BTW - red silicone bushings will be in the finished plane, not these ugly ones!
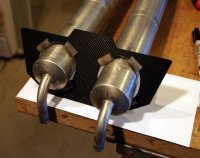
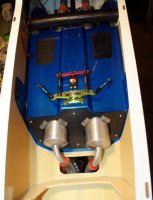
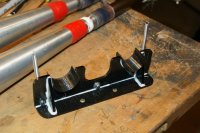
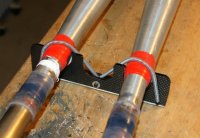
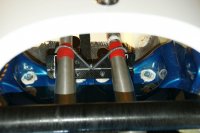
For the front supports I made up a small bracket that uses the landing bolts to secure it. Two small springs stretch over the pipes, which are wrapped with some silicone "rescue" tape.
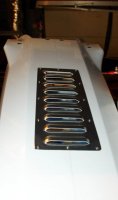
For cooling, I opened up a large rectangular area on the bottom of the fuse, and then mounted a nicely made set of aluminum louvers. These will be painted with the fuse later, and will basically disappear.
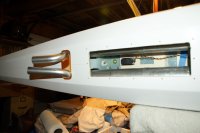
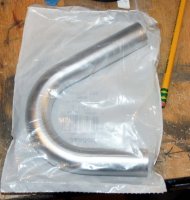
For exhaust tip extensions I found a 1" dia aluminum elbow at the local hardware....sold for washing machine drain hookups! Sliced in the middle of the bend, it makes 2 extensions. To mount them I wrap silicone tape around the pipe stinger, making a bushing for the extensions to slide onto. Then a small hole is drilled thru one side into the stinger and a servo screw installed. Has worked well on my other planes.
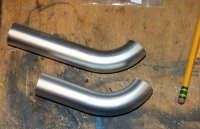
These will be shortened later
Krill provides some room for installing pipes....but not much! The stock FG interior tray/bulkhead has round openings in the rear so I decided to use this area for the rear support of the KS 1060 pipes. Again, some CF/balsa laminate and silicone rubber bushings did the trick here. BTW - red silicone bushings will be in the finished plane, not these ugly ones!


For the front supports I made up a small bracket that uses the landing bolts to secure it. Two small springs stretch over the pipes, which are wrapped with some silicone "rescue" tape.


For cooling, I opened up a large rectangular area on the bottom of the fuse, and then mounted a nicely made set of aluminum louvers. These will be painted with the fuse later, and will basically disappear.


For exhaust tip extensions I found a 1" dia aluminum elbow at the local hardware....sold for washing machine drain hookups! Sliced in the middle of the bend, it makes 2 extensions. To mount them I wrap silicone tape around the pipe stinger, making a bushing for the extensions to slide onto. Then a small hole is drilled thru one side into the stinger and a servo screw installed. Has worked well on my other planes.


These will be shortened later

Pistolera
HEY!..GET OUTTA MY TREE!
Splitting the cowl  . I hate single piece cowlings, which is of course exactly what the Krill came with! 2-piece cowls just make life SO MUCH easier to gain access to the engine, etc without having to pull the spinner and prop. PLus....they are SCALE!!! I've never split my own, but with some ideas and encouragement from Krazy Karl I jumped into it.
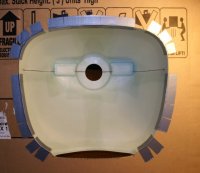
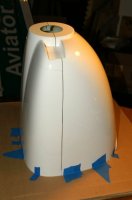
First thing was to cutout a cardboard template and tape the cowl to it so it will keep its shape and be easier to handle. I marked off on the outside and inside where I wanted to cut, leaving a small section on each side and at the air inlets uncut to keep both halves in alignment. Got out the Dremel with a diamond saw blade, which cuts a pretty thin kerf and carefully followed my lines.
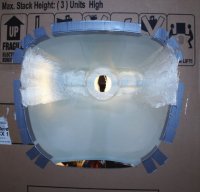
Next came the fiberglass layups. For this I used 6 oz cloth and Gorilla Glue, instead of epoxy (Karl's method). First lay clear packing tape over the inside cowling above the cut line. This is to keep the glue from sticking. Rough up all areas of the cowling below the cut line so the glue will stick well. After cutting my cloth to lengths desired I sprayed some 3M 77 adhesive on one side and placed the cloth into position.
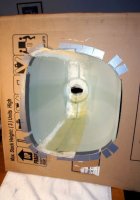
Then heat up the GG bottle to thin it and make it flow easier. Apply and spread with a plastic squeegee or credit card, working the glue into the cloth. The lower portion has glue spread evenly all the way down the cloth, while the upper portion (above the cut) is only spread about an inch or so in the cloth. This is the flange to hold the upper owl in place and will be trimmed later. As the GG starts to set it will expand a bit, so keep the squeegee ready and remove this excess as it does. After a bit it will stop....then let it cure.
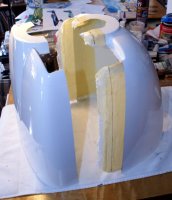
After the GG is hard, I finished cutting the separation lines that were left uncut earlier and popped the top of the cowling off the newly formed flange. That was the most nerve-wracking step as at first it didn't seem like it wanted to separate, but with a little pressure here and there and a literal "pop", it finally did . I marked off some trim lines and with a sharp pair of scissors cut off the excess glass.
The last step was to mark off the screw hole locations and glue in 4-40 blind nuts, which are mounted on small ply tabs.
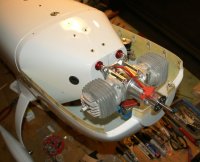
I was very happy with the end result
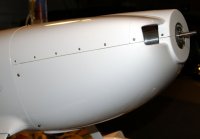
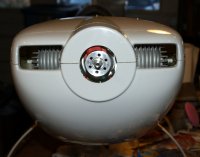
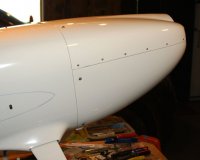
First thing was to cutout a cardboard template and tape the cowl to it so it will keep its shape and be easier to handle. I marked off on the outside and inside where I wanted to cut, leaving a small section on each side and at the air inlets uncut to keep both halves in alignment. Got out the Dremel with a diamond saw blade, which cuts a pretty thin kerf and carefully followed my lines.


Next came the fiberglass layups. For this I used 6 oz cloth and Gorilla Glue, instead of epoxy (Karl's method). First lay clear packing tape over the inside cowling above the cut line. This is to keep the glue from sticking. Rough up all areas of the cowling below the cut line so the glue will stick well. After cutting my cloth to lengths desired I sprayed some 3M 77 adhesive on one side and placed the cloth into position.

Then heat up the GG bottle to thin it and make it flow easier. Apply and spread with a plastic squeegee or credit card, working the glue into the cloth. The lower portion has glue spread evenly all the way down the cloth, while the upper portion (above the cut) is only spread about an inch or so in the cloth. This is the flange to hold the upper owl in place and will be trimmed later. As the GG starts to set it will expand a bit, so keep the squeegee ready and remove this excess as it does. After a bit it will stop....then let it cure.

After the GG is hard, I finished cutting the separation lines that were left uncut earlier and popped the top of the cowling off the newly formed flange. That was the most nerve-wracking step as at first it didn't seem like it wanted to separate, but with a little pressure here and there and a literal "pop", it finally did
 . I marked off some trim lines and with a sharp pair of scissors cut off the excess glass.
The last step was to mark off the screw hole locations and glue in 4-40 blind nuts, which are mounted on small ply tabs.

I was very happy with the end result


Last edited:
Pistolera
HEY!..GET OUTTA MY TREE!
Regular old polyurethane Gorilla Glue.What kind of Gorilla Glue?
