SnowDog
Moderator
Introduction
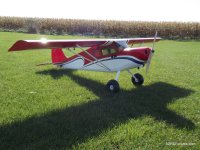
Bigfoot is 3DHobbyShop's first high-performance high-wing aircraft. The amazing maneuvers performed by Alaskan and Canadian bush pilots, and the rugged, light, maneuverable aircraft they fly, are the inspiration for this amazing model aircraft. Bushplanes rely on light weight, large wings, high power, and big flaps to do these amazing things. These extreme capabilities are very similar to 3D flight, and so Bigfoot fits right in to the 3DHobbyShop lineup of extremely high-performance aircraft.
We recently got to build and fly one, and here is our review!
Manufacturer's Description
Bigfoot is 84" in wingspan, and is a bushplane, drawing from the designs of several of these epic aircraft, rather than an exact scale model of any particular one. Built of strong, lightweight balsa and ply construction and covered in genuine Ultracote, Bigfoot is an impressive aircraft. Removable wing halves and carbon tube spar ensure easy transportation. Functional wing struts are included, as is functional tail bracing.
The landing gear is an important part of any bush plane. Bigfoot uses a resilient aluminum main gear assembly that bounces back from big hits. Although the Bigfoot kit includes a conventional pavement wheel, we expect virtually everyone to choose a big, bouncy bushplane tire for their Bigfoot. Our recommendation is the Du-Bro inflatable 6" tire, although these are even larger sizes available in the market, up to 8". The axles included in the Bigfoot kit will accommodate these large tires and feature positive retention. We have tested the 6" Dubro tire combo on dirt, clump grass, and rocks of various sizes, and it also works fine on pavement if you just want "the look".
The big flaps used on Bigfoot allow up to 70 degrees of deflection, although they are very effective at smaller throws. Bigfoot includes a metal spring-tailwheel assembly designed for use on very rough fields.
Bigfoot requires 6 full-size metal gear servos with at least 100 oz-inches of torque for the flight controls. We recommend a full-size/full-range receiver. Bigfoot includes a pre-built pocket with cover in the wing leading edge for installation of a landing light system if desired. Bigfoot includes a scale side hatch for battery and/or fuel system access.
Specifications:
Requires:
Un-boxing and kit quality
As usual the double box shipping box saved our airframe from the UPS "Hulk" drivers ("Hulk smash"!) Not that bad really, one corner of the box was slightly dented; no damage inside!
Build
The entire build log can be seen here: 3DHS Bigfoot Build Log however we'll hit a few of the highlights as part of this review.
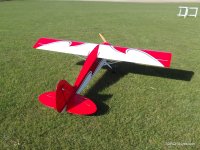
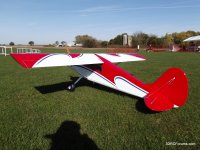
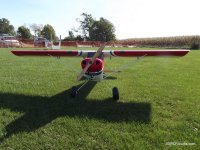
As with all 3DHS ARFs, the covering is really well done. No wrinkles or anything. The red and white color scheme stands out really well and looks great in the air.
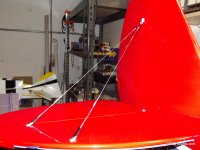
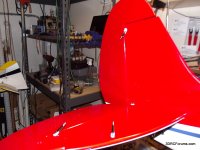
Per the online instruction manual, we started by removing the covering and installing the tail surfaces. No big surprises here. The tail wires are something new for a 3DHS airframe, and we required time and patience to get this right. There are wires for the top of the stabs and wires for the bottom of the stabs...they are of different lengths, and care must be taken to assure the correct wire is in the correct location.
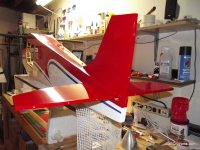
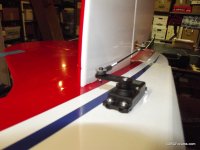
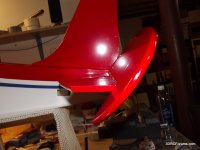
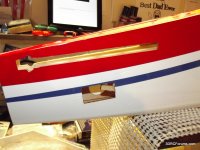
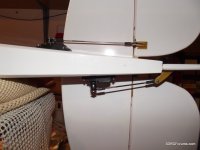
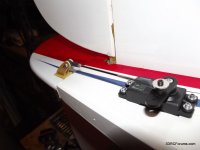
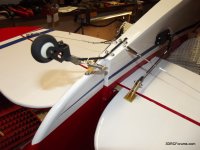
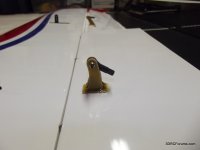
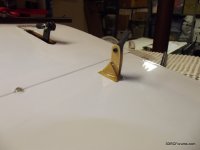
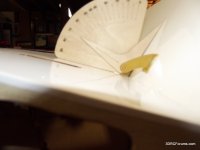
The next step was installing the aileron control horns and flap control horns in the wings. Installation of the aileron control horns was simple. The flap control horns were problematic. Based on other build logs and input from 3DHS, we were aware that installing the flap control horns in the manner specified in the installation manual would lead to problems such as burned out servos. This was determined to be a result of bad geometry of the flap control horns. We decided the best approach given the materials that we had was to reverse the orientation of the flap control horns. Here are a few pictures which should help clarify:
We were disappointed to learn that even with the well known issues with the flap control horns, the online manual was not updated to mention this issue.
Another issue identified in the manual is the amount of deflection recommended for the flaps. The manual calls for 85 degrees of travel in one section and 75 degrees in a later section. Consensus from other builders and from 3DHS was that 70-75 degrees of travel is the correct amount. We feel the manual should have been updated regarding this issue.
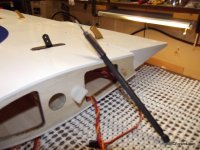
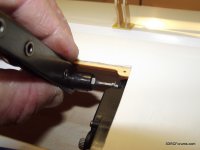
Once the control horns were glued in and the ailerons and flaps were hinged, it was time to tackle the installation of the aileron and flap servos. We installed the flap servos without any problems; the aileron servos were more of a challenge. The reason for this was simple geometry - it was very hard to reach the servo screw holes that were closer to the top side of the wing (those furthest away from the panel opening in the bottom of the wing). If we had used the standard phillips head screws that were provided with the servos, this might have proved a nearly impossible task without a special screw driver. As it was, third party hex head servo screws were used to attach the servos. A nut driver with a hex head attachment was used to secure the servo screws. We found this to be a tedious process but our patience was rewarded with a very clean looking wing.
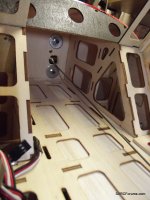
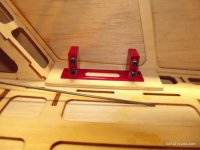
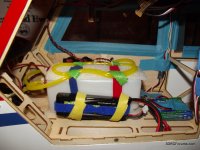
The engine and fuel tank installation was quite simple...there is plenty of room up front and inside the cockpit for all the components. We decided to use the stock fuel tank and plumb it with a three line fuel system.
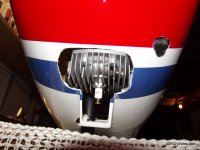
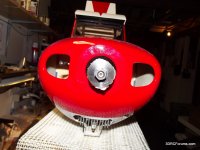
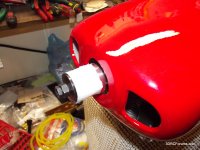
Cutting the cowl required patience (as always) but resulted in a nice looking front end.
Wing Struts:
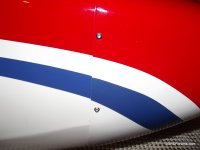
The final part of the assembly covers the wing struts. Attaching the wing struts to the wings was easy. Attaching the wing struts to the fuselage proved to be much more difficult. There were no markers on the fuselage to help find the blind nuts that were hidden by the covering. We used the hunt and peck method to find the blind nuts which resulted in a great deal of frustration and some unnecessary holes in the fuselage.
Final Assembly:
At the field, everything attached; ready for the maiden flight!
Flight Performance
For the maiden, we went with the following setup:
* Engine: OS-GT33
* Servos: Six Solar D771 Servos
* Propeller: Xoar 19x8
* Receiver: Airtronics 92104 10ch FHSS-3
* Electronics: One Life 2600mah battery
* Ignition: 6v NIMH battery pack
Conclusion
The 3DHS Bigfoot is an exciting new airplane for 3D pilots. However, it is not as forgiving as previous airframes offered by 3DHS. The instruction manual clearly states this difference and encourages people to take a cautious approach to learning how to fly this airframe. Failure to heed this advice will likely result in unexpected behavior in the air and potentially wing stalls that require time and height to recover from. With the judicious use of flaps this airframe can fly low and slow just like the real bush planes. Short distance take offs and landings will be real crowd pleasers. Full on 3D maneuvers such as hovers and rolling harriers are also possible with this airframe, making it a unique combination airframe.
Highlights:
* Short take offs and landings
* Slow speed flying with the use of flaps
* The red and black schemes are both real crowd pleasers
Low points:
* Documented approach for installation of flap control horns will cause problems
* Locating blind nut locations for wing struts on fuselage was very difficult
* Stabilizer wire mounting tabs did not have correct bend angles
* Online instruction manual has not been updated to cover known issues/mistakes
© www.3DRCForums.com
Some of items received by 3DRCForums for review were provided for free or at a discount.

Bigfoot is 3DHobbyShop's first high-performance high-wing aircraft. The amazing maneuvers performed by Alaskan and Canadian bush pilots, and the rugged, light, maneuverable aircraft they fly, are the inspiration for this amazing model aircraft. Bushplanes rely on light weight, large wings, high power, and big flaps to do these amazing things. These extreme capabilities are very similar to 3D flight, and so Bigfoot fits right in to the 3DHobbyShop lineup of extremely high-performance aircraft.
We recently got to build and fly one, and here is our review!
Manufacturer's Description
Bigfoot is 84" in wingspan, and is a bushplane, drawing from the designs of several of these epic aircraft, rather than an exact scale model of any particular one. Built of strong, lightweight balsa and ply construction and covered in genuine Ultracote, Bigfoot is an impressive aircraft. Removable wing halves and carbon tube spar ensure easy transportation. Functional wing struts are included, as is functional tail bracing.
The landing gear is an important part of any bush plane. Bigfoot uses a resilient aluminum main gear assembly that bounces back from big hits. Although the Bigfoot kit includes a conventional pavement wheel, we expect virtually everyone to choose a big, bouncy bushplane tire for their Bigfoot. Our recommendation is the Du-Bro inflatable 6" tire, although these are even larger sizes available in the market, up to 8". The axles included in the Bigfoot kit will accommodate these large tires and feature positive retention. We have tested the 6" Dubro tire combo on dirt, clump grass, and rocks of various sizes, and it also works fine on pavement if you just want "the look".
The big flaps used on Bigfoot allow up to 70 degrees of deflection, although they are very effective at smaller throws. Bigfoot includes a metal spring-tailwheel assembly designed for use on very rough fields.
Bigfoot requires 6 full-size metal gear servos with at least 100 oz-inches of torque for the flight controls. We recommend a full-size/full-range receiver. Bigfoot includes a pre-built pocket with cover in the wing leading edge for installation of a landing light system if desired. Bigfoot includes a scale side hatch for battery and/or fuel system access.
Specifications:
- Wing span: 84"
- Length: 69"
- RTF Weight: 12-14 pounds
Requires:
- Engine: Any 30-40cc engine; Recommended: DLE 30, OS GT 33, DLE 35, VVRC 40 Twin, 18-21" prop OR
- Electric Motor: Hacker A60-6X on 6S5000-5800, 20x10 prop
- Servo: six high torque servos with at least 200 oz-in of torque and one standard metal geared servo for throttle
- Radio system with at least 8 channels for gas setup.
Un-boxing and kit quality
As usual the double box shipping box saved our airframe from the UPS "Hulk" drivers ("Hulk smash"!) Not that bad really, one corner of the box was slightly dented; no damage inside!
Build
The entire build log can be seen here: 3DHS Bigfoot Build Log however we'll hit a few of the highlights as part of this review.
As with all 3DHS ARFs, the covering is really well done. No wrinkles or anything. The red and white color scheme stands out really well and looks great in the air.
Per the online instruction manual, we started by removing the covering and installing the tail surfaces. No big surprises here. The tail wires are something new for a 3DHS airframe, and we required time and patience to get this right. There are wires for the top of the stabs and wires for the bottom of the stabs...they are of different lengths, and care must be taken to assure the correct wire is in the correct location.


The next step was installing the aileron control horns and flap control horns in the wings. Installation of the aileron control horns was simple. The flap control horns were problematic. Based on other build logs and input from 3DHS, we were aware that installing the flap control horns in the manner specified in the installation manual would lead to problems such as burned out servos. This was determined to be a result of bad geometry of the flap control horns. We decided the best approach given the materials that we had was to reverse the orientation of the flap control horns. Here are a few pictures which should help clarify:


We were disappointed to learn that even with the well known issues with the flap control horns, the online manual was not updated to mention this issue.
Another issue identified in the manual is the amount of deflection recommended for the flaps. The manual calls for 85 degrees of travel in one section and 75 degrees in a later section. Consensus from other builders and from 3DHS was that 70-75 degrees of travel is the correct amount. We feel the manual should have been updated regarding this issue.
Once the control horns were glued in and the ailerons and flaps were hinged, it was time to tackle the installation of the aileron and flap servos. We installed the flap servos without any problems; the aileron servos were more of a challenge. The reason for this was simple geometry - it was very hard to reach the servo screw holes that were closer to the top side of the wing (those furthest away from the panel opening in the bottom of the wing). If we had used the standard phillips head screws that were provided with the servos, this might have proved a nearly impossible task without a special screw driver. As it was, third party hex head servo screws were used to attach the servos. A nut driver with a hex head attachment was used to secure the servo screws. We found this to be a tedious process but our patience was rewarded with a very clean looking wing.


The engine and fuel tank installation was quite simple...there is plenty of room up front and inside the cockpit for all the components. We decided to use the stock fuel tank and plumb it with a three line fuel system.


Cutting the cowl required patience (as always) but resulted in a nice looking front end.


Wing Struts:
The final part of the assembly covers the wing struts. Attaching the wing struts to the wings was easy. Attaching the wing struts to the fuselage proved to be much more difficult. There were no markers on the fuselage to help find the blind nuts that were hidden by the covering. We used the hunt and peck method to find the blind nuts which resulted in a great deal of frustration and some unnecessary holes in the fuselage.
Final Assembly:
At the field, everything attached; ready for the maiden flight!


Flight Performance
For the maiden, we went with the following setup:
* Engine: OS-GT33
* Servos: Six Solar D771 Servos
* Propeller: Xoar 19x8
* Receiver: Airtronics 92104 10ch FHSS-3
* Electronics: One Life 2600mah battery
* Ignition: 6v NIMH battery pack
Conclusion
The 3DHS Bigfoot is an exciting new airplane for 3D pilots. However, it is not as forgiving as previous airframes offered by 3DHS. The instruction manual clearly states this difference and encourages people to take a cautious approach to learning how to fly this airframe. Failure to heed this advice will likely result in unexpected behavior in the air and potentially wing stalls that require time and height to recover from. With the judicious use of flaps this airframe can fly low and slow just like the real bush planes. Short distance take offs and landings will be real crowd pleasers. Full on 3D maneuvers such as hovers and rolling harriers are also possible with this airframe, making it a unique combination airframe.
Highlights:
* Short take offs and landings
* Slow speed flying with the use of flaps
* The red and black schemes are both real crowd pleasers
Low points:
* Documented approach for installation of flap control horns will cause problems
* Locating blind nut locations for wing struts on fuselage was very difficult
* Stabilizer wire mounting tabs did not have correct bend angles
* Online instruction manual has not been updated to cover known issues/mistakes
© www.3DRCForums.com
Some of items received by 3DRCForums for review were provided for free or at a discount.
Last edited by a moderator:
