• If you are new to GiantScaleNews.com, please register, introduce yourself, and make yourself at home.

    We're 1st in Giant Scale RC because we've got the best membership on the internet! Take a look around and don't forget to register to get all of the benefits of GSN membership!

    Welcome!

Scale 50cc Scratch Build From My Own Design Revisited

Jetpainter

640cc Uber Pimp
Tonight I filled in the seam between the canopy and the hatch. I used canopy glue to install the canopy, and since it stays flexible, I was afraid just to go directly over it with polyester glaze/filler, so I tried something new. I mixed up a small amount of the Z-Poxy finishing resin and added milled fiberglass to it until it was a paste. I had tested this out the night before on a scrap of canopy and it really stuck well. I masked both sides and smeared the mix on with my finger. I left the tape on when sanding so I wouldn't sand anything that didn't need it. Once I got close to done I remasked it a tad farther away and sanded again to clean up the edge. After that I went over it with a polyester filler/glaze and then sanded that. I remasked again ans sanded to clean up the edge. I may spray some primer on it tomorrow if I have time.

20150523_203020_resized.jpg
20150523_213230_resized.jpg
20150523_215055_resized.jpg
20150523_221158_resized.jpg
 

Jetpainter

640cc Uber Pimp
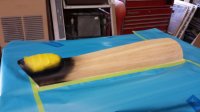
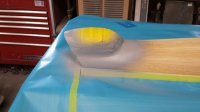
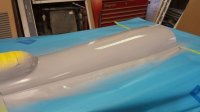
I took the hatch to my shop today and sprayed some primer on it.

After masking I started by spraying around the canopy area with some black primer. After that dried I used my Nason 421-19 primer and gave it a coat around the canopy, since I had done body work there I wanted a little extra. After that flashed off I sprayed the whole hatch with two coats.

20150524_145116_resized.jpg
 

Attachments

  • 20150524_144238_resized.jpg
    20150524_144238_resized.jpg
    74.4 KB · Views: 274
  • 20150524_144344_resized.jpg
    20150524_144344_resized.jpg
    70.9 KB · Views: 297
  • 20150524_145107_resized.jpg
    20150524_145107_resized.jpg
    69.7 KB · Views: 263

ExtraNuts

70cc twin V2
Beautiful plane. Just went through this thread. You do amazing work. Thanks for sharing it with us. I cant wait to see the finished result
 

Jetpainter

640cc Uber Pimp
Not much to show for this week even though I did manage to work on it a little every night.

I used a Balsa USA laser cut servo mount kit to mount the throttle servo. I had to mount it to the top of the engine box to get a straight shot to the throttle arm. The linkage in the picture is just temporary. It will probable get a turnbuckle since I need to order some anyway.

I also cut the cowl for header clearance and drilled holes for the accessing the needles. I came to the conclusion that reaching the lower cowl bolts is pretty much impossible with the header on. So, I decided to make two small access hatches to get to the bolts. I didn't take any pictures of the work on the cowl for some reason so I'll take some tonight.

20150524_222740_resized.jpg
20150526_202625_resized.jpg
 

Alky6

150cc
Tonight I filled in the seam between the canopy and the hatch. I used canopy glue to install the canopy, and since it stays flexible, I was afraid just to go directly over it with polyester glaze/filler, so I tried something new. I mixed up a small amount of the Z-Poxy finishing resin and added milled fiberglass to it until it was a paste. I had tested this out the night before on a scrap of canopy and it really stuck well. I masked both sides and smeared the mix on with my finger. I left the tape on when sanding so I wouldn't sand anything that didn't need it. Once I got close to done I remasked it a tad farther away and sanded again to clean up the edge. After that I went over it with a polyester filler/glaze and then sanded that. I remasked again ans sanded to clean up the edge. I may spray some primer on it tomorrow if I have time.
No problem putting polyester filler/glaze over epoxy? I know polyester resin over epoxy is a problem. Good to know! You are doing amazing work!
-Paul
 
Top