• If you are new to GiantScaleNews.com, please register, introduce yourself, and make yourself at home.

    We're 1st in Giant Scale RC because we've got the best membership on the internet! Take a look around and don't forget to register to get all of the benefits of GSN membership!

    Welcome!
  • Unless you are a paid advertiser NO more posting advertisement in the individual vendor forums. You may post in the Manufacturer's Announcements section only but only ONCE a month unless your a paid advertiser.

AJ Laser 230z 73" Build Thread

AKNick

640cc Uber Pimp
I'm guessing when you snap to inverted flat spin the throttle stick is at idle? You should consider an idle-up switch so the engine idles closer to 3000 rpms while flying. This will help it tolerate various tumbling moves a lot better.

I use an "idle up" on my 71 slick w/DLE35RA, 3DNater is spot on. I had the same issue, It didn't like pop-tops... Idle is around 1600-1800 and I my idle up is about 2400-2600. once again, spot on [MENTION=4]3dNater[/MENTION]
It isn't enough rpm to effect the way you fly. Just flip the switch once lined up on the runway for take off and flip it off during your decent back to the runway.
Some of these carbs don't have all the bells and whistles to supply constant fuel pressure through the full throttle range as 3DNater already said. If you are running a little rich, fuel will puddle up inside the card a bit - so when you do an aggressive maneuver it will give you a rich condition. My DLE35RA still does this a bit during its first flight before the engine/carb are warmed up. It used to bother me, now I just live with it.
 
It Is very common to have an idle up switch on a gasser. I would not fly any gas setup in high G manuevers without some way to get the idle speed higher. The fuel pressure changes and there are a lot of different forces at work when you tumble. The rpm will almost certainly drop some. If you are already at a low idle there is a good chance the motor will die.

QUOTE]

Great advice! The gas guys in my club told me about this little trick, they call it the "600 switch" for the added 600 RPM.
 

AKNick

640cc Uber Pimp
Has anyone use a DA35, header and canister muffler in this airplane?

I don't recall if anybody has used that setup on this particular airframe. I thought about doing it, but It seemed that the cost outweighed the benefit for me personally. The Pitts Muffler from J-Tec is pretty much the go-to muffler. You can find people using a header and canister or pipe of the DA-35... last time I looked I found maybe one or two folks that have switch one way or the other. The tuned pipe will be harder to "tune" to the right length, and canisters/tubes have a tendency to slip out of the coupling, whereas the Pitts seems to be solid, worry free. Let me know if you find anything!
 
Thanks
I found by reading more on another thread that you used the JTec standard size. I'm measuring right now to determine if the large will work. JTec said I need 2" behind the muffler. I would like to get it as quiet as possible. I want hassle free too.
 

AKNick

640cc Uber Pimp
I remember the large size costing a bit more as well and a bit harder to find. I thought someone used the large size, I don't think the dB dropped much with a tiny drop on the top end. With that said, I haven't really found anybody using this one yet. Let me know if you do! Noise was an issue for me too, I remember the canister being very comparable to the standard pitts (in comparison to noise). unlike the DLE35 which is a rear exhaust, the DA dumps from the side, I think that helps reduce the noise by bouncing around in there before it exits. My DLE35 was pretty loud.
 
I have the DLE 35RA too. I'm hoping this will be quieter and more reliable. I have a DA50 I never adjusted in 2 years. (It's in a box right now.) The DLE 35 has given me some problems. Seems to run great for 4 or 5 flights then quits flight after flight all in the same day.
 

AKNick

640cc Uber Pimp
Engine Installation:
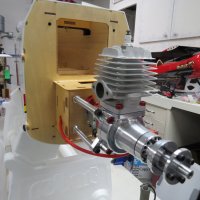
I ended up using the Desert Aircraft DA-35 Engine with a J-Tec DA35 Pitts Muffler (regular).

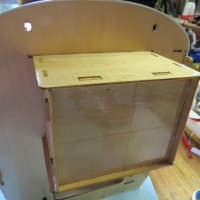
As always, fuel proof the firewall as best you can. I just used 30min ZAP epoxy and smeared/rubbed it into the wood grain on the firewall. Some folks prefer to thin it out using acetone, paint thinner, or isopropyl alcohol (rubbing alcohol), it will make it a bit lighter and it will soak into the grain a bit more... but it will probably dry a little quicker FYI.

IMG_1667.JPG

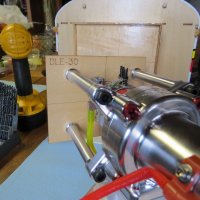
Once happy, I trimmed the corners of the provided engine mount template (since the epoxy left a nice fillet there), affixed it to the engine to double check the fit, removed the engine from the template and pushed it into place.

IMG_1832.JPG
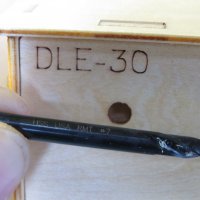
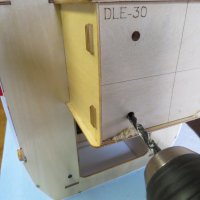
Then I found the best numbered drill bit for the job - #7 and drilled as square as I could all four holes
IMG_1834.JPGIMG_1836.JPG
Then removed the template, dry fit the motor, then wicked a little bit of thin CA into the new holes. I didn't finish the engine install yet, since there is still linkages to adjust and what not.

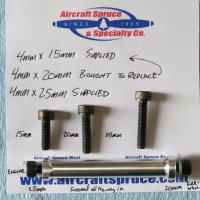
One thing I found that I changed, was the supplied (by DA) 5mm bolts for the engine mount. Forgive my picture, it is incorrect... I wrote 4mm but it should be 5mm. I ended up purchasing 5mmX20mm bolts from the local hardware store (instead of 15mm) to grab more threads on the engine mount after going through the firewall. I hate having slop, so by having an extra 5mm seemed like a good idea, especially after hearing a report of the DA-35 requiring larger area washers on the back of the firewall to prevent vibration... I believe this might be the reason why?
IMG_1838.JPG

Sorry it's been so long posting guys!! I need to get my build back on!!
 

AKNick

640cc Uber Pimp
So there it sits!
IMG_2526.JPG

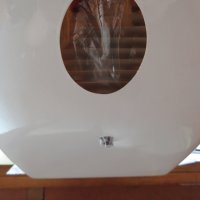
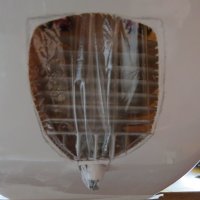
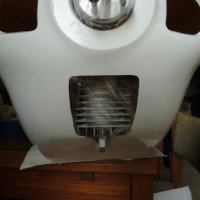
Now for the cowling! I love using a pencil and a dremel tool for this part. You can usually feel what part hits first as the cowling starts to come on, in this case it was the spark plug. Mark it with a pencil and start making small cuts/holes and enlarging them as you go. It's tedious, but it insures that you don't cut in the wrong spot.

IMG_1865.JPG

In this case you can see where the engine is, so you just outline with a pencil and go to town with the dremel tool.

IMG_1867.JPG

So here you can see that the cowling is fully on the airframe at this point. I will smooth out the lines once the exhaust is fitted and cut out.

IMG_1872.JPG
 
Top