• If you are new to GiantScaleNews.com, please register, introduce yourself, and make yourself at home.

    We're 1st in Giant Scale RC because we've got the best membership on the internet! Take a look around and don't forget to register to get all of the benefits of GSN membership!

    Welcome!
  • Unless you are a paid advertiser NO more posting advertisement in the individual vendor forums. You may post in the Manufacturer's Announcements section only but only ONCE a month unless your a paid advertiser.

AJ Laser 230z 73" Build Thread

Looks good, I like it! I will check the nordlocks. I had my muffler shake loose on my OSGT33 so now I check it all the time. As for the soldering and covering, its a great technique, I actually have a separate tip I put on just for that. Two tips if you aren't already aware, when you fire up the iron, do all the openings at once on the plane. I go through the whole thing putting an x with a Sharpie on each spot I need to open, then I just fly right through it. I also try to save some of the larger pieces I remove to use as patch work later if needed. In regards to the horns, here is what I do. Use the iron to remove just the two slots. Then insert the horn all the way flush. Then back it out just a couple hairs. Then lightly cut around the base plate with your hobby knife angling in just a bit under the base plate. Of course being careful not to score too much wood. In the end you should have removed a square's worth just smaller than the horn baseplate, allowing to get 98% plate to wood contact and the extra 2% holds the covering down from peeling. Hope that makes sense, it works for me, been doing it for a long time.
 
Last edited by a moderator:
In regards to the horns, I'm open to just about anything. I like the SWB line, but I'm not too picky. One thing I'm curious about, and I believe you read it too. On another site, or maybe this one I can't remember, another guy said the ball link screws were smaller than the 4-40 horns he was using, so he used all new ball links. I'd like to figure that one out before I buy the horns. I'd prefer to not buy all new links if I don't have too. Oh and I like the tail, looks good!
 

AKNick

640cc Uber Pimp
AJ 73" Laser 230z

Horizontal Stab and Elevator:

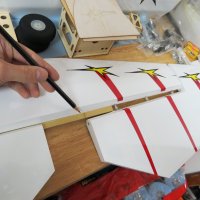
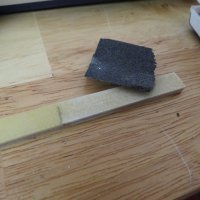
Since I am using one elevator servo, I will be joining the elevator halves together. Doing this, insert the hinges, and joiner, mark the edge with a pencil, remove, scruff the joiner with a fine sandpaper and finish it off with a coarse piece of paper to give that epoxy something to grab onto when the time comes. Dont forget to wipe the joiner with alcohol to remove the epoxy residue left over from the curing process and the left over sanding dust. I'll wait to glue in the elevator once I'm done with the Rudder.


IMG_1647.JPGIMG_1648.JPG

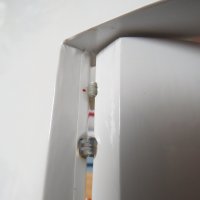
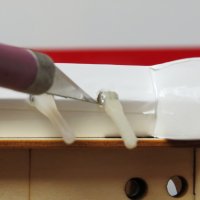
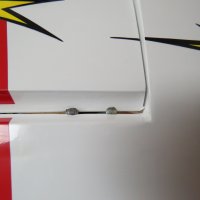
Adding an additional hinge on the outboard side of the elevator.
I think this is important for the longevity of a smaller single cylinder gasser. That tail gets a beatin! Vibration almost always transmits outwards to the extremities, this is why people say to put your wings on your plane when doing your initial engine test runs on the ground. The vibration has to go somewhere, and if not properly resonated through multiple parts of the airframe it'll eat of what's left. My 71" slick is getting quite a bit of hinge pin slop. One way I am going to help pro-long this Lasers' life is to add a hinge right in between the outboard side of the horiz and the last hinge.

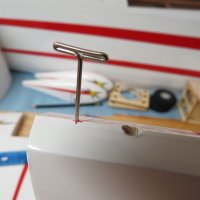
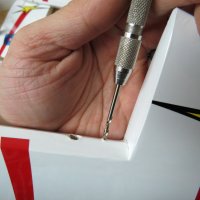
First mark the tip of the bevel, then use a pin as a pilot hole. just make sure you press it in square. Then use the appropriate drill bit to enlarge the the hole to match the hinge shank (less the barbs), slide it in place, and bevel out the sides with an Xacto blade to make the center of the pin remain the center of the hinge point, fold it down, slide the elevator onto the horizontal, mark the center, repeat.

IMG_1650.JPGIMG_1651.JPGIMG_1649.JPGIMG_1653.JPGIMG_1652.JPG

It's a bit of work, but the extra friction and support should help. Also, when the time comes I'll gap seal it using 3M tape, or Clear Ultracote. I cant say that it'll help the flying characteristics, but it once again helps keep the elevator from shaking like a leaf and resonating a lot of the vibration.
 

AKNick

640cc Uber Pimp
Looks good, I like it! I will check the nordlocks. I had my muffler shake loose on my OSGT33 so now I check it all the time. As for the soldering and covering, its a great technique, I actually have a separate tip I put on just for that. Two tips if you aren't already aware, when you fire up the iron, do all the openings at once on the plane. I go through the whole thing putting an x with a Sharpie on each spot I need to open, then I just fly right through it. I also try to save some of the larger pieces I remove to use as patch work later if needed. In regards to the horns, here is what I do. Use the iron to remove just the two slots. Then insert the horn all the way flush. Then back it out just a couple hairs. Then lightly cut around the base plate with your hobby knife angling in just a bit under the base plate. Of course being careful not to score too much wood. In the end you should have removed a square's worth just smaller than the horn baseplate, allowing to get 98% plate to wood contact and the extra 2% holds the covering down from peeling. Hope that makes sense, it works for me, been doing it for a long time.

Makes perfect sense! I've always marked with a pencil and just cut inside the box I made. I like what you are saying about lifting up the horn plate, and using it as a guide as you cut. I usually have enough white ultracote laying around to cover my roof, that stuff is handy. Makes sense to save what you can.
 
Nick, could I trouble you for a small favor at your convenience, no rush at all. Could you please measure the lengths of all the control rods? I'm now considering ordering up some turnbuckles and ball links to kind of spruce things up. Jake
 

AKNick

640cc Uber Pimp
In regards to the horns, I'm open to just about anything. I like the SWB line, but I'm not too picky. One thing I'm curious about, and I believe you read it too. On another site, or maybe this one I can't remember, another guy said the ball link screws were smaller than the 4-40 horns he was using, so he used all new ball links. I'd like to figure that one out before I buy the horns. I'd prefer to not buy all new links if I don't have too. Oh and I like the tail, looks good!

It's hard to find any aftermarket servo arms that support the Mfgrs ball link ID. The Mfgrs ball links have a smaller OD so they can fit inside the control horn slots, and you can use the servo arms that cam with the servo and wouldn't have to auger out a huge 4-40 hole. I essentially bought new pushrods, and heated up the pushrod with a torch lightly and threaded it onto the Mfgrs ball link so they wouldn't crack from the more aggressive 4-40 threads, that way I can use both ball links without modifying too much on the control horn side. When you heat up the push rod make sure it ain't so hot it melts the plastic, just so make it softer, because it will thread onto the Mfgrs rod ends with a little gusto.

I got my ball links from:

http://www.aztechaeromodels.com/

Adjustable Push Rods:

http://www.redwingrc.com/index.php?main_page=product_info&cPath=3_30&products_id=91

Servo Arms (except Rudder)

http://www.redwingrc.com/index.php?main_page=product_info&cPath=3_6_38&products_id=28
 

AKNick

640cc Uber Pimp
Nick, could I trouble you for a small favor at your convenience, no rush at all. Could you please measure the lengths of all the control rods? I'm now considering ordering up some turnbuckles and ball links to kind of spruce things up. Jake

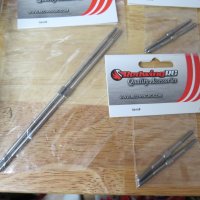
I used these from Redwing RC (they come in pairs):

Elevator - SS-PR-110 (140mm OAL)
Ailerons - SS-PR-30 (55mm OAL)

http://www.redwingrc.com/index.php?main_page=product_info&cPath=3_6_38&products_id=91

I found that these push rods use up most of the threads with a bit to spare. I just absolutely hate it when you can't grab 25% of the threads.

IMG_1756.JPG
 
Last edited by a moderator:
Top