• If you are new to GiantScaleNews.com, please register, introduce yourself, and make yourself at home.

    We're 1st in Giant Scale RC because we've got the best membership on the internet! Take a look around and don't forget to register to get all of the benefits of GSN membership!

    Welcome!

Any Monokote users here?

jtec/radiowave

70cc twin V2
Interesting thread:

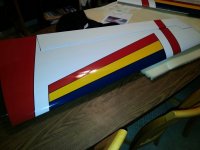
I used to be a die hard Ultracote user and liked it over the old MonoKote, We had a falling out with Horizon so I changed over to using Monokote. The new monokote is very different than the old stuff. I find that you have to use much higher heat to apply it and shrink it. You also need to make sure your surface is well prepped. It has to be clean!! Brush it off, vacuum and tack rag it. Prep work is 90% of the finish to make it look good.

The only time I use an iron is to tack down the edges and seal the seams. Once I have it stretched out and the edges sealed I use a heat gun and a large car wash mitt. I heat small areas at a time and rub it in while it cools, that way the adhesive on the covering sticks to both the film and the wood. If you don't rub it in while it cools the adhesive can stick to only one surface. Rubbing it in while cooling will give you a whole lot less bubbles out in the sun.

If I get a bubble I do use a needle or a pin (but I like the needle idea if available) to poke a small relief hole or two and keep heating it working to the pin hole while rubbing it in to get the air out.

To make it look good it takes time and work and I am no expert.

As for trim the Windex trick is GREAT but it has to be real windex with ammonia. I usually mark with a felt tip pen where I want to place my trim, Cut my trim piece, spray the area with windex then lay the trim over the area and position it. next take a squeegee, ( playing card or credit card) over the trim piece and work the windex and air out from under the trim. Pat dry with paper towels and let it sit for 24 hours. After that I take the iron with a sock on it with low heat and make sure the edges are sealed well. It on't show any air bubbles.

because we build mostly big planes I buy 25 ft rolls at a time and haven't had any real issues with color match. I have seen issues with all covering. It happens do to how batches are run unfortunately. If you do get a bad batch of film call Tower or Hobbico and let them know. I am also pretty sure different color may react differently.

I am sure their are lots of different ways to work with all coverings but this is how it seems to work for me best. our next project will be fabric covered!!

Al
 

Attachments

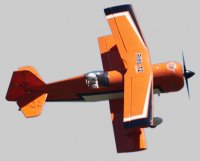
  • IMG_3018.JPG
    IMG_3018.JPG
    99.8 KB · Views: 666
  • pitts.jpg
    pitts.jpg
    33.3 KB · Views: 652
  • 20131106_214010.jpeg
    20131106_214010.jpeg
    68.6 KB · Views: 598
  • IMG_3242.JPG
    IMG_3242.JPG
    28 KB · Views: 619
Interesting thread:

I used to be a die hard Ultracote user and liked it over the old MonoKote, We had a falling out with Horizon so I changed over to using Monokote. The new monokote is very different than the old stuff. I find that you have to use much higher heat to apply it and shrink it. You also need to make sure your surface is well prepped. It has to be clean!! Brush it off, vacuum and tack rag it. Prep work is 90% of the finish to make it look good.

The only time I use an iron is to tack down the edges and seal the seams. Once I have it stretched out and the edges sealed I use a heat gun and a large car wash mitt. I heat small areas at a time and rub it in while it cools, that way the adhesive on the covering sticks to both the film and the wood. If you don't rub it in while it cools the adhesive can stick to only one surface. Rubbing it in while cooling will give you a whole lot less bubbles out in the sun.

If I get a bubble I do use a needle or a pin (but I like the needle idea if available) to poke a small relief hole or two and keep heating it working to the pin hole while rubbing it in to get the air out.

To make it look good it takes time and work and I am no expert.

As for trim the Windex trick is GREAT but it has to be real windex with ammonia. I usually mark with a felt tip pen where I want to place my trim, Cut my trim piece, spray the area with windex then lay the trim over the area and position it. next take a squeegee, ( playing card or credit card) over the trim piece and work the windex and air out from under the trim. Pat dry with paper towels and let it sit for 24 hours. After that I take the iron with a sock on it with low heat and make sure the edges are sealed well. It on't show any air bubbles.

because we build mostly big planes I buy 25 ft rolls at a time and haven't had any real issues with color match. I have seen issues with all covering. It happens do to how batches are run unfortunately. If you do get a bad batch of film call Tower or Hobbico and let them know. I am also pretty sure different color may react differently.

I am sure their are lots of different ways to work with all coverings but this is how it seems to work for me best. our next project will be fabric covered!!

Al
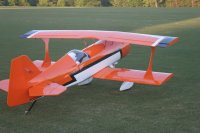
I was told by Dave Sullivan ( Plane Bender Products ) if you order two or more rolls of MonoKote from Tower have them check the lot number on the end of the roll and make sure they are of the same lot. That way the color is the same and not a shade off.

My $.02

Van
 
I was told by Dave Sullivan ( Plane Bender Products ) if you order two or more rolls of MonoKote from Tower have them check the lot number on the end of the roll and make sure they are of the same lot. That way the color is the same and not a shade off.

My $.02

Van

I have had rolls from the same batch be slightly different color. I'm thinking they don't keep the color mixed well during production so it varies a bit from the start to the end of a production run. Just a guess though.
 

Yakman

70cc twin V2
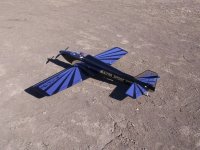
Did this some years ago, in Black and the stripes were chrome monocote. And i'll never touch that chrome stuff again.
 

Attachments

  • Ultra Sport 60 2.jpg
    Ultra Sport 60 2.jpg
    128 KB · Views: 627

Bipeguy03

150cc
The Beautiful thing about Covering is everyone has their preferred methods, and all of them work. I love to read through threads like this cause no matter how much you know, you will always pick up a new trick to try.

I don't use the hairspray or the windex trick. As everyone knows, surface prep is the key. Just when you think you are done sanding, sand some more. I like to have a good seal to the entire airframe, which a lot of guys hate, but I cant stand it when my plane wrinkles like a prune on the flight line, and sealing it to the fuse tends to keep that from happening.

My first rule of surface prep, NEVER SAND WITH YOUR HAND, ALWAYS USE A BLOCK! If you seal over the whole airframe like I do, if you sand with your hand the covering will highlight the surface irregularities caused by using your hand.

As for putting film on top of film, I use a trick that is a little more tedious. After I have the trim piece cut and mark for position, I use a small needle to put holes in the bottom covering. I don't use the wood pecker tool because the points are not sharp enough and will put a detent in the bottom covering that will show through the trim. After the millions of holes of poked through bottom film, I put the trim on, starting with low heat and then working up in temperature until it is firmly attached.


Some of my cover jobs:
PAU/BME 37% Ultimate
Bob Trueworthy 35% Pitts M-12
Radiowave 42% Edge 540
Lanier 25% Cap 232
Carl Goldberg Sukhoi

11174839_836410926396047_1203792230128204410_n.jpg
52498573E.jpg
10577003_1541178109436347_100574533836957688_n.jpg
10273453_668181076552367_8072954878538929736_n.jpg
Rt32817.jpg
To43511.jpg
Gb89295.jpg
Lw18911.jpg
486417_417683061602171_660713634_n.jpg
538974_417684948268649_1489297635_n.jpg
 
Last edited:
Bipeguy, very, very nice work! I especially like your tasteful trim schemes. It seems so many planes look like circus wagons these days with excessive swoops, curves, points galore and of course excessive graphics. Yours are very tastefully done and look like airplanes!
 

Bipeguy03

150cc
Bipeguy, very, very nice work! I especially like your tasteful trim schemes. It seems so many planes look like circus wagons these days with excessive swoops, curves, points galore and of course excessive graphics. Yours are very tastefully done and look like airplanes!

;)
 
The Beautiful thing about Covering is everyone has their preferred methods, and all of them work. I love to read through threads like this cause no matter how much you know, you will always pick up a new trick to try.

I don't use the hairspray or the windex trick. As everyone knows, surface prep is the key. Just when you think you are done sanding, sand some more. I like to have a good seal to the entire airframe, which a lot of guys hate, but I cant stand it when my plane wrinkles like a prune on the flight line, and sealing it to the fuse tends to keep that from happening.

My first rule of surface prep, NEVER SAND WITH YOUR HAND, ALWAYS USE A BLOCK! If you seal over the whole airframe like I do, if you sand with your hand the covering will highlight the surface irregularities caused by using your hand.

As for putting film on top of film, I use a trick that is a little more tedious. After I have the trim piece cut and mark for position, I use a small needle to put holes in the bottom covering. I don't use the wood pecker tool because the points are not sharp enough and will put a detent in the bottom covering that will show through the trim. After the millions of holes of poked through bottom film, I put the trim on, starting with low heat and then working up in temperature until it is firmly attached.


Some of my cover jobs:
PAU/BME 37% Ultimate
Bob Trueworthy 35% Pitts M-12
Radiowave 42% Edge 540
Lanier 25% Cap 232
Carl Goldberg Sukhoi

View attachment 53844 View attachment 53845 View attachment 53846 View attachment 53847 View attachment 53848 View attachment 53849 View attachment 53850 View attachment 53851 View attachment 53852 View attachment 53853


Very nice !! You are so right you can always pick up a new trick or two.

Thanks for showing your work!!

Van
 
Top