• If you are new to GiantScaleNews.com, please register, introduce yourself, and make yourself at home.

    We're 1st in Giant Scale RC because we've got the best membership on the internet! Take a look around and don't forget to register to get all of the benefits of GSN membership!

    Welcome!

Scale Balsa USA 1/3 Scale Super Cub Kit " NIB "

pawnshopmike

Staff member
A little update... I haven't worked on this bird in a while but fall is here along with crummy weather... perfect time to finish her up! Major construction is complete. My custom wing tubes fit perfectly and both wings align... I'll just need to secure the outer tubes once I've set the wing dihedral. The holes in the ribs are slightly larger to accommodate this down the road. Now it's on to the detail work, sanding and electronics installation! a few other minor construction items. She's looking like an airplane!!! It takes up my entire living room! I didn't realize how big 1/3 scale was I think. Haha!!View attachment 44528
Very nice! Looking good bro.:way_to_go:
 

BalsaDust

Moderator
Yes looks really good. I was talking to @Bartman on the phone last night about how I have a buddy sending me a couple OS 120 surpass four stroke engines and his first response was that motor has 1/4 scale cub written all over it. Maybe a Balsa USA kit is in my future.
 

fencelake

70cc twin V2
Yes looks really good. I was talking to @Bartman on the phone last night about how I have a buddy sending me a couple OS 120 surpass four stroke engines and his first response was that motor has 1/4 scale cub written all over it. Maybe a Balsa USA kit is in my future.

I've been really pleased with this kit overall. I bought it used, so there was a few pieces of wood missing, but none of the critical sized pieces, stuff I could quickly buy up the road. I haven't had any real problems with the die-cut sheets or quality in any way. This is my first non ARF build and there's a different connection to the project than an ARF or something RTF. I highly recommend getting one!
 

fencelake

70cc twin V2
So, whittling away at the ol' girl. This weekend I did quite a few things to the fuselage. The first thing was to carve/sand down the front of the fuselage so the cowling fits properly. This is important because it gave me a chance to see if I was going to need any additional mounting blocks for the engine, which I won't... which is good! I used a role of masking tape for the radius, and it just happened to fit the plan perfectly. I traced that radius and went to work with the sanding blocks. I thought about using the dremel or something, but in my experience to get the best curves on a plane you have to just put in the work with the sanding blocks. It's slow, but it allows you to do a little bit and look at both sides carefully. I learned this building my Airtronics Sapphire.
 

Attachments

  • IMG_4298.JPG
    IMG_4298.JPG
    47.9 KB · Views: 436
  • IMG_4299.JPG
    IMG_4299.JPG
    45.8 KB · Views: 454
  • IMG_4300.JPG
    IMG_4300.JPG
    55.3 KB · Views: 472
  • IMG_4304.JPG
    IMG_4304.JPG
    52 KB · Views: 451
  • IMG_4305.JPG
    IMG_4305.JPG
    62.6 KB · Views: 420
  • IMG_4306.JPG
    IMG_4306.JPG
    73.8 KB · Views: 450

fencelake

70cc twin V2
The next step for the weekend was to put down some fiberglass cloth in a few places, not that I don't trust my construction, but uh... I'm all about over engineering! Haha. So I added fiberglass cloth to the firewall and to the areas where the landing gear and tailwheel attach. My whole plan with this plane is to be able to fly it out in the country off of any surface... I ordered some big tundra tires and a super beefy tailwheel from PR Bushwheels, so I feel like adding the fiberglass will just help support those a little more. I may add some more to a couple of strategic areas, but that's all for now.
 

Attachments

  • IMG_4307.JPG
    IMG_4307.JPG
    63.9 KB · Views: 497
  • IMG_4308.JPG
    IMG_4308.JPG
    61.3 KB · Views: 425
  • IMG_4309.JPG
    IMG_4309.JPG
    66.1 KB · Views: 451
  • IMG_4311.JPG
    IMG_4311.JPG
    69.2 KB · Views: 448
  • IMG_4312.JPG
    IMG_4312.JPG
    75.5 KB · Views: 429
  • IMG_4313.JPG
    IMG_4313.JPG
    61 KB · Views: 424
  • IMG_4315.JPG
    IMG_4315.JPG
    87.7 KB · Views: 455

fencelake

70cc twin V2
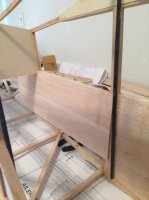
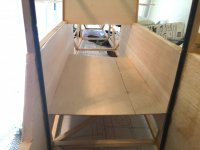
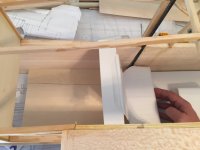
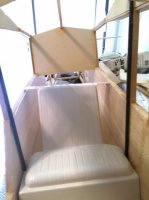
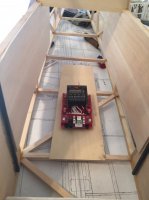
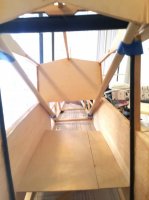
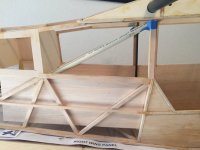
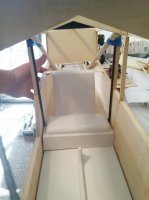
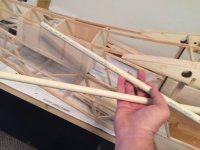
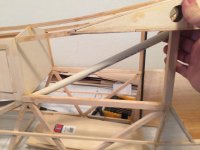
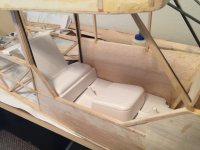
I also started laying out the interior. I had to build the floor for the cargo area using light ply, and this will be stained later. I put in the sidewalls in the cargo area, and then tried to match the floors and seats with photos from the plane I'm replicating. It's a little more tricky than I first thought, but it's going to work out great because there's a lot of room under the flooring for all of my electronics and batteries. And actually it looks like my batteries will be able to be further forward, so my CG will be better for sure. I also did the first cut on my PVC tubing. These tubes simulate the bracing in the L-21 design, but will actually have the aileron and flap wiring running from under the flooring up into the wings so you'll never see any electronics or wiring. It's taking some time to plan it because the one thing I've promised myself is I won't build myself out of the airplane. I have had several planes over the years that were so dang hard to access and I'm not going to do that on purpose... so the interior will all be removable with bolts and blind nuts to access my electronics.
 

Attachments

  • IMG_4320.JPG
    IMG_4320.JPG
    69.7 KB · Views: 467
  • IMG_4321.JPG
    IMG_4321.JPG
    71.2 KB · Views: 472
  • IMG_4322.JPG
    IMG_4322.JPG
    77.4 KB · Views: 453
  • IMG_4323.JPG
    IMG_4323.JPG
    46.9 KB · Views: 454
  • IMG_4325.JPG
    IMG_4325.JPG
    59.9 KB · Views: 434
  • IMG_4326.JPG
    IMG_4326.JPG
    59.7 KB · Views: 434
  • IMG_4327.JPG
    IMG_4327.JPG
    37.6 KB · Views: 451
  • IMG_4329.JPG
    IMG_4329.JPG
    45.7 KB · Views: 427
  • IMG_4333.JPG
    IMG_4333.JPG
    39.8 KB · Views: 449
  • IMG_4334.JPG
    IMG_4334.JPG
    75.4 KB · Views: 469
  • IMG_4335.JPG
    IMG_4335.JPG
    38.6 KB · Views: 430
Top