• If you are new to GiantScaleNews.com, please register, introduce yourself, and make yourself at home.

    We're 1st in Giant Scale RC because we've got the best membership on the internet! Take a look around and don't forget to register to get all of the benefits of GSN membership!

    Welcome!

Scale Bud Nosen 1/4 Scale Cub?

Well, things started showing up and it got a little crazy. I had no idea just how big the bandsaw was. I almost popped a gasket getting it into the hobby room. It will probably end up in the garage with my larger woodworking stuff. Here's a pic of the WALL, but it will probably change.
 

Attachments

  • IMG_4756.JPG
    IMG_4756.JPG
    613.3 KB · Views: 181
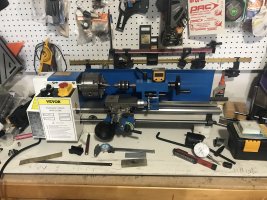
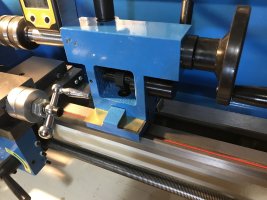
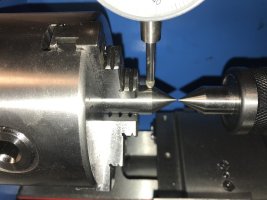
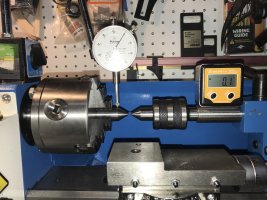
I had a little extra cash and just couldn't shake the lathe idea, so I purchased the cheapest one I could find. I know I'll have to do a lot of work to it, but that was part of the reason I got it, as a learning experience. I've done some work on getting the tailstock level and parallel with the headstock and after some filing and shimming, I've got it where it needs to be. I'll have to keep an eye on it for a bit. Still have to do the ways, handles, locks, and a few other things before I can turn my first piece.
 

Attachments

  • IMG_4758.JPG
    IMG_4758.JPG
    673.6 KB · Views: 160
  • IMG_4765.JPG
    IMG_4765.JPG
    512 KB · Views: 175
  • IMG_4768.JPG
    IMG_4768.JPG
    513.7 KB · Views: 149
  • IMG_4771.JPG
    IMG_4771.JPG
    599.2 KB · Views: 171
Had some time to do a little work on the Cub. Got the wing tube sleeves glued into each wing panel. Spent some time sanding the leading edge of the wings as well, and got the eyebrows shaped. I also followed suit on some of the other Cub builds and installed a horizontal stabilizer base plate, and cut off the upper portion of the tail fairing. I'll use balsa blocks to fill that area in once the vertical fin is glued in place.
 

Attachments

  • IMG_4890.JPG
    IMG_4890.JPG
    556.4 KB · Views: 178
  • IMG_4893.JPG
    IMG_4893.JPG
    531.7 KB · Views: 147
  • IMG_4897.JPG
    IMG_4897.JPG
    493.3 KB · Views: 154
Had a little time last night and got the wing servo mount plates cut and installed. Now I just need to add the servo posts to the plates and cut the servo arm holes once I get the servos mounted.
 

Attachments

  • IMG_4904 (2).JPG
    IMG_4904 (2).JPG
    164.5 KB · Views: 143
I was also thinking of adding some Lt.Ply sheer webbing on the first 3 rib bays for added strength, as most kits with wing tubes do. What do you guys think?
 
Spent most of my off on the wing struts. Lots of work for a little bit of progress. I'm going to try and use the wood provided in the kit for now. I might still buy some strut material, but for now I'm going with wood. Drilled and tapped the ends for the 4mm screws. It was also a good time to break out the tilt table for the Byrne's saw and cut the tapers to make sanding go a little easier. Got 90% of the shaping done for now. I won't glue the screws in until everything is cut to the right length. The screws will be buried in the wood about an inch.
 

Attachments

  • IMG_4906 (2).JPG
    IMG_4906 (2).JPG
    428 KB · Views: 131
  • IMG_4910 (2).JPG
    IMG_4910 (2).JPG
    522.9 KB · Views: 136
  • IMG_4913 (2).JPG
    IMG_4913 (2).JPG
    535.3 KB · Views: 129
  • IMG_4923 (2).JPG
    IMG_4923 (2).JPG
    290.4 KB · Views: 141
Top