• If you are new to GiantScaleNews.com, please register, introduce yourself, and make yourself at home.

    We're 1st in Giant Scale RC because we've got the best membership on the internet! Take a look around and don't forget to register to get all of the benefits of GSN membership!

    Welcome!
  • Unless you are a paid advertiser NO more posting advertisement in the individual vendor forums. You may post in the Manufacturer's Announcements section only but only ONCE a month unless your a paid advertiser.

Building of the 30cc Slick 540 from Redwing RC!!!

TimP

GSN Sponsor Tier 1
Looking good Jeff! Glad you guys like the manual - we have others coming out. Redwing RC is committed to offering the best products and services we can -

many companies get in whatever the factory sends and sells it. We do R&D and develop our own and also are trying to do things like the manuals (and of course our videos) to help people out. We have limited resources as a small growing company (we wish we could instantly have all the manuals done :) but If you guys have any questions or suggestions please let us know
 

Jwmav528

70cc twin V2
It's been a few days since I've updated. I've had enough time lately to either build or talk about building so I opted for the former. I took pictures though and I can update tonight once I get home from work. I've gotten a lot done! :D
 

Jwmav528

70cc twin V2
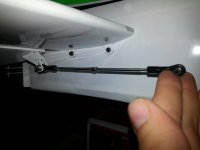
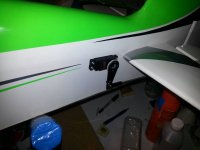
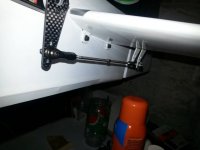
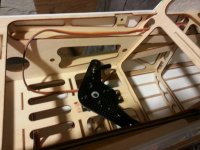
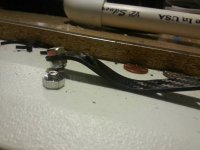
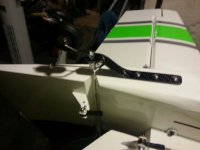
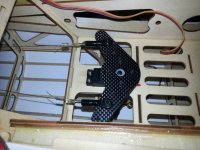
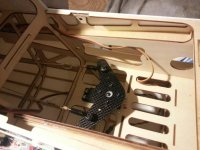
I've gotten a lot done since my previous update. In this post, I've pictured my installation of the tail servos. Redwing included some nice carbon fiber arms in the hardware pack that I ended up using. They just bolt to the circle arms that ship with servos. Redwing also included some turnbuckle style pushrods that make adjusting the linkage length easy. I also installed the rudder servo at this point but had not run the cables yet. In the picture of the rudder servo you can also see one of the channels that Redwing built into the frame for you to run your elevator extensions through so that they won't get caught up in your rider cables.

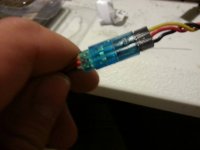
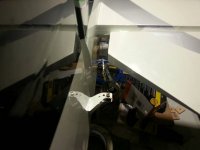
I've also included a tip that myself and several other modelers use. If you find yourself out of clips to ensure your servo stays connected to the extension, use two pieces of fishing line and tie them together.
 

Attachments

  • uploadfromtaptalk1382094941876.jpg
    uploadfromtaptalk1382094941876.jpg
    28.5 KB · Views: 363
  • uploadfromtaptalk1382094990282.jpg
    uploadfromtaptalk1382094990282.jpg
    29.1 KB · Views: 368
  • uploadfromtaptalk1382095024085.jpg
    uploadfromtaptalk1382095024085.jpg
    37.9 KB · Views: 411
  • uploadfromtaptalk1382095036203.jpg
    uploadfromtaptalk1382095036203.jpg
    34.1 KB · Views: 408
  • uploadfromtaptalk1382095060871.jpg
    uploadfromtaptalk1382095060871.jpg
    52.7 KB · Views: 371

Jwmav528

70cc twin V2
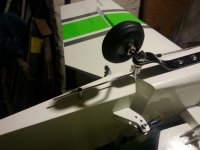
Next up, I worked on the landing gear. I had a small misshap when I over tightened the bushing and sheared it. uploadfromtaptalk1382095908247.jpg
Redwing took care of it and sent me another and I worked on the tail servos while I waited. Tim informed me that the bushing doesn't need to be reel tight as the locknut is pretty effective. uploadfromtaptalk1382095921693.jpg

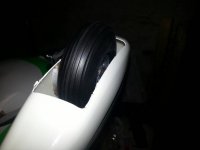
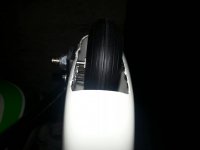
Here you can see the tail gear installed. It's your typical tail gear setup. I used 30 minute epoxy on the post that the steering arm went through.uploadfromtaptalk1382095936559.jpguploadfromtaptalk1382095959782.jpg

While I was working on the gear, I decided to change out the wheels that came with the plane for some Dubro low bounce rubber wheels. They are thinner so they fit in the wheel pants better, they are softer to absorb a little bit more shock on landing. That part is important for me since I fly off asphalt. Finally, they don't go quite as flat as harder and foambased wheels do from sitting for a period of time. uploadfromtaptalk1382095979992.jpguploadfromtaptalk1382096003973.jpg
 
Last edited by a moderator:

Jwmav528

70cc twin V2
I had a small issue when I went to install the rudder cable that came with the kit. It went together fine but it kept stretching as I was bringing up the tension on it. So much that I could move the rudder independent of the servo. I confirmed this problem with another modeler from my club who experienced the same thing. uploadfromtaptalk1382097225204.jpg

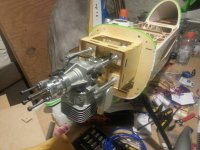
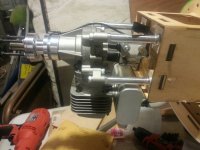
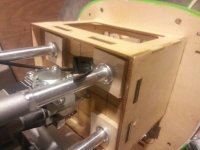
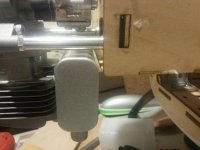
I moved onto to installing the engine because my LHS was closed and on the other side of the city. The engine needed to be sourced an additional 3/16" from the firewall beyond what you already get from the standoffs. This was to ensure the proper spinner gap and muffler clearance of the firewall. I accomplished this with some 3/16" birch plywood cut into 1"x1" squares. uploadfromtaptalk1382097319446.jpguploadfromtaptalk1382097334025.jpguploadfromtaptalk1382097349005.jpguploadfromtaptalk1382097363816.jpg

The next day, I picked up a new rudder cable and assembled it. It tightened up to the proper tension easily. uploadfromtaptalk1382097386832.jpguploadfromtaptalk1382097400687.jpg
 

TimP

GSN Sponsor Tier 1
Hey if you haven't seen them already you may want to try out a Xion prop on this guy!

Glad it's going pretty well
 

SnowDog

Moderator
that was a nice video...must have been pretty windy that day! I would have liked to see more slow speed stuff like some harriers; I know that's tough in the wind, but it would have shown if there was any wing rock to deal with. The DLE-35RA is the right motor for this plane, I think!

No pressure, right Jeff?! :D
 

Jwmav528

70cc twin V2
Mine will be finished and ready to maiden in the next day or so. Just one problem. I'm supposed to be in Youngstown this weekend. Anyone on here in the north east Ohio area free on Sunday and willing to let me visit their field? Also would said person be willing to film it for me? :eek:
 

TimP

GSN Sponsor Tier 1
Hey Snow dog - watch it again at 2:00 even.... he dropped it flat for about 200' it looks like.. Almost no rock - any there is appears to be gusts.

BTW Troy - if you're watchin this thread that was one of my favorite spots in the video
 
Top