• If you are new to GiantScaleNews.com, please register, introduce yourself, and make yourself at home.

    We're 1st in Giant Scale RC because we've got the best membership on the internet! Take a look around and don't forget to register to get all of the benefits of GSN membership!

    Welcome!

Scale Curtiss XP-55 Ascender

Larry B

70cc twin V2
Once you have the plug in the parting board and you are happy with where it's sitting then you need to seal the edges with clay. I use a plastic putty knife to get a nice sharp corner along the edge where the plug meets the parting board. Don't worry if you have a bit of a gap between the pug and parting board, the clay will take care of this, of course the better the fit, the less clay you need.

Once you are at this point, then it's time to start with the actual mold making.
Until the next session,
 

Attachments

  • L6.JPG
    L6.JPG
    345.5 KB · Views: 325
  • M1.JPG
    M1.JPG
    266.9 KB · Views: 344

Larry B

70cc twin V2
Brenda & I just got back from the NAT's and we are beat from the drive! I will get back to my "build" and making molds in a day or two, sorry for the intermission:(
Larry B
 

Jetpainter

640cc Uber Pimp
Brenda & I just got back from the NAT's and we are beat from the drive! I will get back to my "build" and making molds in a day or two, sorry for the intermission:(
Larry B
No problem Larry, glad you guys and your airplane got home safe.:)
 

Larry B

70cc twin V2
Here is the story Ace, I ended up missing first place by just 1.6 points, if Brenda had not missed calling the loop in my first round I would have won first place in designer scale, it figures this was the first time she ever missed calling a maneuver & she feels awful about it, oh well:(
My first round I was flying in front of the "generous" judges so my scores were a notch above all the other rounds so to miss the opportunity during the first round killed us. I thought my flying was the worst during the first round but I was getting the highest scores for my flying, it just goes to show how much difference the set of judges can make. The last round on Sunday I had some crud in the carb and the mixture would not go rich, something I check prior to each flight, I took off anyway and the engine started to go lean so I called a "mayday" and landed without incident. If I had scored better than a 92 on that last flight I could have won again but it was not to be.
I did get the highest static score yet with my Fiat so that was a good thing that came out of this event.

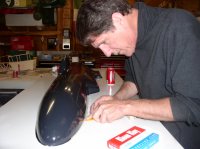
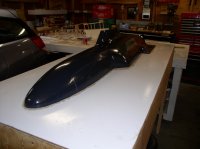
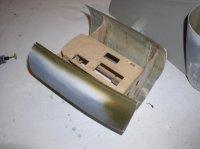
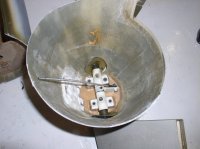
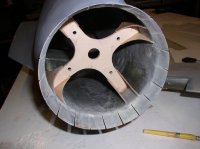
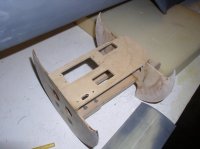
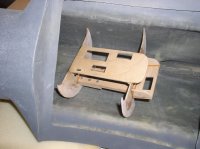
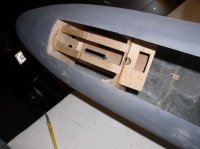
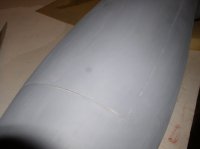
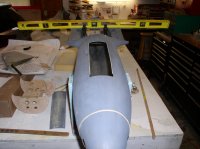
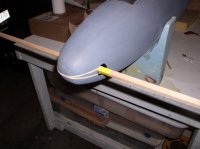
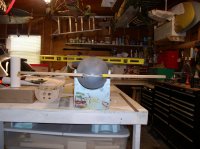
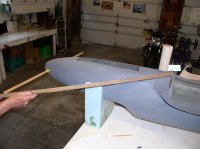
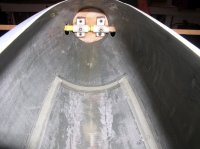
Now for some updates on the Ascender project, today I was able to cut the old fuse apart and salvage the wood formers that form the nose gear mount and the servo mounts. This little assembly came out perfect and cleaned up great, all I have to do is slip it in the nose and glass it in place, this saved a huge amount of work and I know that everything already fits! Also finished glassing in the mount for the electric motor, and cut the cowl flaps in the tail end. Here are a few photo's of the work so far, oh yea, the last photo is of the hatch on top of the nose. I am really happy with the fit of the hatch:)
 

Attachments

  • C1.JPG
    C1.JPG
    345.6 KB · Views: 328
  • C2.JPG
    C2.JPG
    439.2 KB · Views: 318
  • C3.JPG
    C3.JPG
    370.4 KB · Views: 298
  • C7.JPG
    C7.JPG
    355 KB · Views: 341
  • C8.JPG
    C8.JPG
    526.8 KB · Views: 303
  • C9.JPG
    C9.JPG
    368.6 KB · Views: 339
  • C4.JPG
    C4.JPG
    270.8 KB · Views: 301

Larry B

70cc twin V2
Today was a good bit of progress, I got the canard bearing former epoxied in place. It was a challenge to get it all square and true but I came up with an easy method. I used a rubber band to keep the stick pulled up against the inside of the nose, and with slow cure epoxy I could take the time to get it right. After it cures over night I'll glass it in place.
 

Attachments

  • D1.JPG
    D1.JPG
    311 KB · Views: 311
  • D3.JPG
    D3.JPG
    355.5 KB · Views: 350
  • D4.JPG
    D4.JPG
    305.2 KB · Views: 308
  • D5.JPG
    D5.JPG
    404.4 KB · Views: 315
  • D7.JPG
    D7.JPG
    332.9 KB · Views: 323
  • D8.JPG
    D8.JPG
    509 KB · Views: 311
Top