• If you are new to GiantScaleNews.com, please register, introduce yourself, and make yourself at home.

    We're 1st in Giant Scale RC because we've got the best membership on the internet! Take a look around and don't forget to register to get all of the benefits of GSN membership!

    Welcome!

3D Demystifying Vacuum Bagging of foam wings!!

IMAC FANATIC

40% happier than most folks.
NICE, but I have to say........This post is useless without pics!:yesss:

If you have some, post 'em, that's a killer idea.
Grrr, those pics are no longer on my phone and were on my laptop that got taken in the burglary, guess if I HAVE to I can post a link from the place that shall not be named.
 
Also backing up slightly to truing the edges of sheeting. Table saw clamp style jigs work well, I use a wide belt sander so I can do 50-60 sheets at one time and be done in about 4 minutes. This is the ideal way if you have any access at all to a sander, if not I recommend the table saw method. Worst case, the ol' straight edge and elbow grease. Anyone have methods on this please feel free to post so others can learn!!

Nope. You covered them all. Atleast all that I know of, outside of using a long straight edge and a hobby knife.....
 

Terryscustom

640cc Uber Pimp
Grrr, those pics are no longer on my phone and were on my laptop that got taken in the burglary, guess if I HAVE to I can post a link from the place that shall not be named.

Tried to send you a PM but could not (need to turn them on HERE). You could always just go there and save the pics and re-post them here, that would be cool!
 

Terryscustom

640cc Uber Pimp
An option instead of a wet dry vac...... how about a refrigerator vacuum pump for a/c?

You would not be able to use a shop vac for the actual vacuum bagging process, but it would suck a ton of air to help evacuate the bag quickly and then let that little EZ Vac system (or regular vacuum system) take over as the actual vacuum process. I read somewhere that a guy made a bagging system from a refrigerator compressor though. Sounds like a cool project, let us know how that works for you;)

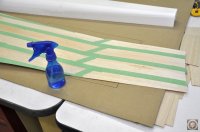
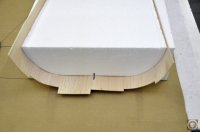
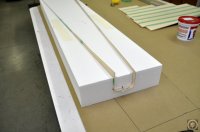
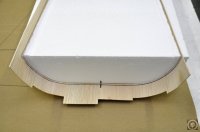
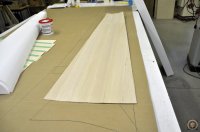
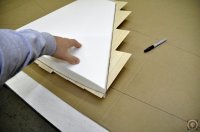
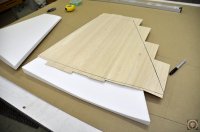
OK, back to business. Thought I'd show a couple more pics and small tips for getting the sheeting cut to size. For really odd parts (like a belly pan and for flat parts like wings, stabs and rudder) you can put the taped up balsa in the shuck with the part and trace around it that way. For really tight curves you can mist the balsa slightly to keep it from cracking. Don't soak it, just mist it and give it a minute to soak in. Then carefully put the part in the shuck, trace and cut out. All of these parts I am leaving about 1/16" - 3/32" hang outside the shucks. You can go up to about 1/8" on the ends if you need to. If you leave too much, the vacuum bag will bend it over and suck it flat to the outside of the foam. If that happens it's not a huge deal, just sand it flush, but it is a bit of a PITA so easier to take your time cutting the sheets to size.
 

Attachments

  • _DSC0300.JPG
    _DSC0300.JPG
    79.9 KB · Views: 568
  • _DSC0301.JPG
    _DSC0301.JPG
    60.3 KB · Views: 591
  • _DSC0302.JPG
    _DSC0302.JPG
    68.5 KB · Views: 596
  • _DSC0303.JPG
    _DSC0303.JPG
    69.3 KB · Views: 550
  • _DSC0304.JPG
    _DSC0304.JPG
    75.7 KB · Views: 522
  • _DSC0305.JPG
    _DSC0305.JPG
    73.7 KB · Views: 577
  • _DSC0306.JPG
    _DSC0306.JPG
    78.7 KB · Views: 554

Terryscustom

640cc Uber Pimp
You bet! I'll be bagging most of my parts tomorrow and will shoot a couple of better vids of the actual resin and bag process (and with a better camera now that we did a test run).

Will get those up tomorrow night when I get home, but will post some pics through the day.
 

Flyrcjoe

70cc twin V2
This is been some great information to learn from you. It looks much easier than the way I have been doing it. I am excited to get on board and try it with my next project.
 
Top