You are using an out of date browser. It may not display this or other websites correctly.
You should upgrade or use an alternative browser.
You should upgrade or use an alternative browser.
3D EMHW 2.15 Ultimate
- Thread starter ThePledge
- Start date
ThePledge
50cc
I think.
Haha, that's how I felt trying to find a picture...I "think" this is it..
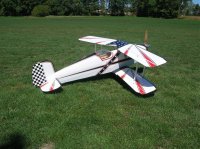
It's got some nice lines. I see what you mean about the Extra influence. It does look like it would fly well.
Naughty Monkey
100cc
Nice! Not only a bipe, but a different one at that!
If you think trying to get the name of the designer in a post is tough, wait till you start posting about the ****pit details!
If you think trying to get the name of the designer in a post is tough, wait till you start posting about the ****pit details!
Last edited:
IMAC FANATIC
40% happier than most folks.
Watch "Bucker Jungman TOC" on YouTube
Bucker Jungman TOC:
No idea if this is a hanson kit but it looks close, mine will be 50cc though.
Bucker Jungman TOC:
No idea if this is a hanson kit but it looks close, mine will be 50cc though.
ThePledge
50cc
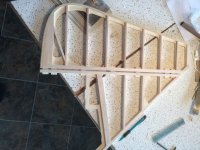
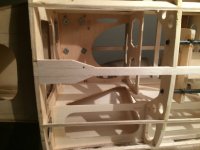
Here's some pictures of the forward sheeting going together. I used Windex and it worked really well. Next time I'll square up the edges of the sheets and glue them all together before gluing them to the plane. There's a few spots where the joint started coming apart and I had some fairly excessive gaps to spackle. It would be easier to stretch the entire thing around the plane rather than try to fit sheets together one at a time. Came out looking great though so I'm happy. The plane's starting to look bigger.
I trippled up one of the balsa stringers to allow a hole to be drilled through the sheeting/stringers for a fuel dot right in the center.
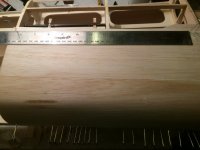
There's another picture of a ruler being used to trim one side of the sheeting so it ended up in the middle of the middle stringer to enable the other side to have a place to grab.
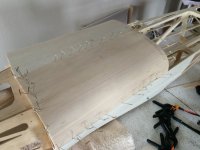
Spacked the gaps and all the pin holes and sanded to 150 grit. I'll leave the final sanding for the end.
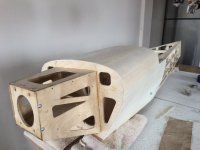
There is some sheeting still to be trimmed from the wing area. I'll leave this until I have the wings made to get as close a fit as possible.
Test fit the cowl and it's a nice tight fit.
I trippled up one of the balsa stringers to allow a hole to be drilled through the sheeting/stringers for a fuel dot right in the center.
There's another picture of a ruler being used to trim one side of the sheeting so it ended up in the middle of the middle stringer to enable the other side to have a place to grab.
Spacked the gaps and all the pin holes and sanded to 150 grit. I'll leave the final sanding for the end.
There is some sheeting still to be trimmed from the wing area. I'll leave this until I have the wings made to get as close a fit as possible.
Test fit the cowl and it's a nice tight fit.
Attachments


Last edited:
IMAC FANATIC
40% happier than most folks.
Gorgeous work and I like/use the windex/water method for curves too.
Terryscustom
640cc Uber Pimp
Gorgeous work and I like/use the windex/water method for curves too.
Me three. Dayum, that's one sexy looking fuse!!!
ThePledge
50cc
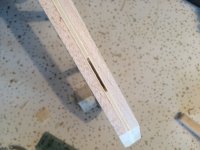
Did the hinging for the tailfeathers. They supply nice Kavan flat hinges. The hinges have 1.4mm nails through them, but these can be replaced with #24 piano wire/spring steel to make everything removable.
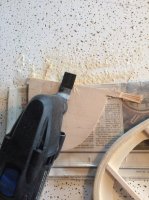
As the tailfeathers are built by sandwhiching ply between balsa, digging slots out might be a challenge with handtools so used a Dremel Multitool with a 3/4 flush cut bit. BradleyBan on RcCanada did a great Ultimate build which is where I got the idea.
It worked really well and was easy to cut the hinges fairly cleanly and centered using 6mm ply sitting on some newspaper as a shim.