Terryscustom
640cc Uber Pimp
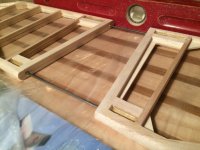
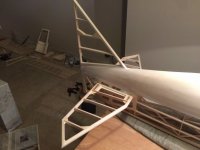
Sooooo, ready to cover yet??

I had the same 'aha' moment about cornhuck the other day too. Glad to see you back on it.Thanks Terry, sort of dawned on me the other day that if I don't get moving this plane will miss another huckfest lol
I had the same 'aha' moment about cornhuck the other day too. Glad to see you back on it.