• If you are new to GiantScaleNews.com, please register, introduce yourself, and make yourself at home.

    We're 1st in Giant Scale RC because we've got the best membership on the internet! Take a look around and don't forget to register to get all of the benefits of GSN membership!

    Welcome!

Extreme Flight 60" Laser Build Thread

Ohio AV8TOR

Just Do It
Although not a Giant Scale I always have a smaller electric plane that I can fly at work (I work for Nike Golf and we have a really nice driving range to fly off of)

I had a 60" Extreme Flight Edge before this and on flight 166 I was doing low rollers about 6' and not sure if it was dumb thumbs or something I later found but it started rolling fast and I could not stop nor catch up to stop it going down and bam it went in hard and to my surprise absolutely splinted the front end to small pieces. When stripping the gear out I did notice that one of my 3" aileron extensions had the signal pin pushed in a little more than 1/8" so I really don't know if that is why I could not stop the roll but I look at it as an opportunity to get the Laser which has always caught my eye.

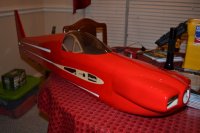
On the Laser I had to go red because of the many years of following Leo Loudenslager I saw this as an opportunity to do this as a stand off scale project. I plan on getting some custom Bud Light graphics as well.

I know there are many building or getting ready to start building so I hope this can be as helpful as many said my Edge build was.
 

Ohio AV8TOR

Just Do It
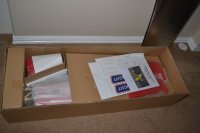
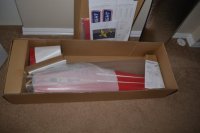
Well the packaging. What can you say Extreme Flight does it better than any that I have build. Double boxed and really nice custom fit places for everything. The finish is well protected by tissue paper wrapped under the plastic bagging.

DSC_0008.JPG DSC_0009.JPG
 

Ohio AV8TOR

Just Do It
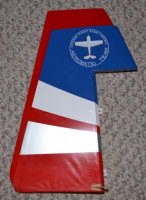
For those interested in the size, yes this "is" an EXP and below I have shown some comparison to the size of my 60" Edge 540 both elevator and rudder.

The rudder is taller and slightly wider.

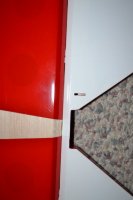
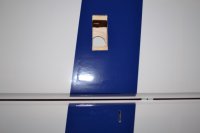
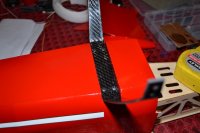
The elevator and stab is slightly bigger all around - the Laser is on the bottom with the Edge elevator on top. It is about 3/8" wider on the control surface and also about 3/8" longer on the sides. I can't wait to glue the elevator to the stab to show you but the gap bevel is done fantastic. Looks like no problem to get 90º

DSC_0010.JPG DSC_0011.JPG
 

Ohio AV8TOR

Just Do It
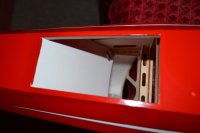
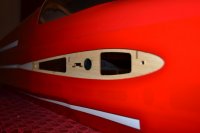
A lot of the work is done for you and done very well regarding the pre-trimming of control horns, servo openings, the fuselage bottom cooling exit and the wing recess. I had a problem with the exit cooling cut out on my Edge because a wood cross member was not low enough. This is absolutely perfect and the cool part is that the back slanted wall deflecting the air is also covered in white for that extra clean look. A nice touch indeed.

DSC_0014.jpg DSC_0013.JPG DSC_0019.JPG DSC_0020.JPG DSC_0018.JPG
 

Ohio AV8TOR

Just Do It
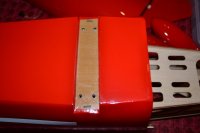
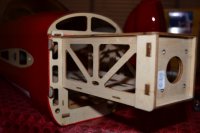
The fuselage is slightly taller and wider than my Edge, it should be easy to work inside for sure. The motor box is real long and at the moment has me concerned for the short wires that came on my ZTW ESC. The cowl has huge air inlets which should be wonderful for those that have hot running motors and ESC's. Should not be a problem cooling things down with this one.

DSC_0017.jpg DSC_0016.JPG
 

Ohio AV8TOR

Just Do It
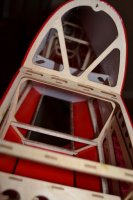
The turtle deck has the typical foam lamination on the inside giving it a lot of strength. You can see in the picture that tapered wall for the cooling exit finished in white. Canopy latch has very smooth operation.

DSC_0021.jpg
 

Ohio AV8TOR

Just Do It
I have been talking with Eric at B&E and I sent him some art work that he matched nicely. I really want this to look like Leo's Laser so I am replacing the Extreme Flight decals which by the way are matched nicely to Leo's Bud Light sponsor's decals. Extreme flight does not supply the extra blue matching side decals but I will have them along with Leo's tail number N-10LL. Just what I was looking for. I also have a friend cutting me Leo Loudenslager for the name on the canopy.

EF-laser-bud-light-60in.jpg
 

Ohio AV8TOR

Just Do It
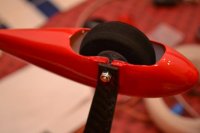
Put the gear on last night, no big deal same as usual. One thing I like to do that I have been doing with great results with regards to not having a wheel fall off is to locate and relieve a slot for the grub screw to be recessed into. All you have to do is slide on the wheel and lock collar on the axle and just snug down the grub screw. Remove everything and you will see on the axle the exact spot the screw made a mark in the plating on the axle. I use a dremel with a cutoff wheel and grind a flat in the axle. This will allow the screw to recess into. Re-assemble everything as before but add some blue loctite on the grub screw. Now with it going into a recess in the axle even if the screw loosens slightly it is still mechanically trapped to the axle. When you do a preflight just try and rotate the wheel collar and if it comes loose it will want to rotate some but will not come off. I have used this for all my 48"-87"

Note I do not install the wheel pant "anti rotation" screw until the plane is finished. I like to prop the plane in a wings level flying position, then I rotate the wheel pant to be lined up with the wing incidence then I install that screw.

DSC_0252.jpg DSC_0250.jpg DSC_0240.JPG
 

Ohio AV8TOR

Just Do It
Dry fitting the aileron to the wing I am looking to see that all hinge slots are cut right to accept the hinge on both surfaces. Both wings on the Laser were perfectly cut and required no opening of the hinge slots. I like to mark that centerline with a thin marker to ensure that the hinge is equal. I then install the aileron and please - please rotate the wing over and make sure that one of the hinges did not accidentally miss the slot. Now is the time to find this out. I use a lot of wood coffee stirrers in my builds, here is use it to get equal spacing on the root of both ailerons to the wing spacing. Starbucks is your friend, I always grab some when I am there. Allow the aileron to fall down on its own and start glueing with thin CA.

DSC_0255.jpg DSC_0254.JPG
 

Ohio AV8TOR

Just Do It
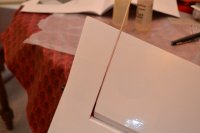
If you do not seal your gaps there is no time like the present to start and make this a part of every build. I do this a little different than some and I not only find it easier it is so cheap In the past I have used Blenderm tape, Monocote and Ultracoat but I am telling you clear packing tape is the way to go. It is so clear it makes no difference with whatever coloring scheme you use. Something else I found is you do not have to do it all in one piece. I cut the tape in about 8" or so length which is so much easier to handle. I am using 2" wide here. Lay the wing on the table letting the aileron fall. I place the tape on the aileron trying not to let it touch the wing. Press in on your finger to get it sealed right down into the gap then allow it to touch the wing and rub it down. Take an Xacto knife and with ever the slightest pressure slide the blade to cut the tape. I so it about 1/16" down from the top of the wing. The pressure I use is only enough to score the tape not cut it and peal it back and off. I use the remaining cut off for the next strip and I overlap it 1/4" or less. Do this to finish the full gap and I take a plastic pen cap and rub it down to help work out any line. It is totally invisible and I have never developed a tear. I do this on the bottom surfaces.
Yes the slide on the right is finished so you can see how clear it is.

DSC_0257.jpg DSC_0258.jpg DSC_0259.jpg
 
Top