You are using an out of date browser. It may not display this or other websites correctly.
You should upgrade or use an alternative browser.
You should upgrade or use an alternative browser.
Hostetler Cessna 336 Skymaster
- Thread starter Patto
- Start date
Patto
70cc twin V2
Looking at Hostetler's other planes, I'm seeing that there is a wire support that runs up the sides, between windshield and side windows, that acts as a brace for the front wing mounting block. I had wondered when looking at the Skymaster how that little bit of wood was supposed to support the fuse during any kind of load. Any ideas why the wire isn't in the Skymaster? Should I plan on installing one?
Patto
70cc twin V2
After too long of a hiatus, I finally, FINALLY got the plans out and started on the wing center section.
I started gathering all the wood that I would need, and lo and behold.... I was missing several sticks. I was able to get started because I had anticipated needing more 1/4X3/8 basswood sticks since I previously ran out while putting the fuselage together. I was also missing the balsa for the leading edge of the wing center section. As far as I can tell, the wing is built the same where it meets the fuse as it is elsewhere, so there's no reason it should have been omitted.
I started by making the spar boxes. Fairly straightforward as far as I can tell. I opted to NOT cut the basswood to get the sticks to line up perfectly on the edges of the spar boxes. The only crucial spacing is where the wing "plugs" insert. Otherwise, they're all about providing strength. Maybe they'd be find cut up, but I decided to just keep them whole.
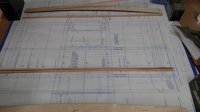
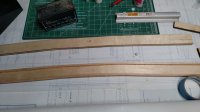
Next, it was time to start installing ribs!!
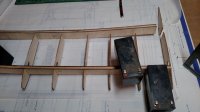
For some reason I remember reading somewhere, maybe on the plans, that you should plan ahead for the tail booms to slide onto the rear spar box. For that reason, I did not glue the rear spar box into place yet. I will have to rotate the plans and put them at the end of the table to get the tail booms in place on the plans. I'm looking forward to hopefully doing that tomorrow.
The center section is polyhedral: flat in the middle and angled at the fuse sides. It does make it a little more complicated to get the angles right, but the spar boxes are a good guide.
HOWEVER, progress will be hindered by that pesky shed project. I've been waiting for a dry forecast, and if there is any dry time this weekend, I will be out there finishing the painting. Maybe I'll "luck out" and there will be rain?
I started gathering all the wood that I would need, and lo and behold.... I was missing several sticks. I was able to get started because I had anticipated needing more 1/4X3/8 basswood sticks since I previously ran out while putting the fuselage together. I was also missing the balsa for the leading edge of the wing center section. As far as I can tell, the wing is built the same where it meets the fuse as it is elsewhere, so there's no reason it should have been omitted.
I started by making the spar boxes. Fairly straightforward as far as I can tell. I opted to NOT cut the basswood to get the sticks to line up perfectly on the edges of the spar boxes. The only crucial spacing is where the wing "plugs" insert. Otherwise, they're all about providing strength. Maybe they'd be find cut up, but I decided to just keep them whole.


Next, it was time to start installing ribs!!

For some reason I remember reading somewhere, maybe on the plans, that you should plan ahead for the tail booms to slide onto the rear spar box. For that reason, I did not glue the rear spar box into place yet. I will have to rotate the plans and put them at the end of the table to get the tail booms in place on the plans. I'm looking forward to hopefully doing that tomorrow.
The center section is polyhedral: flat in the middle and angled at the fuse sides. It does make it a little more complicated to get the angles right, but the spar boxes are a good guide.
HOWEVER, progress will be hindered by that pesky shed project. I've been waiting for a dry forecast, and if there is any dry time this weekend, I will be out there finishing the painting. Maybe I'll "luck out" and there will be rain?
Patto
70cc twin V2
Nice job [MENTION=3711]Patto[/MENTION]! This fall I will be building a Top Flite Gold Edition .60 size Spitfire, it's been 3 years since I have built a kit, getting the urge again
Once you lay out the plans and get started, you'll wonder why you don't build all year long... Trust me, it's weird. As soon as you just get the plans out and start, it takes off...
Bipenut53
150cc
Once you lay out the plans and get started, you'll wonder why you don't build all year long... Trust me, it's weird. As soon as you just get the plans out and start, it takes off...
Yes you are right I do enjoy building. That's the only way we got our planes back in the day. Just got to get the fire lit under my butt to start lol
Patto
70cc twin V2
For the two or three of you that may still be following this thread, you may recall that I already built up the tail booms and vertical stabs previously. Now that I have the spar boxes complete and the front half of the wing center section built up, I can attach the booms to the rear spar box. After a lot of trial fitting, measuring, and a little sanding, it was time to mix up some 30 min epoxy with some glass fiber mixed into it. I do this because it thickens up the epoxy and supposedly increases strength. I used some balsa tri-stock to further strengthen the joint.
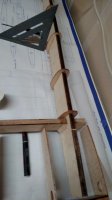
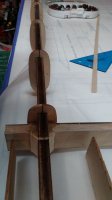
And here are both of them together.
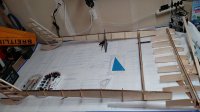
The rear/trailing pieces of the three part W1 ribs have tabs on them so you can build the center section on the table. I have no idea how that would be done. I chose to leave them off and add them later. The tricky part will be to get the ends to all line up in a straight line. I'll work on that later...


And here are both of them together.

The rear/trailing pieces of the three part W1 ribs have tabs on them so you can build the center section on the table. I have no idea how that would be done. I chose to leave them off and add them later. The tricky part will be to get the ends to all line up in a straight line. I'll work on that later...
Patto
70cc twin V2
I've been on vacation so I missed your post this week! Glad you're back at it man!
I'm back and I'm making progress now. I didn't work on it for a few months because I just didn't feel like it. Now, I'm excited about it again. We'll see if I can get it done by the end of the summer, eh?
