You are using an out of date browser. It may not display this or other websites correctly.
You should upgrade or use an alternative browser.
You should upgrade or use an alternative browser.
Sport JTEC RADIOWAVE 26% Pitts Model 12
- Thread starter stangflyer
- Start date
stangflyer
I like 'em "BIG"!
Thank you Brett. I really appreciate you taking time out yesterday to answer a bunch of questions.Lookin' great Rob!
stangflyer
I like 'em "BIG"!
I'm really pleased with how the Pitts is coming out. I've almost convinced myself I may build another stick built plane. Al-most...!!! Lol


With the fin dowels for the flying wires drilled, I guess I need to get the vertical fin sheeted. I now have the left and right side fin sheeting skins made. Now I just need to figure out how to sheet the fin while keeping the sheeting pressed tight and keeping the fin from twisting. Ugh! Not looking forward to this step.

Will post more later.
With the fin dowels for the flying wires drilled, I guess I need to get the vertical fin sheeted. I now have the left and right side fin sheeting skins made. Now I just need to figure out how to sheet the fin while keeping the sheeting pressed tight and keeping the fin from twisting. Ugh! Not looking forward to this step.
Will post more later.
Bipeguy03
150cc
I'm really pleased with how the Pitts is coming out. I've almost convinced myself I may build another stick built plane. Al-most...!!! Lol
It's looking fantastic, your doing one heck of a job! Building is a blast, I got away from it for a while and put together and rebuilt some ARF's but it's just not the same. I haven't had as much fun modeling as I am having building my Krier, in a long time.
looking forward to seeing more of your progress!
Wacobipe
100cc
Any time! I've got all the time in the world to help more people build! ARF's are a great addition to the hobby...but you lose a huge part of what makes the hobby great if you don't build something at least occasionally!Thank you Brett. I really appreciate you taking time out yesterday to answer a bunch of questions.
Jetpainter
640cc Uber Pimp
Maybe not cheap...but quality stuff is very important to have. Especially for that awesome scratch build of yours. I really honestly am so excited to see it once it's all done. You gotta be just thrilled huh?
Alky6
150cc
Is that it??? OK. Done. You name the brand. Heck, I'll bring two six packs! That would be more than worth the trip from CA to ID! LOL. Besides, been quite a while since I drove through Jordan ValleyOh now wait just a darn minute. Only way I do specialized sanding is if there is a brewsky or three in it for me. Just bring the six pack and we'll git after it.
stangflyer
I like 'em "BIG"!
Ah yes..... Jordan Valley. Been a while since I myself have been through there. I might have to take the drive just for the heck of it. Usually my trips to sun So. Cal. are by way of 93. I really like that drive. Lots and lots of open miles. Come on up any time. We can go blast some planes around.Is that it??? OK. Done. You name the brand. Heck, I'll bring two six packs! That would be more than worth the trip from CA to ID! LOL. Besides, been quite a while since I drove through Jordan Valley.
stangflyer
I like 'em "BIG"!
Well here is my progress for this afternoon. I did take a short break to go out and spot my friend Tom with his new Pilot RC Decathlon. Yes, he now has two. The first one....with the Valach flies so well, he just had to have another. This one is kind of small though. 107". He put his Saito 57 gas twin on it. Holy smokes, that thing was like it was made especially for that plane. What a nice flying plane. As much as the little RCGF 10cc brought life to the Hobbico Trainer, I am thinking now I may sell it and get a Pilot Decathlon. No sense in not enjoying the flying while I am teaching right? LOL
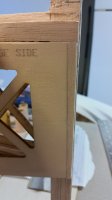
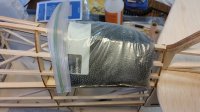
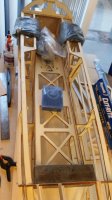
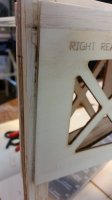
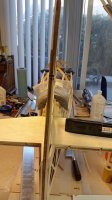
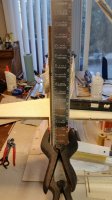
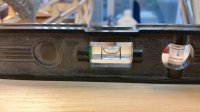
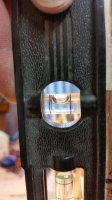
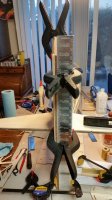
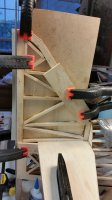
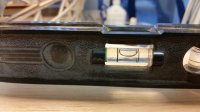
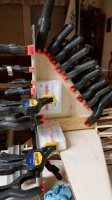
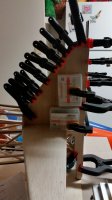
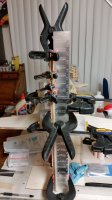
As for the progress, I came to a conclusion that I really messed up with the planned sheeting on the vertical fin. I really should have done the sheeting "before" I attached it to the fuse. But I was trying to follow the manual as closely as possible. Not a problem though. I did conjure up a plan to sheet the fin without removing the fuse from the jig or having to do anything extreme. First thing I did was to weight the entire fuse down with buck shot in plastic bags. I wanted to make sure that fuse was down good and solid and was not going to move or twist with any amount of twisting I put on the vertical fin. Using a builders square, I placed it right against the right side of the trailing edge fin post the full length and resting the other portion against the building board. I discovered that I was correct. The fin does/did have a bit of a warp in it. I could see it from looking from behind, but once the square was against it, it is very noticeable. I removed the balsa filler at the aft end of the rear right side fuse plate. I needed to get a good clean straight line. Once I had it in place, using "C" clamps to hold it in place on the board and against the fin post, I was able to bring the fin post straight. Sweet.... Now I can start laying in the vertical fin sheeting skins. I did the left side first and allowed it to come to about 50% cured. I soaked the outside of the skin with Windex as I wanted the fin to be somewhat flexible when I layed in the right side skin. Once I had the glue spread evenly at the contact points of the skin, it was placed into position and the outside of that skin was also soaked with Windex. Then clamped into position along with the builders square. It has brought the fin into perfect alignment for now. I hope once the skins dry and the glue cures, it will hold its shape. Needless to say, during this entire process, I checked, double checked and then triple checked the fuse for being securely held down as well as insure the stabs and fin were in perfect leveled positions. That little 6" level is proving to be worth its weight in gold. Wish I had a laser like some of you, but the level is doing a good job. Although my methods and "on hand" tools and equipment may be a bit obscure, the building of this kit is coming out pretty darned nice. I can pretty much guarantee I won't be building another plane until I get two things in place. A true building room with building table like I used to have years ago. And second....tools and equipment. LOTS OF STATE OF THE ART tools and equipment. LOL
I also came up with my ultimate decision on the rear of the fuse behind the turtle deck at the leading edge of the fin. Some guys have used balsa blocks then sanded to shape. This I mentioned earlier. I had planned to extend the stringers to the vertical fin trailing edge post. I soon realized this is not going to allow for a clean solid surface in which to lay covering on, so....I have cut out of extra light ply (4) small "U" shaped brackets to lay on the back side of F7 at the stringer points from the turtle deck. I will then go head and replace the 1/4" x 1/4" stringers to the fin post. Since the turtle deck is going to be sheeted with 3/32" sheeting, I plan to make up my sheets to extend all the way to the trailing edge of the fin post. This way it will give the constant continued shape all the way to the fin post from the canopy area of the turtle deck and also allow me to lay in a complete (1) piece panel of covering. It won't take near the shaping and sanding as it would with a balsa block formed to match the contours.
The weather today was once again simply outstanding and tomorrow is looking to be the same way. So I plan to take the big round cowl orange bird out for a few flights. (I am liking these round cowl fuselages lately) Who knows, maybe a H-9 100-125cc Pitts is in my future after all. LOL. But I promise to get back on the Pee-Wee Pitts when I return. The plan for tomorrow is to get the leading edge of the fin sanded to shape. And since I now have the block I want inside the rudder for the control horn, it has the remaining sheeting in place and it is under the press for the night. I will sand and shape the rudder, drill the hinge line for hinges and then....I am going to sheet the canopy/hatch and the rear turtle deck area to the trailing edge fin post. My remaining wing tubes from TNT arrived today so once the sheeting is done, I can get the fuse off the jig and start building the wings.
Just a few photos of progress from today.


stangflyer
I like 'em "BIG"!
Just in from flying and couldn't wait to pull the square from the fin post on the Pitts. Fingers crossed...

Well I'll be!!! Look at that. Yes!
Top right stab...

Top left stab...

And last but not least, vertical fin...

This I can live with. I think I'll sand the leading edge now and finish up the fuse. I'm really getting excited to see this round cowl two winged 3w packin' beast fly!!!
Well I'll be!!! Look at that. Yes!
Top right stab...
Top left stab...
And last but not least, vertical fin...
This I can live with. I think I'll sand the leading edge now and finish up the fuse. I'm really getting excited to see this round cowl two winged 3w packin' beast fly!!!
