You are using an out of date browser. It may not display this or other websites correctly.
You should upgrade or use an alternative browser.
You should upgrade or use an alternative browser.
Sport JTEC RADIOWAVE 26% Pitts Model 12
- Thread starter stangflyer
- Start date
stangflyer
I like 'em "BIG"!
Yes, very true. I have not updated the Pitts thread in a few days. I have been working on other projects in hopes our weather has finally changed for the better and I can get out and start doing a little IMAC practice and just breathing good fresh clean air.Have not seen you on your site for many days, are staring at it like I am at completed Inversa33.
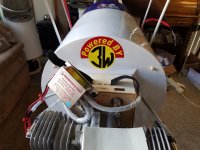
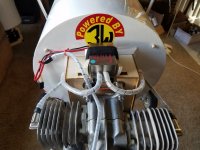
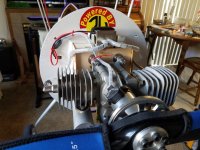
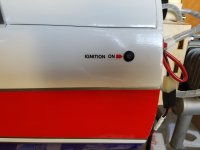
I did a little tinkering with the Pitts today. I added a few decals just to break up the monotony of the scheme. I also wanted to block off the front former from as much hot engine air flow as I could. I wanted to keep it light so covering was the answer. I hope it will help deflect at least some of the hot air from the engine from getting directly inside the fuse. Course, the baffling will help a great deal too.
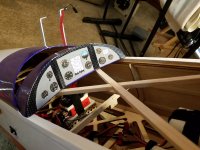
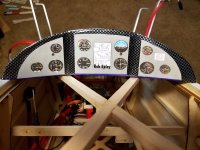
I also tinkered around with the instrument cluster. Basically used what I had on hand but really not sure I like the outcome. It probably will not stay this way but at least it gives me an idea of what I really want. I have a real nice photo saved that I believe @Pistolera attached to the thread a few pages back. I am probably going to have my friend who has a lazer cutter print me a decal of that photo.
I just really want to get the canopy in place, Pilot installed and cowl painted. I am so ready to have this project finally done.
Snoopy1
640cc Uber Pimp
You just cannot leave it alone the plane is slowly becoming your favourite, building a big one soon for the 220 big red heads.Yes, very true. I have not updated the Pitts thread in a few days. I have been working on other projects in hopes our weather has finally changed for the better and I can get out and start doing a little IMAC practice and just breathing good fresh clean air.
I did a little tinkering with the Pitts today. I added a few decals just to break up the monotony of the scheme. I also wanted to block off the front former from as much hot engine air flow as I could. I wanted to keep it light so covering was the answer. I hope it will help deflect at least some of the hot air from the engine from getting directly inside the fuse. Course, the baffling will help a great deal too.
View attachment 93693 View attachment 93694 View attachment 93695 View attachment 93696 View attachment 93697
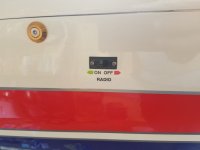
I also tinkered around with the instrument cluster. Basically used what I had on hand but really not sure I like the outcome. It probably will not stay this way but at least it gives me an idea of what I really want. I have a real nice photo saved that I believe @Pistolera attached to the thread a few pages back. I am probably going to have my friend who has a lazer cutter print me a decal of that photo.
View attachment 93698 View attachment 93699 View attachment 93700
I just really want to get the canopy in place, Pilot installed and cowl painted. I am so ready to have this project finally done.
pawnshopmike
Staff member
@stangflyer
Where did you get those switch decals? I like those.
Where did you get those switch decals? I like those.
Bunky.F.Knuckle
150cc
Hey Rob. Just a FYI, if that blue dot ignition goes belly up, you can use a DA ignition and not have any worries.
Also, too...... I see you are foam insulating the bottom side of the ignition..... Its not a good idea to do that. The bottom side is where all the heat is generated, and which is why it is recommended to have a gap between the unit and what you are mounting to. Lately, I have been flipping my ignition modules over, so that the top is down and then you can use the foam for an insulator.
Also, too...... I see you are foam insulating the bottom side of the ignition..... Its not a good idea to do that. The bottom side is where all the heat is generated, and which is why it is recommended to have a gap between the unit and what you are mounting to. Lately, I have been flipping my ignition modules over, so that the top is down and then you can use the foam for an insulator.
Snoopy1
640cc Uber Pimp
Hey Rob. Just a FYI, if that blue dot ignition goes belly up, you can use a DA ignition and not have any worries.
Also, too...... I see you are foam insulating the bottom side of the ignition..... Its not a good idea to do that. The bottom side is where all the heat is generated, and which is why it is recommended to have a gap between the unit and what you are mounting to. Lately, I have been flipping my ignition modules over, so that the top is down and then you can use the foam for an insulator.
Thanks that info on the 3w ignition and the DA is useful I have couple off those.
stangflyer
I like 'em "BIG"!
Actually two full sheets of those came with a "glow" ARF I purchased....hmm, like 5 or 6 or 20 years ago. I honestly do not remember. I will try to remember and let you know. The sheets consist of a huge variety of decals from choke to power to rx. to, well lots of things. I wish I could remember where I got them.@stangflyer
Where did you get those switch decals? I like those.
Appreciate the heads up on the ignition. So far it has proved to be bullet proof. Pretty sure though if something goes amiss with it, I will simply replace it with an RC Excel. They have proved themselves worth their weight in gold on my 157 and 170. As for the foam under the igniton...this was only a temporary setup to test run the engine. I actually have a TDRC Anti-Shock Ignition Mount I plan to install. Just haven't gotten around to some of the last minute details yet. I have these same units installed on my 260, my Sukhoi and my Yak. Personally my absolute answer to ignition mounting. Especially the 3w's.Hey Rob. Just a FYI, if that blue dot ignition goes belly up, you can use a DA ignition and not have any worries.
Also, too...... I see you are foam insulating the bottom side of the ignition..... Its not a good idea to do that. The bottom side is where all the heat is generated, and which is why it is recommended to have a gap between the unit and what you are mounting to. Lately, I have been flipping my ignition modules over, so that the top is down and then you can use the foam for an insulator.
Last edited:
stangflyer
I like 'em "BIG"!
So today.... I think my plan is to actually get a couple of those last minute details taken care of. Lets see now... check list:
(1) Of course the vibra mount on the ignition.
(2) finalize the gauges.
(3) cut my spinner for the prop.
(4) install the canopy, and reinstall the center top wing section.
I still need to baffle the engine and cut the openings I need in the cowl. I also need to make a decision on the main wheels. I like the White Rose wheels but two things bother me about them. First, they weigh just shy of a pound combined and I could save some serious weight and help with the balance if I go to a lighter set of wheels. Second, although I feel the 3.5" suggested for the plane are too small, the White Rose are also just a smidgen too big. In my opinion. I will do a complete reassembly and balance also. I am still waiting for a pilot bust and paint for the cowl. Oh and of course I need to get the "dummy" radial deal for the face of the cowl once it is painted.
So it's close.....
stangflyer
I like 'em "BIG"!
Dang!!!! That is absolutely BEAUTIFUL! But then I would expect nothing less from you. Damn! Wish you had a full straight on shot of the face of that. I think my dilemma has been getting the correct configuration. The reason I first chose the "rounded" and "recessed" design is because it is about the best pictures I could find to reproduce the look. But to be in true fashion, the rounded and recessed design was kind of maintained to the twin seaters.Stang....here's the instrument panel I made for my Beast, using that photo from the original Beast. Made the first one out of Depron, but vibrations quickly got to it....so reproduced the same thing from balsa later. It held up fine.
View attachment 93711 View attachment 93712 View attachment 93713 View attachment 93714 View attachment 93715
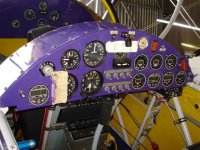
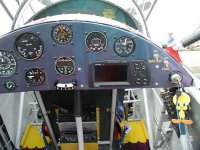
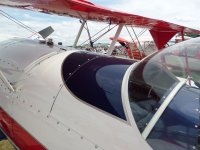
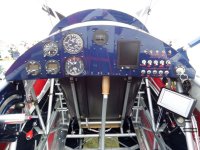
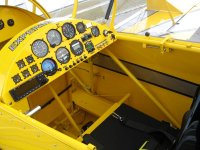
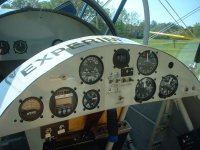
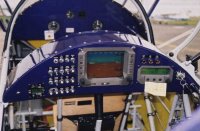
The angled one like yours were specific to the single seaters. 2wings.com has been a great resource of information. At least this is what I have been finding. Someone correct me if I am wrong. The actual decal I wanted to use was this one:

But now after seeing yours and doing a little more research... i.e.,
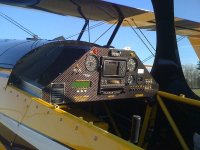
If I had a photo of the full on face of the panel you used, I would in a heart beat re-design the panel completely. Nothing is in stone yet. Not until the canopy is in place.
Last edited:
