• If you are new to GiantScaleNews.com, please register, introduce yourself, and make yourself at home.

    We're 1st in Giant Scale RC because we've got the best membership on the internet! Take a look around and don't forget to register to get all of the benefits of GSN membership!

    Welcome!
  • Unless you are a paid advertiser NO more posting advertisement in the individual vendor forums. You may post in the Manufacturer's Announcements section only but only ONCE a month unless your a paid advertiser.

OMP 60" Electric Sbach Assembly

garlandk

100cc
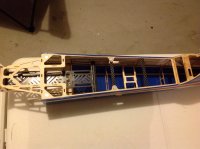
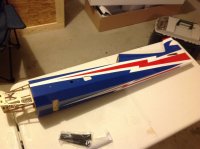
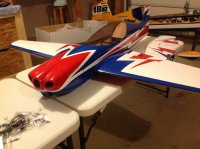
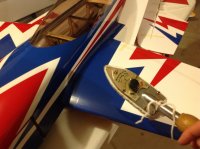
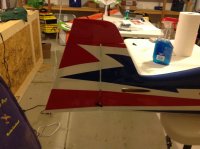
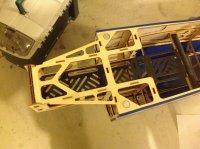
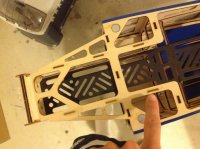
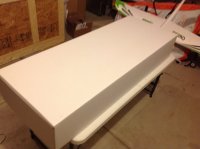
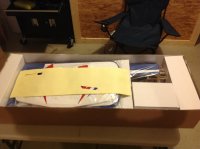
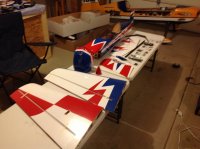
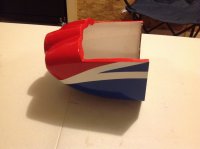
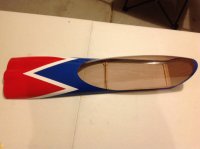
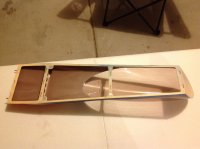
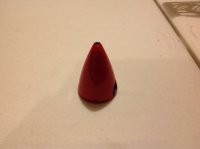
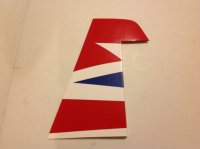
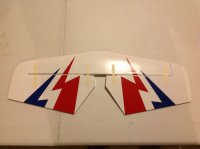
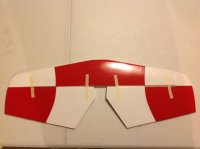
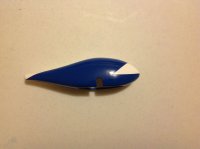
This week I have Ohio Model Products 60" Sbach coming in. Here are a few specs.

Wing Span: 60 inches
Length: 58 inches
Power: Hacker A50-14S
(or equivalent)
Battery: 3800 5-cell LiPo
ESC: 75 amp
Flying Weight: 4.75 - 5.25 lbs

Price: $289.95 plus shipping.
 

Attachments

  • IMG_0444.jpg
    IMG_0444.jpg
    200.8 KB · Views: 402
  • IMG_0445.jpg
    IMG_0445.jpg
    196.1 KB · Views: 222
  • IMG_0446.jpg
    IMG_0446.jpg
    195.6 KB · Views: 239
  • IMG_0447.jpg
    IMG_0447.jpg
    192.4 KB · Views: 230
  • IMG_0448.jpg
    IMG_0448.jpg
    196.5 KB · Views: 210
  • IMG_0449.jpg
    IMG_0449.jpg
    200.2 KB · Views: 256

garlandk

100cc
Below are photos of each individual parts.
 

Attachments

  • IMG_0450.jpg
    IMG_0450.jpg
    203.4 KB · Views: 225
  • IMG_0451.jpg
    IMG_0451.jpg
    202.5 KB · Views: 210
  • IMG_0452.jpg
    IMG_0452.jpg
    199.4 KB · Views: 227
  • IMG_0453.jpg
    IMG_0453.jpg
    202.3 KB · Views: 235
  • IMG_0454.jpg
    IMG_0454.jpg
    199.4 KB · Views: 263
  • IMG_0455.jpg
    IMG_0455.jpg
    203.7 KB · Views: 214
  • IMG_0456.jpg
    IMG_0456.jpg
    209.3 KB · Views: 206
  • IMG_0457.jpg
    IMG_0457.jpg
    203.3 KB · Views: 199
  • IMG_0458.jpg
    IMG_0458.jpg
    208.5 KB · Views: 233
  • IMG_0459.jpg
    IMG_0459.jpg
    203.6 KB · Views: 268
  • IMG_0460.jpg
    IMG_0460.jpg
    203.2 KB · Views: 228
  • IMG_0461.jpg
    IMG_0461.jpg
    214.5 KB · Views: 224
  • IMG_0462.jpg
    IMG_0462.jpg
    205.9 KB · Views: 199

garlandk

100cc
Hardware Package
 

Attachments

  • IMG_0463.jpg
    IMG_0463.jpg
    198.4 KB · Views: 220
  • IMG_0464.jpg
    IMG_0464.jpg
    196.2 KB · Views: 240
  • IMG_0465.jpg
    IMG_0465.jpg
    195.6 KB · Views: 224
  • IMG_0466.jpg
    IMG_0466.jpg
    201.6 KB · Views: 234
  • IMG_0467.jpg
    IMG_0467.jpg
    199.3 KB · Views: 225
  • IMG_0468.jpg
    IMG_0468.jpg
    196.9 KB · Views: 222
  • IMG_0469.jpg
    IMG_0469.jpg
    196.4 KB · Views: 224
  • IMG_0470.jpg
    IMG_0470.jpg
    196.3 KB · Views: 226
  • IMG_0471.jpg
    IMG_0471.jpg
    198.9 KB · Views: 221
  • IMG_0472.jpg
    IMG_0472.jpg
    197.2 KB · Views: 228
  • IMG_0473.jpg
    IMG_0473.jpg
    217.1 KB · Views: 216
  • IMG_0474.jpg
    IMG_0474.jpg
    191.8 KB · Views: 205
  • IMG_0475.jpg
    IMG_0475.jpg
    197.4 KB · Views: 207
  • IMG_0476.jpg
    IMG_0476.jpg
    201.1 KB · Views: 201

garlandk

100cc
More Photos :)
 

Attachments

  • IMG_0477.jpg
    IMG_0477.jpg
    194.8 KB · Views: 280
  • IMG_0478.jpg
    IMG_0478.jpg
    194.2 KB · Views: 219
  • IMG_0479.jpg
    IMG_0479.jpg
    194.8 KB · Views: 255
  • IMG_0480.jpg
    IMG_0480.jpg
    195.3 KB · Views: 240
  • IMG_0481.jpg
    IMG_0481.jpg
    194.6 KB · Views: 208
  • IMG_0482.jpg
    IMG_0482.jpg
    200.5 KB · Views: 242
  • IMG_0483.jpg
    IMG_0483.jpg
    204.2 KB · Views: 234
  • IMG_0484.jpg
    IMG_0484.jpg
    193.7 KB · Views: 196
  • IMG_0485.jpg
    IMG_0485.jpg
    194 KB · Views: 207
  • IMG_0486.jpg
    IMG_0486.jpg
    193.9 KB · Views: 200
  • IMG_0487.jpg
    IMG_0487.jpg
    193.3 KB · Views: 203
  • IMG_0488.jpg
    IMG_0488.jpg
    195.9 KB · Views: 236
  • IMG_0489.jpg
    IMG_0489.jpg
    196.2 KB · Views: 234

garlandk

100cc
It is a good idea on any ARF to go over all of the covering with an iron set on a med setting. A lot of covering problems are due to this step being skipped!
 

Attachments

  • IMG_0490.jpg
    IMG_0490.jpg
    190.6 KB · Views: 168
  • IMG_0491.jpg
    IMG_0491.jpg
    195.7 KB · Views: 188

garlandk

100cc
We suggest to install the control horn on the rudder before installing the rudder to the vertical stab.

I check and there are two spots back at the rear of the fuse for servos. I plan on running a Pull Pull Setup for now so I will be using the double horn. The kit is supplied with a extra single horn just in case you want to run your rudder servo in the back or run two elevator servos instead of one.


Its a good idea to take some sand paper or a dremel tool and scuff up the horn so the glue can stick to it better.

Next you need to cut the covering in the rudder so the control horn can go through. I prefer using a soldering tip to do this

Use epoxy to glue the control horn. I have used thick CA in the past on this size of plane and it also works well. For this plane I am using 5 minute epoxy. Make sure both sides are equal.

Use the supplied CA hinges to hinge the rudder. Be sure to wipe away any excess CA.

Its a good idea to go through the fuse and put a few drops of CA where wood joints meet. The aircraft does not really need it, but its always a good idea to do this so the plane will last even longer. I also put a few drops going down the battery tray. I plan on pushing the limits with this plane!
 

Attachments

  • IMG_0492.jpg
    IMG_0492.jpg
    206.6 KB · Views: 161
  • IMG_0493.jpg
    IMG_0493.jpg
    192.4 KB · Views: 175
  • IMG_0494.jpg
    IMG_0494.jpg
    197.9 KB · Views: 201
  • IMG_0495.jpg
    IMG_0495.jpg
    206.7 KB · Views: 197
  • IMG_0496.jpg
    IMG_0496.jpg
    205.7 KB · Views: 173
  • IMG_0497.jpg
    IMG_0497.jpg
    199.1 KB · Views: 168
  • IMG_0498.jpg
    IMG_0498.jpg
    200.7 KB · Views: 142
  • IMG_0499.jpg
    IMG_0499.jpg
    232.1 KB · Views: 169
  • IMG_0500.jpg
    IMG_0500.jpg
    192.4 KB · Views: 186
  • IMG_0501.jpg
    IMG_0501.jpg
    201.9 KB · Views: 176
  • IMG_0502.jpg
    IMG_0502.jpg
    201.9 KB · Views: 154
  • IMG_0503.jpg
    IMG_0503.jpg
    195.7 KB · Views: 149
  • IMG_0504.jpg
    IMG_0504.jpg
    196.4 KB · Views: 146

hone

150cc
the build is coming along nicely. Looks like a good plane. Can't wait for some video :popcorn:
 
Top