You are using an out of date browser. It may not display this or other websites correctly.
You should upgrade or use an alternative browser.
You should upgrade or use an alternative browser.
Redwing RC 76" MXS-R
- Thread starter gyro
- Start date
Drew
70cc twin V2
Are the ball links provided with the kit?
Are the ball links M3 or 4-40 or ...?
Sorry for the delay, but they are M3.
Drew
70cc twin V2
Ok, back to the build......
Got all the hinging done minus the rudder. I will do the rudder last after engine and most equipment is fully installed. Without a rudder on the plane, makes it easier to flip the fuse around for the install.
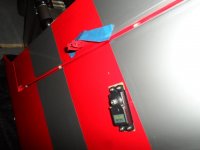
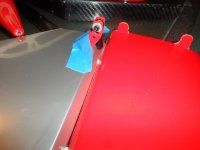
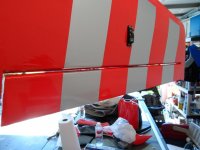
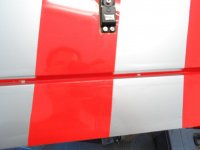
All hinging is finally done. I ran into a few issues with the wings. Upon epoxying in the aileron to the wing, I found the aileron to have a bad bow or warp in it. I went ahead and installed it anyway since epoxy was already on and left it to dry. Once dry, as soon as i deflected the aileron the 2 outer hinges pulled out. Ive ran across this a few times and have an easy fix. I simply get the smallest drill bit I have and drill a straight hole right under the hinge. Then i flow CA into the hole and kick it with accelerator. You do this with the aileron fully deflected. Works like a champ. Only issue is now you have a large hinge gap on the furthest parts of the aileron and a clean hinge line in the center. Here are a few pics...you can see right under the servo where the hinge gap is right, rest is gaped. This wont hurt anything in flight, I'm sure we wont even notice it.




Drew
70cc twin V2
While the epoxy cured for horns, I started on the engine install. The motor box has a DLE 30 template printed on it, but after my measurements I found it to be slightly off, I believe its was low about a 1/8" or little more, which is not that big of a deal.
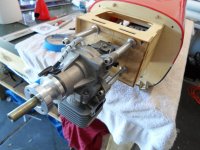
Once installed, the engine needed just a little more standoff length, so I small thick washer did the trick.
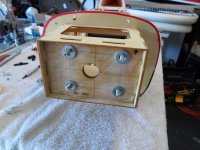
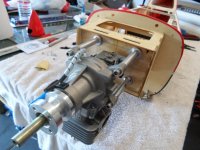
When installing the engine cowl, found one of the cowl blind nuts had no threads.... ....good thing I had one, so popped it out and glued in a new one.
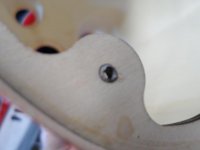
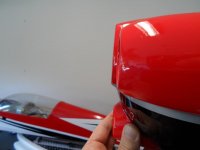
Once installed, I thought the motor box was not square after seeing this uneven gap. Found its actually the shape of the cowl.
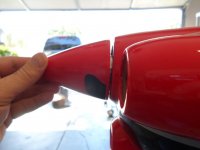
You can see the center engine hole is slanted compared to the outer air holes. No fixing this.

Once installed, the engine needed just a little more standoff length, so I small thick washer did the trick.


When installing the engine cowl, found one of the cowl blind nuts had no threads....

Once installed, I thought the motor box was not square after seeing this uneven gap. Found its actually the shape of the cowl.

You can see the center engine hole is slanted compared to the outer air holes. No fixing this.

SnowDog
Moderator
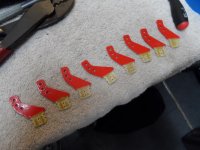
great build pics Drew! thanks for updating us on your progress. The red control horns against the silver covering is a funny quirk...the slanted engine hole in the cowl...not so funny. 
could you put a small washer between the cowl and the firewall on the top side to "square up" the cowl to spinner gap? or would that push the top of the cowl too far away from the firewall/fuse?
could you put a small washer between the cowl and the firewall on the top side to "square up" the cowl to spinner gap? or would that push the top of the cowl too far away from the firewall/fuse?
Drew
70cc twin V2
great build pics Drew! thanks for updating us on your progress. The red control horns against the silver covering is a funny quirk...the slanted engine hole in the cowl...not so funny.
could you put a small washer between the cowl and the firewall on the top side to "square up" the cowl to spinner gap? or would that push the top of the cowl too far away from the firewall/fuse?
This is something I was thinking of doing actually. The cowl hangs over the canopy hatch so there is some room for it to move forward before you expose an opening. It also might push the cowl to much further and hit the spinner, therefor needing a little more standoff length.
Last edited by a moderator:
Scooterpilot
50cc
I had my Syssa 30cc updated to a V2. Aluminum exhaust is now stainless steel and updated carb. Yesterday I ran it up with a vess 18X5 and the tac showed 8100 RPM.....whoooooa. I lost my soft copy of the manual and I want to double check the CG. What does the manual call out for a starting point for the CG?

