What a really fine day today was. Nothing but peace and quiet and plenty of lovin's from all my kids. I took advantage later this afternoon to attack the Yak. Hmmm....Yak attack? Attack the Yak...!!

I decided to get the broken fin sheeting issue taken care of. I had a little more difficulty getting into the sheeting than I thought I would. I decided to remove the top fin cap in hopes of accessing the broken sheeting from the inside. Ugh, below the fin cap was a 1/8'th inch rib that I needed to cut a portion out of in order to get inside the fin. Wasn't that big if a deal once I removed a small section.
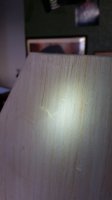
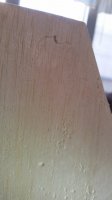
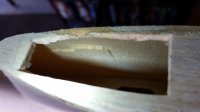
Once inside, I had figured I would mix some epoxy and spread it equally across the broken sheeting. However once I simply gently pushed the sheeting back into place, I was able to coat the inside of the sheeting with thin CA. Man that stuff stinks in confined areas. After the CA set up, I replaced the removed section of the top fin rib, glued it back in place then re-capped the top of the fin with a fresh sheet of balsa sheeting. After checking the integrity of the repairs on both sides of the fin, it took a whisper of balsa filler to remove any signs of the broken sheeting of ever being existent. A little gentle light sanding with 400 grit sandpaper and the fin was looking (and feeling) smooth as butter and looking really great.


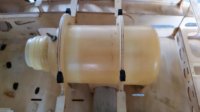
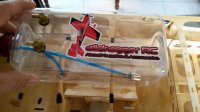
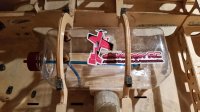
Being very pleased with the outcome, I set that project to the side and addressed the fuel tank area of the fuse. Originally the previous owner had installed I am guessing a 3w round fuel tank. The braces that were incorporated into the fuse apparently came with the fuel tank as they appeared to have been very professionally manufactured. My first thought was to remove them and rebuild that structure as per original design from Pilot. A little assistance from
@Spats and I had the necessary pictures I needed to duplicate the fuse structure. But then after looking at it a little closer, I noticed the tank mount which was positioned over the wing tube was incorporated very well. I decided to remove the balsa tri-stock from the tank mount and utilize it for the new TDRC fuel tank. I got most of that structure the way I want it and what do you know? That nice new clear TDRC tank slid right in place of where the old ugly round tank was. I think it is going to work out quite well.
I also removed the existing control horns from the right elevator and rudder to facilitate the addition of the new control horns. Since the rudder will be driven by two Hitec HS 7980's at the rear of the fuse, it was necessary to remove the horns from where they were originally installed for the pull/pull setup. I will be building a structure at the lower portion of the rudder to support the new control horns for the push/pull setup. I will also need to build servo bay structure at the rear of the fuse for the rudder servos. Also since the elevators were originally setup for a single servo, those horns came off and new horns will be installed for the twin servo per elevator half setup. I did a little light sanding on the fuse sides, fin and rudder as well.
I actually got quite a bit accomplished today. I am spent for the day and calling it a night. Tomorrow is going to be a full day working on the big Yakster. I am probably going to begin with working on the fuel tank and electronics bay areas. I will probably strip the left stab and elevator as well. Along with removing the control horns from the left elevator. My plan is to have most of that tied up and Saturday I will begin stripping the wings. A little bit done and a whole lot yet to do. I will say though, I am having a really nice relaxing time.
More to come.


 .
.
 WAKE UP! Oh......And leave that red head alone! There is 4 other red heads requiring your attention!

 Randy the man


