• If you are new to GiantScaleNews.com, please register, introduce yourself, and make yourself at home.

    We're 1st in Giant Scale RC because we've got the best membership on the internet! Take a look around and don't forget to register to get all of the benefits of GSN membership!

    Welcome!

The 'What did you do in your workshop tonight?' thread

acerc

640cc Uber Pimp
I would have done the same as you except no micro balloons. Micro balloons have no strength.
In this case I think it is ok as while the balloons do weaken the epoxy it is in tensile strength. Here I am using it as a filler and being the filler will be encased there is no real compression or expansion strength needed. It just need's to stay in place as a spacer and I think it is stronger than if a sliver of wood was glued in. But I don't know for sure and time will tell.
 

Jetpainter

640cc Uber Pimp
The Ultimate I've been working on for the past...... forever, is finally gone. Now I finally get to work on my own airplanes!
I've got the Byron P-51 on the bench so I can figure out what I need to get this thing flying. The airplane was built about 20 years ago and never flown. I bought it this past summer at an auction at my club.
I've decided to replace all the servos, wiring, plumbing and linkage. I'm also planning to change the ignition on the Quadra to electronic, and the plastic prop blades to some carbon fiber ones that someone is making.

20191222_145857_resized.jpg
20191222_145621_resized.jpg
 

WMcNabb

150cc
Merry Christmas and Happy Holidays to all the gang here on GSN!!!

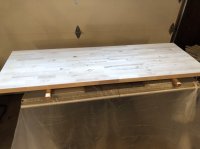
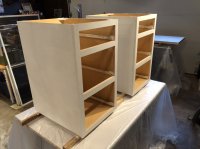
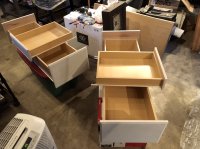
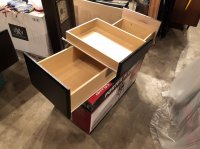
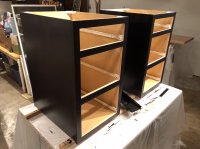
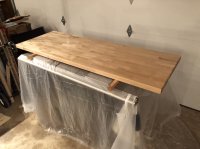
Finished a project with the last coat of paint in response to a computer gaming desk appearing on the Christmas wish list.
Stock cabinets from the local big box store, with the kick plate height shaved off. Butcher block purchased there as well, cut to length with edges rounded over.

61C5659D-D2BA-49E7-A8D8-857378D51A70.jpeg
 

Attachments

  • 5E587761-D771-452D-917B-4C047A21E06D.jpeg
    5E587761-D771-452D-917B-4C047A21E06D.jpeg
    183 KB · Views: 415
  • 132DE04C-F4A6-4BF6-BF5D-9CCE2764D309.jpeg
    132DE04C-F4A6-4BF6-BF5D-9CCE2764D309.jpeg
    222.8 KB · Views: 431
  • 1F169379-807A-4028-A289-51832D3EF5A2.jpeg
    1F169379-807A-4028-A289-51832D3EF5A2.jpeg
    288.3 KB · Views: 395
  • 4B5FFADF-B470-4447-911E-30926710A0B8.jpeg
    4B5FFADF-B470-4447-911E-30926710A0B8.jpeg
    274 KB · Views: 423
  • F6411D47-3545-41E0-AC6A-B9FCF91A6374.jpeg
    F6411D47-3545-41E0-AC6A-B9FCF91A6374.jpeg
    244.2 KB · Views: 411
  • A1ACB4CA-3DAA-4477-A177-46CBA1A3F9B5.jpeg
    A1ACB4CA-3DAA-4477-A177-46CBA1A3F9B5.jpeg
    229 KB · Views: 406

BalsaDust

Moderator
WOW. I'm terrible at overhangs. Did you glue the 5 an 0 on, or print it like that?
- Answered my own question, printed flat. I can see the lines LOL
That nozzle must be huge, it would have taken me forever to do that with mine.

It a lulzbot taz6 we have at work. .5 nozzle. The 5.0 logo took 3 hours to print .15 layer height and 50% infill and the dremel mount took almost 7 hours .20 layer height also 50% infill.
 

AKNick

640cc Uber Pimp
It a lulzbot taz6 we have at work. .5 nozzle. The 5.0 logo took 3 hours to print .15 layer height and 50% infill and the dremel mount took almost 7 hours .20 layer height also 50% infill.
50% infill is pretty tight. I'd try 40% or thinner, 3D concentric infill and you can also thicken the walls. But sometimes it's good to leave good enough alone ha ha
 

BalsaDust

Moderator
50% infill is pretty tight. I'd try 40% or thinner, 3D concentric infill and you can also thicken the walls. But sometimes it's good to leave good enough alone ha ha


Yeah I’m still learning all the things that I can do to improve stuff. Only reason I went 50% on the 5.0 logo was the large flat area it would have to span when doing the last three layers. Wanted it to look nice and smooth with no droop.
 

AKNick

640cc Uber Pimp
Yeah I’m still learning all the things that I can do to improve stuff. Only reason I went 50% on the 5.0 logo was the large flat area it would have to span when doing the last three layers. Wanted it to look nice and smooth with no droop.

Which slicer are you using? I'm using Cura, you can actually adjust infill density to increase or decrease at the top or bottom I'm pretty sure. There is so much a guy can program into it, but man does it take a long time to learn it's capabilities.
 
Top