• If you are new to GiantScaleNews.com, please register, introduce yourself, and make yourself at home.

    We're 1st in Giant Scale RC because we've got the best membership on the internet! Take a look around and don't forget to register to get all of the benefits of GSN membership!

    Welcome!

The 'What did you do in your workshop tonight?' thread

stangflyer

I like 'em "BIG"!
No it is the ViperST kit with lock and tab fuselage. Buy the time it jigged together and glued up before you can get the tubes into it to find out what you have and then it is to late. That is why I was so frustrated with it. So I put it to one side until I was in a better frame of mind.
Ah, ok. For some reason I thought it was a PAY airframe. Shows ya what I know. If it doesn't say "Pilot" on it, I'm lost.
happy-wink-smiley-emoticon.gif
 

stangflyer

I like 'em "BIG"!
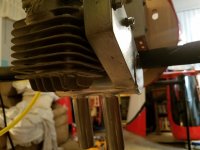
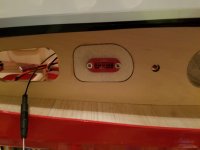
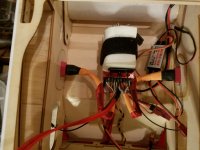
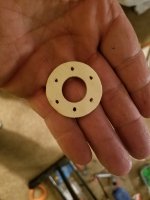
No trick or treaters means a minute or two with the baby Yak. The Falcon 24x9 made its arrival. As did the Jtec Pitts muffler for the 62. I'm still not convinced I want to hack up the cowl to accomadate the muffler. Besides the down stacks, I will need to cut a relief for the canister portion of the muffler. Not much, maybe just a corner. But I will need to open a cooling hole for the cylinder so I guess what has to be, has to be. I also made harness connector plates and glued them into the fuse sides. Got a support backer ring for the fuel dot made too. Getting closer each day.
Pay no attention to the clutter. When I get in the mood, everything comes out and nothing gets put away. Lol

20171031_214154.jpg 20171031_214403.jpg 20171031_214422.jpg 20171031_214538.jpg

It's still quite a spaghetti mess in the fuse, but I'll get everything tidied up once the final wiring for the ignition and throttle servo harnesses are in place.
 

Jetpainter

640cc Uber Pimp
My new custom made TNT landing gear arrived the other day, so I actually hobbled down into the workshop last night and worked on my Hangar 9 Extra. Getting it from the family room into the workshop without damaging it, myself, or any of my other airplanes took some doing since it was in the far back behind everything else, but I managed. It looks like the new gear should work out well. Tonight I'll pull the old gear off and take some pictures of the new gear to post. I'd like to get all the holes drilled tonight so I can paint them tomorrow.
 

Snoopy1

640cc Uber Pimp
No trick or treaters means a minute or two with the baby Yak. The Falcon 24x9 made its arrival. As did the Jtec Pitts muffler for the 62. I'm still not convinced I want to hack up the cowl to accomadate the muffler. Besides the down stacks, I will need to cut a relief for the canister portion of the muffler. Not much, maybe just a corner. But I will need to open a cooling hole for the cylinder so I guess what has to be, has to be. I also made harness connector plates and glued them into the fuse sides. Got a support backer ring for the fuel dot made too. Getting closer each day.
Pay no attention to the clutter. When I get in the mood, everything comes out and nothing gets put away. Lol

View attachment 99941 View attachment 99942 View attachment 99943 View attachment 99944

It's still quite a spaghetti mess in the fuse, but I'll get everything tidied up once the final wiring for the ignition and throttle servo harnesses are in place.
The connection for the ailerons on the side of the fuselage are they from Taildragger-rc need a set.
 

Snoopy1

640cc Uber Pimp
My new custom made TNT landing gear arrived the other day, so I actually hobbled down into the workshop last night and worked on my Hangar 9 Extra. Getting it from the family room into the workshop without damaging it, myself, or any of my other airplanes took some doing since it was in the far back behind everything else, but I managed. It looks like the new gear should work out well. Tonight I'll pull the old gear off and take some pictures of the new gear to post. I'd like to get all the holes drilled tonight so I can paint them tomorrow.
Why do not just polish the gear is that not easier and it will not chip.
 

49dimes

Damn I'm hungry
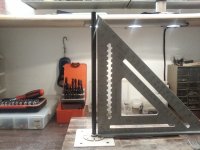
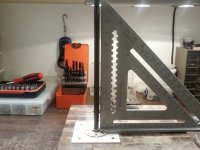
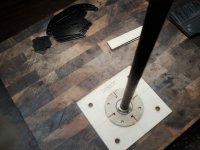
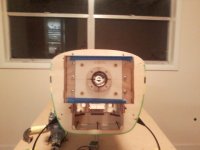
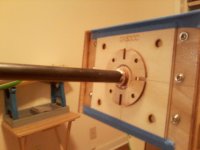
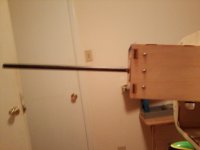
Getting ready to mount an engine and I decided to take a different approach so I could see just how far off the cowl ring in the cowl is from the laser etched cross hairs on the motor mount plate. When I say "cowl ring" I mean the wooden former glued to the back of the cowl that facilitates mounting the cowl.
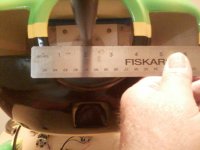
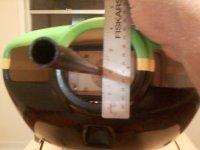
I made a tool, to check this, out of the supplied lazer cut plywood template and some other lazer cut plywood parts from past ARF's that I once had. Used a CF stab tube as the reference mock shaft. Looking forward in to the cowl The "mock shaft" is about 1/4" low and a 1/4" left of center of the cowl opening. I made sure the "mock shaft" was true by checking both x and y axis with a square.

1101172210-00.jpg 1101172211-00.jpg 1101172212-00.jpg 1101172218-00.jpg 1101172219-00.jpg 1101172219-01.jpg 1101172226-00.jpg 1101172226-01.jpg
 

Alky6

150cc
Getting ready to mount an engine and I decided to take a different approach so I could see just how far off the cowl ring in the cowl is from the laser etched cross hairs on the motor mount plate. When I say "cowl ring" I mean the wooden former glued to the back of the cowl that facilitates mounting the cowl.
I made a tool, to check this, out of the supplied lazer cut plywood template and some other lazer cut plywood parts from past ARF's that I once had. Used a CF stab tube as the reference mock shaft. Looking forward in to the cowl The "mock shaft" is about 1/4" low and a 1/4" left of center of the cowl opening. I made sure the "mock shaft" was true by checking both x and y axis with a square.

View attachment 99955 View attachment 99956 View attachment 99957 View attachment 99958 View attachment 99959 View attachment 99960 View attachment 99961 View attachment 99962
Hey, hey... Kelly? What’s this? I thought you were going to take your time? Your moving through this thing like :dancing-poop: through a tin horn! Very nice, very nice indeed! Definitely making hay on this one.
 
Top