• If you are new to GiantScaleNews.com, please register, introduce yourself, and make yourself at home.

    We're 1st in Giant Scale RC because we've got the best membership on the internet! Take a look around and don't forget to register to get all of the benefits of GSN membership!

    Welcome!

The 'What did you do in your workshop tonight?' thread

Alky6

150cc
My new custom made TNT landing gear arrived the other day, so I actually hobbled down into the workshop last night and worked on my Hangar 9 Extra. Getting it from the family room into the workshop without damaging it, myself, or any of my other airplanes took some doing since it was in the far back behind everything else, but I managed. It looks like the new gear should work out well. Tonight I'll pull the old gear off and take some pictures of the new gear to post. I'd like to get all the holes drilled tonight so I can paint them tomorrow.
Aluminum gear? Curious what you use to etch the aluminum before painting? We used to use some crazy stuff to prep our Freightliner cabs before painting with an epoxy primer followed by Imron paint. Ah, I miss Imron. Pretty much all the good stuff is bad for you in California.:(
 

stangflyer

I like 'em "BIG"!
Getting ready to mount an engine and I decided to take a different approach so I could see just how far off the cowl ring in the cowl is from the laser etched cross hairs on the motor mount plate. When I say "cowl ring" I mean the wooden former glued to the back of the cowl that facilitates mounting the cowl.
I made a tool, to check this, out of the supplied lazer cut plywood template and some other lazer cut plywood parts from past ARF's that I once had. Used a CF stab tube as the reference mock shaft. Looking forward in to the cowl The "mock shaft" is about 1/4" low and a 1/4" left of center of the cowl opening. I made sure the "mock shaft" was true by checking both x and y axis with a square.

View attachment 99955 View attachment 99956 View attachment 99957 View attachment 99958 View attachment 99959 View attachment 99960 View attachment 99961 View attachment 99962
Precise, accurate and true. Awesome. I guess I am lazy. I just clamp my motor to the firewall, hang the cowl and adjust until I am satisfied. Wanna sell that there gizmo you designed there? :yesss:

Nicely done Kelly!!!:way_to_go:
 

stangflyer

I like 'em "BIG"!
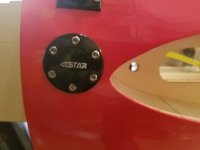
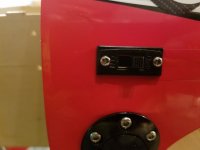
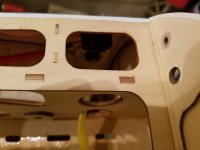
A little bit of accomplishment tonight on the Baby Yak-ster. Now have everything except the throttle servo wired into the Smart Fly Micro 12G. Installed the Star fuel dot, Smart Fly fail safe switch, RC Opto-Kill ignition kill switch. Tested the newly replaced CM6 boot to make sure I still have good spark. Installed the Dual Pulse 3600mah 7.4 2S flight packs. Once I have the throttle servo mounted and wired in, I will place the motor box top on and epoxy into place. Then secure the ignition module. I can then remount the landing gear and she will be pretty much done. I am still working on ideas with the exhaust. I ran across a gent that has two DA60 headers. One with zero drop, the other with 25mm drop. If I can get a canister to work in the tunnel, I would prefer that setup over the Pitts Muffler. Then again, it will depend on overall performance and rpm readings. I am going to try my KS 60 muffler, one of my MTW 75's from the Edge while I await the replacement KS Comfort header. And then lastly, the Pitts muffler. Course I could try the stock exhaust too. Which ever one gives me the best overall performance and top rpm, that is the way I will go. So with a little luck and some good weather, this bird will soar in about a week and a half.

20171101_214032.jpg 20171101_214037.jpg 20171101_214121.jpg

I will post more photos tomorrow. And of course, an ample array of the completed and ready to fly SD Baby Yak.
 

Jetpainter

640cc Uber Pimp
Aluminum gear? Curious what you use to etch the aluminum before painting? We used to use some crazy stuff to prep our Freightliner cabs before painting with an epoxy primer followed by Imron paint. Ah, I miss Imron. Pretty much all the good stuff is bad for you in California.:(

Years ago we used Alumaprep and Alodine and DP40 Epoxy to get aluminum ready for paint. Now days on something small I use some really high tech stuff....... a spray can of SEM Self Etch Primer.:LOL_gif:
After that just basecoat clearcoat.
11313396_sem_sem39673_pri_larg.jpg
 

49dimes

Damn I'm hungry
Precise, accurate and true. Awesome. I guess I am lazy. I just clamp my motor to the firewall, hang the cowl and adjust until I am satisfied. Wanna sell that there gizmo you designed there? :yesss:

Nicely done Kelly!!!:way_to_go:

Thanks Rob.

To be honest I think a 5th grader could have made such a simple tool so why can't these ARF companies??? And then use it themselves to correctly position the cowl mounting ring while gluing it in? Oh! I forgot.....They using 2nd graders on their assembly line :laughing:.
 

stangflyer

I like 'em "BIG"!
Thanks Rob.

To be honest I think a 5th grader could have made such a simple tool so why can't these ARF companies??? And then use it themselves to correctly position the cowl mounting ring while gluing it in? Oh! I forgot.....They using 2nd graders on their assembly line :laughing:.
Do you have something against second graders? Remember, they don't see in between black and white. So things don't get confusing for them. It's either right or it's wrong. Besides, I have seen some 2nd grade work that far surpasses some college degree children. LOL
 

stangflyer

I like 'em "BIG"!
:lol2:
Boy isn't that the truth. The Snowflakes that are being pumped out of Colleges now days aren't even close to being ready for the real world.

I have to go, all these Micro Aggressions make me want to head to a Safe Space and color in some coloring books. :LOL_gif:
Precisely. The clear indication is that when a college student can take an old style can opener and can't figure out how to open up a can of chili. You know something's really wrong with the picture. LMAO
 
Last edited:
Top