• If you are new to GiantScaleNews.com, please register, introduce yourself, and make yourself at home.

    We're 1st in Giant Scale RC because we've got the best membership on the internet! Take a look around and don't forget to register to get all of the benefits of GSN membership!

    Welcome!

3D Viper-ST 100-120cc scratch build......it continues!

Terryscustom

640cc Uber Pimp
OK, I have all the foam parts test fit so over the next few days we'll get these all sheeted. I'm not going to do any coring on these so it will be pretty straight forward build. I am going to install a spar extension on the end of the wing tube and will be laying in some unidirectional carbon over the entire wing tube / spar area as well as the trailing edges of the control surfaces to add surface tension.

Foam parts included:
- Canopy Deck
- Turtle Deck
- Belly pan (shipped in two parts for cut down shipping cost)
- Rudder
- Horizontal stabs
- Wings
_DSC0237.JPG
 

Jetpainter

640cc Uber Pimp
Great glad to hear it's coming together. Looks like we all may have a long building season this winter

No doubt, someone needs to tell mother nature its the middle of November, not the middle of January. It's barely in the double digits here this morning.
 

Terryscustom

640cc Uber Pimp
_DSC0259.JPG
FOAM TIME!

OK, so as mentioned the belly pan is shipped in two parts to save huge $$ on shipping. This is not an issue and only takes a few minutes to assemble before laying out sheeting. I use a non-hardening molding glue but any wood glue will work just fine. The molding glue just remains slightly flexible and works very well with the foam.

First I glued the outside shuck together. Do this but pay attention that the inside is lined up since that's the only part that matters. Once the inside is taped, tape the outside.

Next I glued the actual belly pan, but make sure that the outside of the part is flush and nice.

The inner part does not need to be glued and actually preferred not as we will use part of it to make a former after the sheeting process is done.
 

Attachments

  • _DSC0252.JPG
    _DSC0252.JPG
    70.2 KB · Views: 291
  • _DSC0253.JPG
    _DSC0253.JPG
    62.5 KB · Views: 285
  • _DSC0254.JPG
    _DSC0254.JPG
    65.6 KB · Views: 312
  • _DSC0255.JPG
    _DSC0255.JPG
    59 KB · Views: 333
  • _DSC0256.JPG
    _DSC0256.JPG
    70.2 KB · Views: 287
  • _DSC0257.JPG
    _DSC0257.JPG
    68.1 KB · Views: 301
  • _DSC0258.JPG
    _DSC0258.JPG
    54.2 KB · Views: 307

Terryscustom

640cc Uber Pimp
Next I install the wing tube phenolics into the fuselage. This is very simple since the holes are lasered out. However, the doublers are parallel with the fuse sides and not perpendicular to the fuse center-line like the tubes need to be. This takes about two seconds with a pc. of sandpaper wrapped around the actual wing tube. Very gently sand the LE and TE of the outer holes (DO NOT modify the holes going through the engine box extensions unless your sleeve does not fit perfectly). This takes very little as you can see and the sleeve will slide in. Center the sleeve in the fuse and move onto the wing tube.
 

Attachments

  • _DSC0260.JPG
    _DSC0260.JPG
    97.8 KB · Views: 304
  • _DSC0261.JPG
    _DSC0261.JPG
    69.7 KB · Views: 311
  • _DSC0262.JPG
    _DSC0262.JPG
    61.1 KB · Views: 324
  • _DSC0263.JPG
    _DSC0263.JPG
    72.3 KB · Views: 293
  • _DSC0264.JPG
    _DSC0264.JPG
    58.3 KB · Views: 300
  • _DSC0265.JPG
    _DSC0265.JPG
    75.3 KB · Views: 265
  • _DSC0266.JPG
    _DSC0266.JPG
    62.2 KB · Views: 292
  • _DSC0267.JPG
    _DSC0267.JPG
    77 KB · Views: 272
Last edited:

Terryscustom

640cc Uber Pimp
Repeat this process for the wing tube sleeve, again, don't modify the inner birch ply engine box extensions unless you absolutely need to.

Now comes the cool part of a nice tight laser cut kit. The most I've ever had a tube out of alignment is a weak 1/32" which equates to about two swipes with sandpaper on the phenolic hole. The tubes should be extremely close in both being parallel and horizontal to the fuse top, which is our datum line.

When you are pleased with the placement center the sleeves in the fuse and tack them in with thin CA glue. Apply CA a couple times to wick in well (it will not wick through the sleeve since it is made with resin).

Now use a flush-cut pull saw to slowly and carefully cut the sleeves flush with the fuse. The tubes and sleeves are slightly long so don't be afraid to cut out slightly from the fuse side. When done, use a sanding block to sand flush but don't sand too much on the outsides of the fuse until the sheeted parts are installed.
 

Attachments

  • _DSC0269.JPG
    _DSC0269.JPG
    72.9 KB · Views: 297
  • _DSC0270.JPG
    _DSC0270.JPG
    76.3 KB · Views: 286
  • _DSC0271.JPG
    _DSC0271.JPG
    87.2 KB · Views: 315
  • _DSC0272.JPG
    _DSC0272.JPG
    88.1 KB · Views: 285
  • _DSC0273.JPG
    _DSC0273.JPG
    97.3 KB · Views: 352
  • _DSC0274.JPG
    _DSC0274.JPG
    92.4 KB · Views: 302
  • _DSC0275.JPG
    _DSC0275.JPG
    81.7 KB · Views: 342
  • _DSC0276.JPG
    _DSC0276.JPG
    72.4 KB · Views: 333
  • _DSC0277.JPG
    _DSC0277.JPG
    70.5 KB · Views: 284
  • _DSC0278.JPG
    _DSC0278.JPG
    124.4 KB · Views: 304
  • _DSC0279.JPG
    _DSC0279.JPG
    80.7 KB · Views: 312
  • _DSC0280.JPG
    _DSC0280.JPG
    77.9 KB · Views: 301
  • _DSC0281.JPG
    _DSC0281.JPG
    77.5 KB · Views: 274
  • _DSC0282.JPG
    _DSC0282.JPG
    104.9 KB · Views: 364
  • _DSC0283.JPG
    _DSC0283.JPG
    95.7 KB · Views: 299
  • _DSC0284.JPG
    _DSC0284.JPG
    78.7 KB · Views: 340

Terryscustom

640cc Uber Pimp
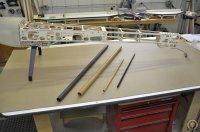
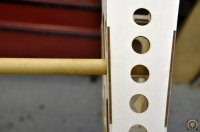
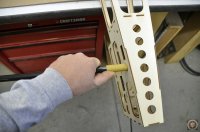
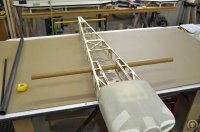
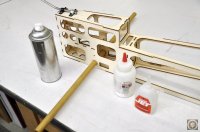
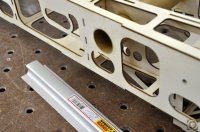
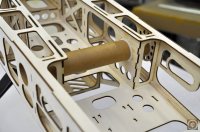
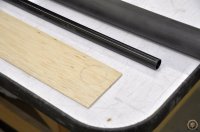
Working on installing the phenolic tubes. We tried to be able to use as much as possible of the 48" wing tube, and Rick is making some final adjustments (as we max out the capabilities of his machine again;)). I always seem to find a way to push the limits......keeps things interesting!

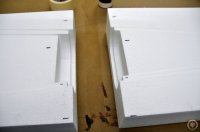
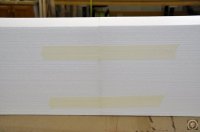
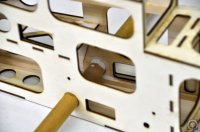
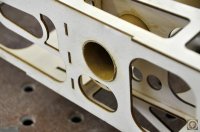
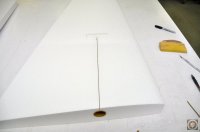
So, the tube slots will be slightly longer in the production kits. Installation process can be done in a couple of different ways. Instead of a hard plywood end cap, short rib or partial rib (whatever you want to call it) we are going to go for the K.I.S.S. method of using simple balsa. The way the blocks are cut out of the wings it leaves a perfect gap for a medium density pc. of 1/16" balsa. You can choose to simply put the block on the inside and butt the phenolic up to it. Or, since I like to take it to the next level, make the phenolic pass through the block at the end of the wing tube.

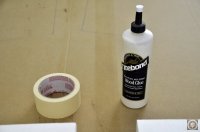
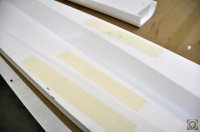
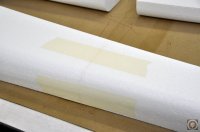
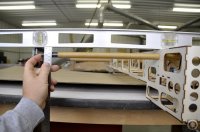
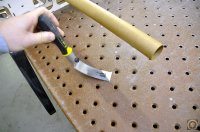
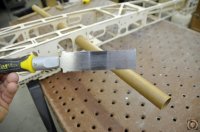
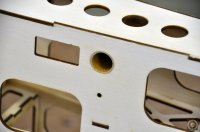
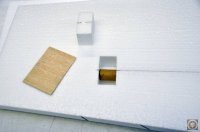
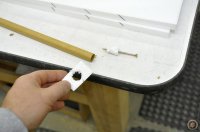
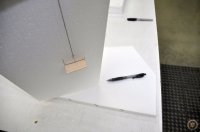
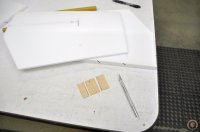
First, you need to plug the end of the wing tube phenolic. I like to mark the leading edge of the wings differently to help keep the shucks and parts all easily identifiable with their mate. I simply used some 3/32" balsa, pressed the wing tube into it and cut it out with a hobby knife (on the outside of the indent). Fit it into the end of the sleeve and glue in. Take care to ensure that no glue runs inside the phenolic!

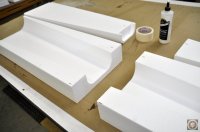
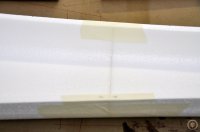
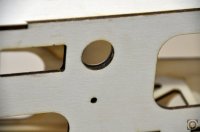
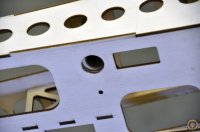
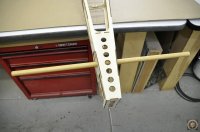
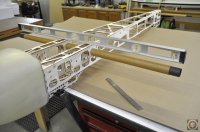
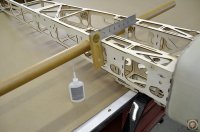
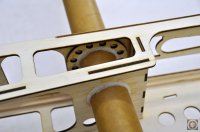
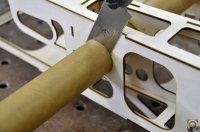
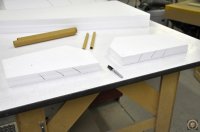
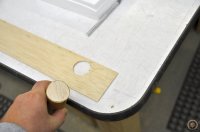
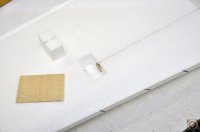
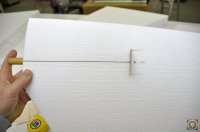
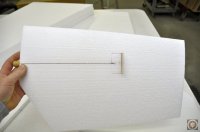
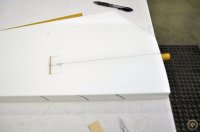
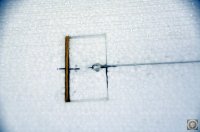
Next I made a small notch in the other end of the phenolic to help drill, and carefully drilled a hole through the foam block. Slide a pc. of balsa into the gap and trace the airfoil. Simply cut it with a hobby knife to shape and check the fit.

Repeat for both wings and both stabs.
 

Attachments

  • _DSC0307.JPG
    _DSC0307.JPG
    58.7 KB · Views: 305
  • _DSC0308.JPG
    _DSC0308.JPG
    72 KB · Views: 325
  • _DSC0309.JPG
    _DSC0309.JPG
    83.4 KB · Views: 329
  • _DSC0311.JPG
    _DSC0311.JPG
    63.6 KB · Views: 291
  • _DSC0312.JPG
    _DSC0312.JPG
    57.4 KB · Views: 292
  • _DSC0313.JPG
    _DSC0313.JPG
    76.1 KB · Views: 302
  • _DSC0314.JPG
    _DSC0314.JPG
    65.4 KB · Views: 289
  • _DSC0315.JPG
    _DSC0315.JPG
    74.4 KB · Views: 299
  • _DSC0316.JPG
    _DSC0316.JPG
    42.7 KB · Views: 272
  • _DSC0317.JPG
    _DSC0317.JPG
    63.8 KB · Views: 255
  • _DSC0318.JPG
    _DSC0318.JPG
    65.8 KB · Views: 269
  • _DSC0319.JPG
    _DSC0319.JPG
    59.7 KB · Views: 256
  • _DSC0320.JPG
    _DSC0320.JPG
    70.1 KB · Views: 300
  • _DSC0321.JPG
    _DSC0321.JPG
    62.7 KB · Views: 245
  • _DSC0322.JPG
    _DSC0322.JPG
    90.1 KB · Views: 239
  • _DSC0323.JPG
    _DSC0323.JPG
    62.5 KB · Views: 412
Top