• If you are new to GiantScaleNews.com, please register, introduce yourself, and make yourself at home.

    We're 1st in Giant Scale RC because we've got the best membership on the internet! Take a look around and don't forget to register to get all of the benefits of GSN membership!

    Welcome!

Scale Wendell Hostetler 30% Piper Cherokee Glass Fuselage Build.

TonyHallo

640cc Uber Pimp
A fellow builder on the RC Scale Builder site suggested this paint for the wing walk.

1759256146902.png


Bought a can on Amazon for $8.00, sprayed a test patch and was quite pleased with the results, looks like 400 grit sandpaper, removed the black peel paint and sprayed with this, I think it is the fifth spraying. It's done now.
 

TonyHallo

640cc Uber Pimp
Started working on the cooling outlet. Cut a 2" x 8" slotin the bottom of the fuselage that straddles the edge of the cowl

IMG_4281.jpg


Laid up two layers of 4 ounce cloth and one layer of carbon fiber on a piece of Lexan, this will be used to finish to outlet. Used a Monokote Woodpecker to made the perforated film, worked well and faster than drilling the holes with a 1/8" hollow drill bit.


IMG_4282.jpg


This is the same method used on the 1/4 scale Cherokee. Didn't have telemetry but I can only assume it worked well since the plane was flown extensively over a 7 year period.

IMG_1260.JPG


A fellow over on the RC Scale Builder site was kind enough to share the baffle plate he made for his FG 61 that I hope to use.
 

TonyHallo

640cc Uber Pimp
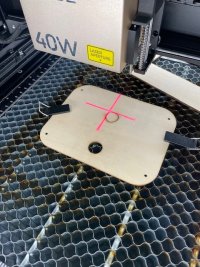
Quick update on the starter additions. Have the clutch hub finished, just need to drill and tap a 3mm - .5 hole for the locating pin and install the magnet. Hoping to remove the rocker arms and covers to gain access to the right side cam housing. The rockers pivot on a screw pin that has a slotted head. Broke every tool that fitted into the slot, ordered a few Chapman #89 bits, these look to be a quality tool, I hope the bits work. Once the rocker covers are removed I can determine if the area selected to mount the starter motor and reduction drive is suitable. Right now on hold until the bits arrive.
The prop nut kept the hub engaged on the original design, I planned the extend the threads and make a flange nut that fit into the counter bore on the prop hub. I would like to know what steel the prop shaft is made of. It is 10mm -1.25 thread. Bought a rethreading die at the local Ace hardware, it squealed like a pig once it hit the unthreaded portion of the shaft and it was well lubricated, it broke shortly there after. Purchased HSS threading die but waiting on a handle to turn it, I suspect it will be unsuccessful as well. The fall back plan is to make a nut 12mm in diameter with a larger hex on the end and counterbore the front of the prop to accept the 12 mm nut, the back side will be the standard 10mm to locate the prop.

IMG_4283.jpg
 

TonyHallo

640cc Uber Pimp
More elements of the engine cooling. Fitted and glued in the composite sheet.

IMG_4288.jpg


Cut the opening in the firewall. Thinking I will span the holes for the engine with a piece if 3/4" aluminum angle

IMG_4286.jpg


Printed the template for engine baffle. I was hoping that a club member could cut this with his laser but after further investigation he has diode laser and apparently you need a CO2 laser to cut fiberglass. Checking other local sources.
Will lay up an oval shaped duct that will seal the baffle to the firewall.

IMG_4289.jpg
 

TonyHallo

640cc Uber Pimp
The pulse width switches arrived from Ebay. The right wing 3.4 volt regulator was built, the the right wing tip installation is completed. Receiver no. 1 is mounted. The switch and regulator are on the right side to the aluminum heat sink. Need to make a 2.4 volt regulator for the left red LED, the lights are 3 watt LED's much brighter than the 1/2 watt previously used. The LED's have a heat sink as well.
The screwdriver bits are expected today, have a football and 2 baseball games to attend today so will out tomorrow if the bits are successful. The HSS die nut suffered the same results, broke the die and the handle, given up on threading the shaft and going with the fall back plan.

IMG_4294.jpg
 

TonyHallo

640cc Uber Pimp
The bits arrived on Saturday and the screws came right out, right tool for the job. Once the cam was removed, the cavity looked to be filled with a black sludge. Decided to disassemble the engine and give it a good clean, I was worried that metal shards might end up in the the sludge. After the cam was removed I discovered that the cam installation tool could not be used on the engine since the lifters are captive by the cam. Found a video on YouTube showing that grease is used to hold the cam in the correct position as it is inserted into the cam pocket. Ends up after the engine was disassembled the sludge seems to discolored grease rather than sludge. At any rate the engine will be clean when assembled. After removing the crankshaft, I found the the main ball bearing is bad so it was a good thing it was taken apart. There is very little wear in the rest of the engine, I had to open a valve to get each cylinder off the piston.
Set the crankcase up and removed a vertical gusset for mounting the starter motor.

IMG_4297.jpg


A 1/4" piece of aluminum was used to mount the starter motor, still need to drill two more hole but it essentially complete. This ended up being quite a bit of work, you know there are a lot of parts inside a four stroke twin. Hey was looking for a machining project anyway. I hope it works as look as it looks.

IMG_4301.jpg
 

AKNick

640cc Uber Pimp
Printed the template for engine baffle. I was hoping that a club member could cut this with his laser but after further investigation he has diode laser and apparently you need a CO2 laser to cut fiberglass. Checking other local sources.

My 40W diode laser has cut 1/16" or 1.5mm G10 for foamy control horns, and also laminated ply (like what we see in modern arfs) in a single pass. The thing about diode lasers is they need something to reflect off of, eg: clear plexiglass cannot be cut, but it can be etched or engraved with a backing. Regardless, I was able to cut my (opaque) G10 material easily. Might be harder with thick material but it worked!
Here’s a pic of the glass laminated ply. Some of the fibers were not cut all the way but was easy to remove.
 

Attachments

  • IMG_4182.jpeg
    IMG_4182.jpeg
    167.1 KB · Views: 2
  • IMG_4183.jpeg
    IMG_4183.jpeg
    213.8 KB · Views: 2
Last edited:
Top