dhal22
GSN Sponsor Tier 1
So if I read this correctly from the pictures you send Tony he determines what parts you need to fix the plane. So do you end up doing some splicing along the fuselage to get it back together.
I suppose.
So if I read this correctly from the pictures you send Tony he determines what parts you need to fix the plane. So do you end up doing some splicing along the fuselage to get it back together.
So depending on the extent of the damage, You will simply remove what covering you need to in order to access the damaged area. In the case of my first big yak, I needed to remove back to the joint where the front fuse halves were joined with the rear fuse. I warmed and lifted most of the covering so that I could reattach it when repaired. The rest of the covering, I recut to fit. Remove the bad/damaged wood using your heat gun to soften the glue. You may have to "work" your tiny flat blade between the joints. I used my hobby knife. By applying a little "separating" pressure, the joints split nice and clean. Some clean up was necessary. Then you simply rebuild/replace the new fuse components in proper order. I used white elmers wood glue and Medium CA. The awesome thing about that repair was everything fit together absolutely PERFECT. Nothing was out of place. Once the fuse was repaired, I replaced the covering and finished her up. She was as straight and true as the day she came out of Tony's factory. The Behemoth Yak (1) flew just as well, (maybe a little better) after the repair as she did before the damage. And so strong. Not a single joint loosened up or pulled apart with that big 212cs four cylinder up front. There are no words of caution or any hints on doing this type of repair. It is pretty much stupid proof. There is just nothing that can go wrong. Unless....you attempt it with your eyes closed. LOL. The only draw back to that repair was the crankshaft "Broke" the second time around and the Behemoth Yak is now needing the same repair as before. No worries though. When I ordered the custom cut covering for the Custom Scheme 330sc, I also ordered all the replacement wood for the Behemoth Yak..."Again". LOL. Tony laughed at me when I told him I needed the "SAME" exact pieces as what he sent me not too long before that. But I am sure he realized one thing with no question....I suppose.
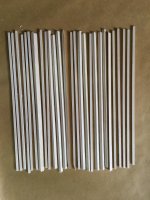
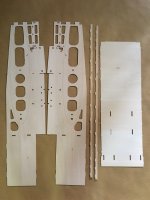
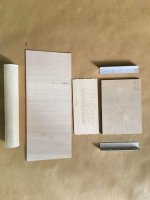
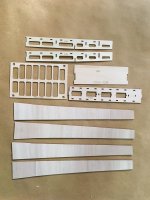
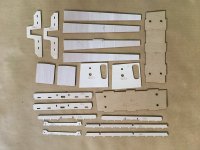
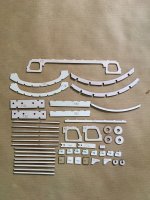
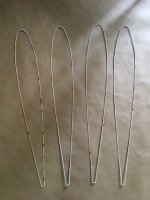
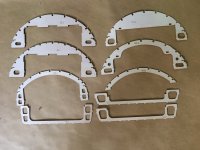
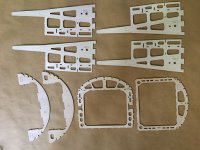
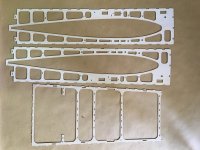
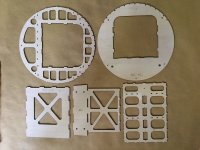
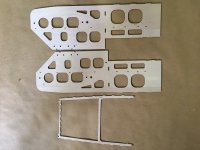
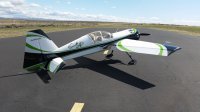
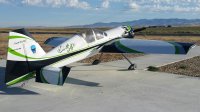
That’s the plane the new 170cs is going into.So depending on the extent of the damage, You will simply remove what covering you need to in order to access the damaged area. In the case of my first big yak, I needed to remove back to the joint where the front fuse halves were joined with the rear fuse. I warmed and lifted most of the covering so that I could reattach it when repaired. The rest of the covering, I recut to fit. Remove the bad/damaged wood using your heat gun to soften the glue. You may have to "work" your tiny flat blade between the joints. I used my hobby knife. By applying a little "separating" pressure, the joints split nice and clean. Some clean up was necessary. Then you simply rebuild/replace the new fuse components in proper order. I used white elmers wood glue and Medium CA. The awesome thing about that repair was everything fit together absolutely PERFECT. Nothing was out of place. Once the fuse was repaired, I replaced the covering and finished her up. She was as straight and true as the day she came out of Tony's factory. The Behemoth Yak (1) flew just as well, (maybe a little better) after the repair as she did before the damage. And so strong. Not a single joint loosened up or pulled apart with that big 212cs four cylinder up front. There are no words of caution or any hints on doing this type of repair. It is pretty much stupid proof. There is just nothing that can go wrong. Unless....you attempt it with your eyes closed. LOL. The only draw back to that repair was the crankshaft "Broke" the second time around and the Behemoth Yak is now needing the same repair as before. No worries though. When I ordered the custom cut covering for the Custom Scheme 330sc, I also ordered all the replacement wood for the Behemoth Yak..."Again". LOL. Tony laughed at me when I told him I needed the "SAME" exact pieces as what he sent me not too long before that. But I am sure he realized one thing with no question....
I LOVE MY PILOT RC AIRFRAMES!
The Behemoth Yak (1) repair pieces again.
View attachment 105764 View attachment 105765 View attachment 105767 View attachment 105768 View attachment 105769 View attachment 105770 View attachment 105771 View attachment 105772 View attachment 105773 View attachment 105774 View attachment 105775 View attachment 105776
One of these days, I will have her looking like this again.
View attachment 105777 View attachment 105778
View attachment 105778
I am happy to offer suggestions or help for anyone that may be looking at a repair such as this. And truthfully, the replacement wood was absolutely 100% undeniably free. Shipping was a meager $93.00. Small price to pay to have your buddy back together again. Humpty Dumpty might have fallen. But it won't take no king or kinds men to put him back together again.
Well... Truth is, that is exactly what I had been thinking. But not certain yet. Time will tell.That’s the plane the new 170cs is going into.
 .
.Good evening Fellas and Happy Wednesday,
I took Doug's advice and use the link he sent me. I ordered bonded washers from Trimcraft, but I screwed up. I tried to order 24 #6 washers and 36 #8 washers for 51 cents each. I can hear Doug laughing now, because that 51 cents gets you 12 washers. So I ended up with 288 #6 washers and 432 #8 washers. . . . . ..
View attachment 105792
Hell, I have enough bonded washers to last me and everybody else I know for the rest of our lives. . . . ..
Hopefully you didn't clean them out since I ordered some too.Good evening Fellas and Happy Wednesday,
I took Doug's advice and use the link he sent me. I ordered bonded washers from Trimcraft, but I screwed up. I tried to order 24 #6 washers and 36 #8 washers for 51 cents each. I can hear Doug laughing now, because that 51 cents gets you 12 washers. So I ended up with 288 #6 washers and 432 #8 washers. . . . . ..
View attachment 105792
Hell, I have enough bonded washers to last me and everybody else I know for the rest of our lives. . . . ..

You can go into business now on bonded washers. That’s funny.Good evening Fellas and Happy Wednesday,
I took Doug's advice and use the link he sent me. I ordered bonded washers from Trimcraft, but I screwed up. I tried to order 24 #6 washers and 36 #8 washers for 51 cents each. I can hear Doug laughing now, because that 51 cents gets you 12 washers. So I ended up with 288 #6 washers and 432 #8 washers. . . . . ..
View attachment 105792
Hell, I have enough bonded washers to last me and everybody else I know for the rest of our lives. . . . ..
