• If you are new to GiantScaleNews.com, please register, introduce yourself, and make yourself at home.

    We're 1st in Giant Scale RC because we've got the best membership on the internet! Take a look around and don't forget to register to get all of the benefits of GSN membership!

    Welcome!

Scale Pitts S1-T, S1-S, and a Challenger.

acerc

640cc Uber Pimp
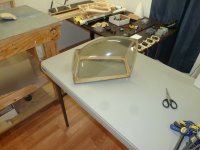
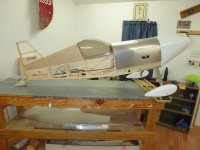
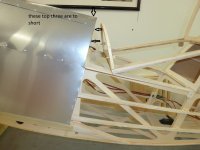
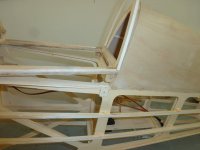
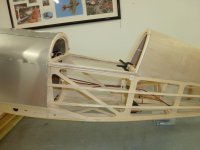
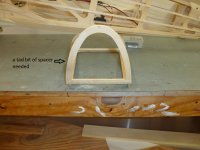
The hatch has had the front pins and the rear bolt through's installed. It fits well but had to make a tiny bit of shim on one side to match the fuse. The canopy has been trimmed close and a trial fitting done, it fits real good, I won't trim it flush until it is glued on. Now I just have to figure how I am going to add the adhesive around the perimeter of the frame and put the canopy in place without getting adhesive all over everything. Also will have to go back and recut the top three aluminum panels as they are a bit short, the canopy should slide under just a bit instead of fitting flush.
 

Attachments

  • 1.JPG
    1.JPG
    317.4 KB · Views: 268
  • 2.JPG
    2.JPG
    308.8 KB · Views: 247
  • 3.JPG
    3.JPG
    314.6 KB · Views: 272
  • 4.JPG
    4.JPG
    320.7 KB · Views: 324
  • 5.JPG
    5.JPG
    352 KB · Views: 279
Last edited:

acerc

640cc Uber Pimp
I was sitting here pondering how I was going to keep this neat and clean. Then it hit me, I don't have to, it is going to get some trim paint around the perimeter, more than enough to cover the glue joint. So I ran a bead of Goop and clamped it together, now to wait for four hours.
 

Attachments

  • 6.JPG
    6.JPG
    354 KB · Views: 283

Snoopy1

640cc Uber Pimp
You are committed now, now you have sit back for a few hours and see what you have ended up with looks good though, looks like you have sufficient clamps on it to keep it nice and smooth and straight.
 

acerc

640cc Uber Pimp
You are committed now, now you have sit back for a few hours and see what you have ended up with looks good though, looks like you have sufficient clamps on it to keep it nice and smooth and straight.
Using the syringe placed a nice 1/16" bead mostly centered around it, when clamping it on it looked to spread evenly within, or on, the frame.
That was the last thing needed built on the fuse, now I am thinking about the cowl. I really hate that smiley face and am not about to cut it out. Was thinking about using some of the expanding foam to fill it, sand it, glass over it and then cut out the openings but as with anything not yet tried I do have my reservations. As thin as they make these cowls I don't think cutting it out then glassing it would go well, but then, I could just leave segments in to hold the nose's shape.
I'd consider any suggestions, might give me an idea for a different method.
 

acerc

640cc Uber Pimp
By the way, a few days ago I happened to mention to the wife how bad I hate walking out of the shop at night because of the night flyers, BUGS!!! She is a wonderful woman, look at what she went and bought for the shop....Pretty cool huh...Her, and the curtains are nice as well.
 

Attachments

  • P1090061.JPG
    P1090061.JPG
    182.3 KB · Views: 222

acerc

640cc Uber Pimp
Just got back from dinner with the wife, her treat. And of course I could not wait any longer, came in the shop, unclamped it and trimmed it up. Need's a light sanding to flush it up real well but turned out much better than I was expecting. It is too late to be hitting the belt sander so tomorrow, when I return from the field, will have to do.
 

Attachments

  • P1090062.JPG
    P1090062.JPG
    325.5 KB · Views: 245
Top