• If you are new to GiantScaleNews.com, please register, introduce yourself, and make yourself at home.

    We're 1st in Giant Scale RC because we've got the best membership on the internet! Take a look around and don't forget to register to get all of the benefits of GSN membership!

    Welcome!

IMAC Dalton Extra 260 35%...Back at it!

Terryscustom

640cc Uber Pimp
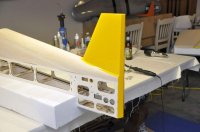
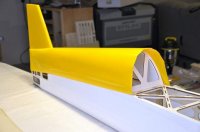
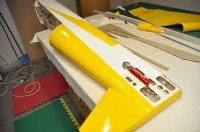
Rule for covering is typically "bottom to top and front to back". That way all the seams are aimed towards the back of the plane and aimed down towards the ground. So that said, I typically do the fuselage in three parts. Belly pan area (below the flat side area). bring that up about 3/16" - 1/4" taller than needed. Overlap and cover the middle section, up to the bottom of the canopy and straight back to tail. Then the top, or turtle deck. Use a pc. of 1/2" covering folded in half and put that in the corner where the stab meets the TD to seal that joint.

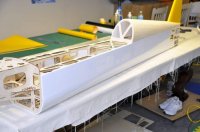
If you have the scrap part from the rudder that you cut out for the vertical stab you can use that as a template to cut a slot to go around your stab. Somewhere in my Viper thread there is a pic of this, I'll see if I can dig it up.
 

Terryscustom

640cc Uber Pimp
Here are a few pics from covering of my last Viper (see my avatar). Basically if you take the block that you cut out the rudder / vertical stab from and cut off the top 1/8" or so you have a perfect template to cut your turtle deck covering with!! See pics:
image004 (2).jpg
 

Attachments

  • image002 (2).jpg
    image002 (2).jpg
    82.4 KB · Views: 273
  • image004 (1).jpg
    image004 (1).jpg
    70.6 KB · Views: 272
  • image001 (3).jpg
    image001 (3).jpg
    79.3 KB · Views: 256
  • image003 (1).jpg
    image003 (1).jpg
    73.5 KB · Views: 264
  • image005.jpg
    image005.jpg
    55.4 KB · Views: 300
  • image006.jpg
    image006.jpg
    39.8 KB · Views: 275
  • image008 (2).jpg
    image008 (2).jpg
    81.3 KB · Views: 249
  • image013.jpg
    image013.jpg
    80.9 KB · Views: 304

stangflyer

I like 'em "BIG"!
Another trick I learned is to use solder. Wrap it around the fin at the top of your fuse where they meet. Lay on Covering, cut out. Walaa.... fits like a glove. The rest of it is fairly easy. I usually use the same method as Terry. Had great results.

Oh and by the way and for what it is worth? Silver Ultracote is just a tad more temper mental at getting it too lay and look good around compound corners.

Personally, I don't think it's lame at all to be able to look at it and be amazed that "YOU" built it. Damn fine looking plane if you ask me. Kudos!!!
 

Dooinit

70cc twin V2
image.jpg image.jpg
The second picture is after I filled the sean of the wheel pants and sanded smooth with a lightweight body filler. The first picture is after I primed them and sanded them. Now I will give it one last coat of primer before I paint. These parts were so full of pinholes, so a little trick is to spray a really wet coat of primer and then take a paint roller and roll the whole thing. Then a couple more coats of primer. All the pinholes get filled. It makes sanding the first time a little longer, but you don't have to deal with those little pinhole buggers.
 

Terryscustom

640cc Uber Pimp
These parts were so full of pinholes, so a little trick is to spray a really wet coat of primer and then take a paint roller and roll the whole thing. Then a couple more coats of primer. All the pinholes get filled. It makes sanding the first time a little longer, but you don't have to deal with those little pinhole buggers.

HOLY CRAP!!!!! I never thought of that!!! I wish I could like your post 100 times!
 
Top