You are using an out of date browser. It may not display this or other websites correctly.
You should upgrade or use an alternative browser.
You should upgrade or use an alternative browser.
Glassing and Painting techniques
- Thread starter Terryscustom
- Start date
balsa
50cc
Three coats of clear over that stuff in a spray can some one posted a while back. I really like the way it turned out.Looks great balsa..........did you use the clear with a little black and how many coats?
Snoopy1
640cc Uber Pimp
It is amazing all the work people have done in this thread and it is all very informative. Let me make it clear I am no painter and do not work in the industry just been painting planes since 1973. (No comments about age ok.) first started with dope, terrible stuff hard to work with and pulls away from the corners just bad stuff. Then went to home hardware type of paints not very successful. This looked good and work great for one season and down hill from there. Tried many automotive type paints and was hit and miss and most of the time ended up heavy. After many planes and combinations you guys have come with the same conclusion that I have. The only thing that I can add is to use 3/4 oz/sq-ft. Used 1/2 oz cloth difficult to use, damages the weave very easy and find it uses more resin to fill because the material is not as tightly woven as the 3/4 oz cloth. The latest I can come up with is exactly the process as described earlier in the thread, and is the lightest. Ok now when it comes to painting all my weight saving down the tube . The only way that I have been able to win is from this point by using Stits. One coat of their primer, for the connection to the epoxy base. Then 2 coats of whatever colour the plane needs to be and then one good coat of striping or fancy striping or whatever looks good. This is the lightest I have ever been able to do it. You can still see the weave, but it is sealed and easy to clean no wrinkles or edge coming loose. And I have planes that are more than 5 years old done this way and look as good as the day they were finished. But are actually getting better with age because I will wax then twice a year and they are starting to shine. Like to see some pictures let me know.
There is a special clear coat that Stits supplies that makes it look like glass and very shiny. It needs to be put on by an expert because it needs to be put on just wet enough for it to blend and not run. Tried it it is heavy and does not add to the performance of the plane except look like a show car.
Sorry for being long winded just trying to help.
Snoopy1
640cc Uber Pimp
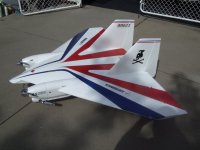
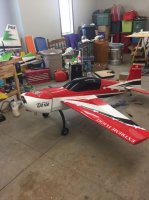
Three pictures below. The painted plane is several years old and was done as follows. 3/4 oz cloth, one coat of resin then 2 coats of special primer from stits bonds Stits paint to epoxy and sanded down. Then a dust coat of Stits white and then a wet coat of white. And then the stripes added. Done. Looks good, lasting good, easy to clean and no seams to let go and no wrinkles.
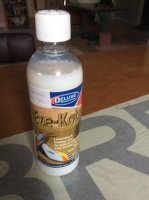
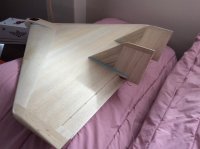
The picture of the plane with no paint is done as follows 3/4 oz cloth then 2 Coats of EzeCoat. That's it, waiting to be painted. Now tried EzeCoat for 2 reasons. It can be done in house and water clean up. It's great to work with easy to do. Did the whole plane in a day could never do that with epoxy. Sands great and does not clog the paper. How good it is I do not know will tell you in a year. What I do know is that it is fuel proof.
Now I need some help/or advice. Paint the plane the same as the plane shown below or do some of the paint experts have some ideas of what I should try and how it should be painted. Sequence and product to be used. Note weight is important to me.
Thanks for your help.


Notorious B.E.N.
100cc
Does anyone set up something to function as a paint booth or do you just work in the shop?
BikeRacer
50cc
I always covered everything in my garage with plastic drop cloth. Cleaned, dusted, cleaned some more. Sprayed the ground with water and ran air filters and box fans to keep the air moving. Some jobs turned out pretty good, but there always seems to be stiff floating around that gets in my clear. If you what to shoot something really well, some sort of a booth is a must. I was thinking of framing up some simple walls with plastic cloth and boxing in an area of my garage. Just make it big enough.
Ohio AV8TOR
Just Do It
I use 3M Fine Line for trim to pain masking and just simple low tack painters 1" blue for holding down paper to the Fine Line and anything else. Fine Line in narrower widths can make some very tight radius turns. Make that up if necessary with thicker to get that tight look.

