• If you are new to GiantScaleNews.com, please register, introduce yourself, and make yourself at home.

    We're 1st in Giant Scale RC because we've got the best membership on the internet! Take a look around and don't forget to register to get all of the benefits of GSN membership!

    Welcome!

Scale Pitts S1-T, S1-S, and a Challenger.

acerc

640cc Uber Pimp
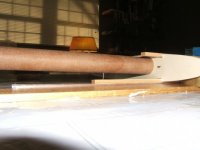
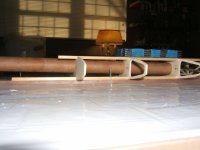
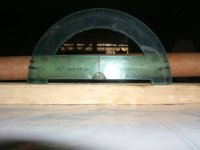
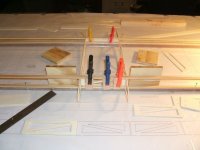
The dihedral should be 3°. I think you should recheck your angle and /or the orientation of the ribs.
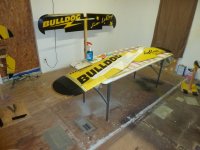
My previous vinyl guy was great but, he called it quits. I am currently working with @Decal Dennis , from conversation it sounds promising.
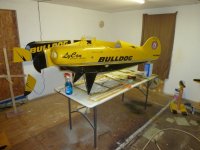
Toni Clark carries the traditional Charlie Hilliard scheme in 1/3 scale, he might enlarge them for yours. Would not hurt to email him.
 

Jaketab

50cc
I measured the angle of the end spacer block.
That is the amount the root rib leans in.
I was assuming the tube angle was the same. Yes - there is that word again, "assuming."
Then the angle of the wing tube is somewhat less than the angle set in root rib and end spacer ????
The order of 1, 2, & 3 ribs is given. Then is it just a question of orientating the 3 ribs so that the tube points upward???
Based on where the tube holes are cut in the ribs - it seems the angle should be pre-determined and correct ????

One thing I did notice - the tube hole in solid 1st root rib is round to match the diameter of the tube socket.
If the root rib leans in, then the hole will have to be ovaled or elongated slightly???

Thanks - the Charlie Hilliard scheme is the one.
May cover with either red Solortex or 21st Century with a clear coat finish.

Jaketab
 

Attachments

  • DSCF4030.JPG
    DSCF4030.JPG
    55.5 KB · Views: 243

Jaketab

50cc
Ace,

I should never doubt your experience. As I stand corrected, the dihedral, or angle the tube exits the wing is close to 3 degrees as best I could measure using primitive skills.
So the angle the tube leaves the wing (3 degrees) is less than the 8 degrees the end root rib is angled.

Jaketab
 

Attachments

  • DSCF4032.JPG
    DSCF4032.JPG
    56 KB · Views: 187
  • DSCF4033.JPG
    DSCF4033.JPG
    60.9 KB · Views: 201
  • DSCF4034.JPG
    DSCF4034.JPG
    62.6 KB · Views: 190

acerc

640cc Uber Pimp
Glad ya got it. Now, if you want a really nice fit when abutting the fuse, leave the root rib unglued until the rest is done enough to slide the wing into the fuse socket, then you can adjust that rib for a perfect fit. I cut a root rib out of balsa and glued it in against the ply rib. Then removed the ply rib until wing was nearly finished, only the sheeting was left to do at the root.
 
Last edited:

acerc

640cc Uber Pimp
Getting there, slowly, but just the same. I will have a few minor things to do in the morning before getting to the clear coat, such as touch up the top of the pants and paint the bottom of the bottom ailerons.
 

Attachments

  • P1080272.JPG
    P1080272.JPG
    81.5 KB · Views: 208

Jaketab

50cc
Question please - hopefully last one for a while. Getting ready to glue up the lower wing. Thought that I would square up and glue the middle section (ribs 5 & 6), let dry, and then work outward to the root and tip. Is there a preferred order or method of gluing up the wing????
Temped to use CA, but will use the Aerobond PVA to start. Any last suggestions please before tackling the wing.

Thanks - Jaketab
 

Attachments

  • DSCF4035.JPG
    DSCF4035.JPG
    65.4 KB · Views: 260

acerc

640cc Uber Pimp
Nope, I think you got it well in hand. About the only thing I can think to remind is the shear webs are the rib spacers, keep that in mind.
 

jeff

30cc
Rob, Dude!! It looks great...I can only imagine what your going to do and how beautiful the Challenger, Bulldog II is going to look like. I hope you decide to go all out scale. I have yet to see one so far. Go for it. You have all the skills necessary to make it a winner!

Jeff
 
Top