• If you are new to GiantScaleNews.com, please register, introduce yourself, and make yourself at home.

    We're 1st in Giant Scale RC because we've got the best membership on the internet! Take a look around and don't forget to register to get all of the benefits of GSN membership!

    Welcome!

IMAC Terryscustom 35% MXS-ST Prototype

Terryscustom

640cc Uber Pimp
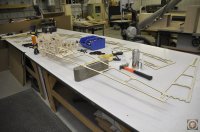
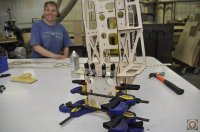
OK, I have a break from work for a few hours so lets get started. I'll take pics but I have largely covered every square inch of my typical plane build more than once so if you see something, don't be afraid to ask!

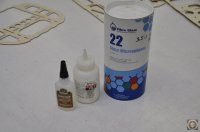
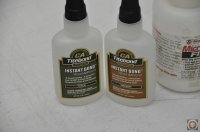
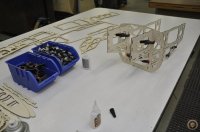
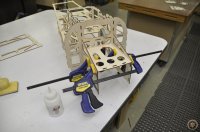
I will start first with the way I have assembled my last two builds. My new best friend is this Titebond CA in medium and thick. It is absolutely amazing with plywood construction and makes incredibly strong joints when dusted with micro-balloons. If you are a builder and use micro DONT buy it from the hobby store. Get it from a fiberglass supply house where you can get a HUGE container for just a bit more than the hobby store bottle.

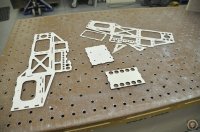
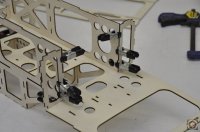
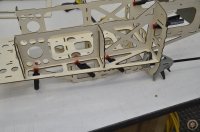
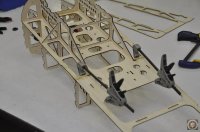
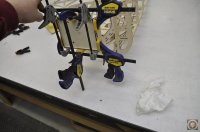
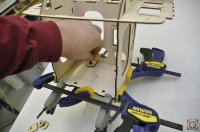
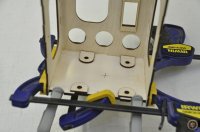
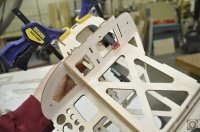
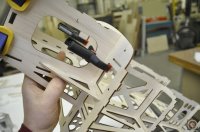
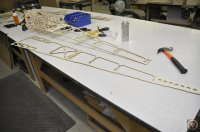
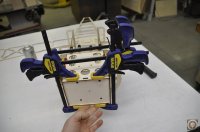
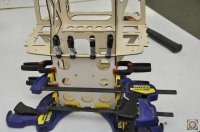
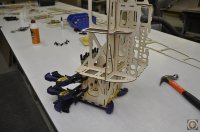
My process is to test fit, clamp, wick in glue, let it soak in, put another bead, microballoons and let dry. For some non-critical joints a light spray of kicker is OK just don't hose it on.

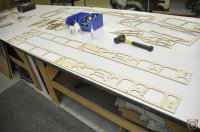
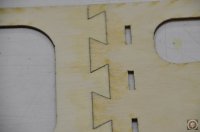
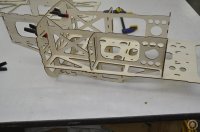
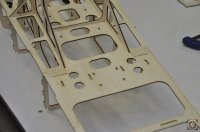
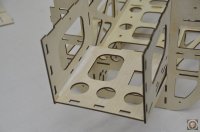
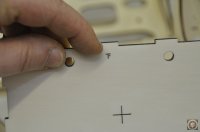
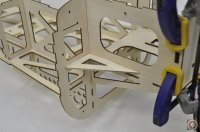
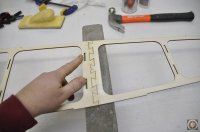
All birch parts are sanded and test fit since they are a few thousandths thicker than the lite ply.
 

Attachments

  • _DSC0062.JPG
    _DSC0062.JPG
    59.5 KB · Views: 281
  • _DSC0063.JPG
    _DSC0063.JPG
    68.6 KB · Views: 273
  • _DSC0064.JPG
    _DSC0064.JPG
    124 KB · Views: 292

BalsaDust

Moderator
Terry where do you find the Thick titebond CA at. Everywhere local to me either carries the titebond or the Gorilla Glue CA but only in the medium. I would love to find the thick and some thin as well. I'm guessing I will just have to order it.
 

Terryscustom

640cc Uber Pimp
Terry where do you find the Thick titebond CA at. Everywhere local to me either carries the titebond or the Gorilla Glue CA but only in the medium. I would love to find the thick and some thin as well. I'm guessing I will just have to order it.

I got it from @Flyrcjoe I don't use the thick much but it is the closest thing to epoxy I've ever seen!!
 

Terryscustom

640cc Uber Pimp
OK, one hour breather. Base engine box assembled and ready for the "important stuff" that makes this all square and straight. Notice for those of you new to my builds I am not using a flat table, or squares or anything. The joints on my laser cut parts are tight enough so that no light shines through and some of them need a light finesse with a sanding block. This means the assembly is largely self aligning and self squaring. The birch hard points for canopy mounts and SFG's need to be tapped in lace because they are an interference fit. Few drops of thin CA locks them in for life
_DSC0081.JPG
:
 

Attachments

  • _DSC0068.JPG
    _DSC0068.JPG
    105.1 KB · Views: 287
  • _DSC0069.JPG
    _DSC0069.JPG
    52.2 KB · Views: 276
  • _DSC0070.JPG
    _DSC0070.JPG
    93 KB · Views: 276
  • _DSC0071.JPG
    _DSC0071.JPG
    81.6 KB · Views: 307
  • _DSC0072.JPG
    _DSC0072.JPG
    46.4 KB · Views: 259
  • _DSC0073.JPG
    _DSC0073.JPG
    71.1 KB · Views: 285
  • _DSC0074.JPG
    _DSC0074.JPG
    69.3 KB · Views: 290
  • _DSC0075.JPG
    _DSC0075.JPG
    77.8 KB · Views: 290
  • _DSC0076.JPG
    _DSC0076.JPG
    86.3 KB · Views: 294
  • _DSC0077.JPG
    _DSC0077.JPG
    79 KB · Views: 234
  • _DSC0078.JPG
    _DSC0078.JPG
    83.3 KB · Views: 278
  • _DSC0079.JPG
    _DSC0079.JPG
    82.8 KB · Views: 262
  • _DSC0080.JPG
    _DSC0080.JPG
    68.2 KB · Views: 246

Terryscustom

640cc Uber Pimp
_DSC0087.JPG
 

Attachments

  • _DSC0082.JPG
    _DSC0082.JPG
    91.7 KB · Views: 274
  • _DSC0083.JPG
    _DSC0083.JPG
    61.3 KB · Views: 275
  • _DSC0084.JPG
    _DSC0084.JPG
    63.8 KB · Views: 306
  • _DSC0085.JPG
    _DSC0085.JPG
    53.8 KB · Views: 290
  • _DSC0086.JPG
    _DSC0086.JPG
    46.2 KB · Views: 306
  • _DSC0088.JPG
    _DSC0088.JPG
    52.9 KB · Views: 292
  • _DSC0089.JPG
    _DSC0089.JPG
    76.1 KB · Views: 306
  • _DSC0090.JPG
    _DSC0090.JPG
    68 KB · Views: 281
  • _DSC0091.JPG
    _DSC0091.JPG
    81.2 KB · Views: 311
  • _DSC0092.JPG
    _DSC0092.JPG
    68.9 KB · Views: 293
  • _DSC0093.JPG
    _DSC0093.JPG
    92.8 KB · Views: 326
  • _DSC0094.JPG
    _DSC0094.JPG
    85.9 KB · Views: 352
  • _DSC0095.JPG
    _DSC0095.JPG
    68.8 KB · Views: 297
  • _DSC0096.JPG
    _DSC0096.JPG
    87.7 KB · Views: 333
  • _DSC0097.JPG
    _DSC0097.JPG
    87.3 KB · Views: 286
  • _DSC0098.JPG
    _DSC0098.JPG
    65.1 KB · Views: 285
  • _DSC0099.JPG
    _DSC0099.JPG
    105.1 KB · Views: 320
  • _DSC0100.JPG
    _DSC0100.JPG
    98.6 KB · Views: 256
  • _DSC0101.JPG
    _DSC0101.JPG
    68.3 KB · Views: 267
  • _DSC0102.JPG
    _DSC0102.JPG
    70.4 KB · Views: 315
  • _DSC0103.JPG
    _DSC0103.JPG
    89.6 KB · Views: 301
  • _DSC0104.JPG
    _DSC0104.JPG
    81.2 KB · Views: 314
  • _DSC0105.JPG
    _DSC0105.JPG
    49.5 KB · Views: 242
  • _DSC0106.JPG
    _DSC0106.JPG
    86.5 KB · Views: 247
Top