• If you are new to GiantScaleNews.com, please register, introduce yourself, and make yourself at home.

    We're 1st in Giant Scale RC because we've got the best membership on the internet! Take a look around and don't forget to register to get all of the benefits of GSN membership!

    Welcome!

3D Viper-ST 100-120cc scratch build......it continues!

Terryscustom

640cc Uber Pimp
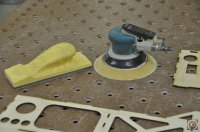
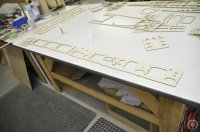
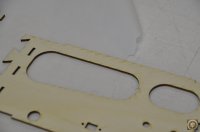
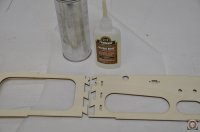
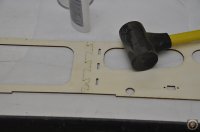
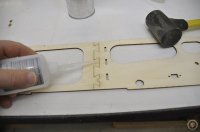
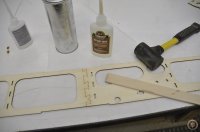
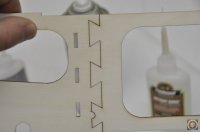
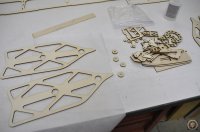
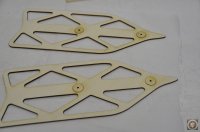
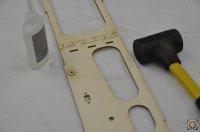
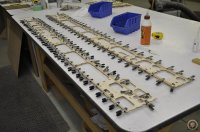
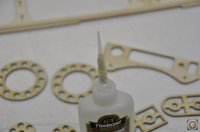
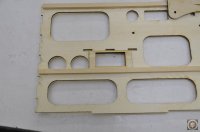
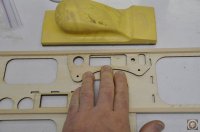
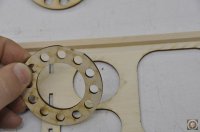
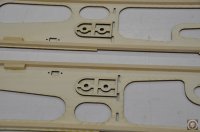
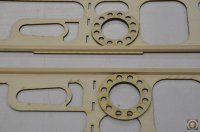
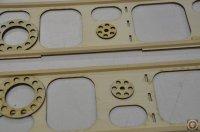
Next I sanded the birch plywood parts. The birch has to be cut a little slower so there is a little more smoky residue on them. I've taken great care to optimize the lite ply parts to get the best cut in a timely manner so they don't really require any sanding unless you really want to.
_DSC0022.JPG
 

Attachments

  • _DSC0020.JPG
    _DSC0020.JPG
    114.7 KB · Views: 243
  • _DSC0021.JPG
    _DSC0021.JPG
    105.6 KB · Views: 219

Terryscustom

640cc Uber Pimp
Next I'm going to join the fuse sides, top and bottom plate halves together. To do this I lay out some parchment paper or wax paper on the table and use a mallet or hammer to gently tap the joint together. It is a tight fit so be careful not to damage the parts.

You can tell the back side of the parts because there is a slight "cross hatch" pattern from the laser. Apply glue to the back-side of these parts. I like to wick in some thin along the joint line since that soaks into the joint nicely. Does not take a lot, so no need to "flood" the joint (it should not be running out the other side). Then I apply some medium CA and spread it with a scrap of wood. Lightly accelerate it and your done (for now). We will add reinforcement to these joints later after the fuse is assembled.
_DSC0030.JPG
 

Attachments

  • _DSC0023.JPG
    _DSC0023.JPG
    93.4 KB · Views: 245
  • _DSC0024.JPG
    _DSC0024.JPG
    41.1 KB · Views: 240
  • _DSC0025.JPG
    _DSC0025.JPG
    47.9 KB · Views: 288
  • _DSC0026.JPG
    _DSC0026.JPG
    46.8 KB · Views: 233
  • _DSC0027.JPG
    _DSC0027.JPG
    50.6 KB · Views: 236
  • _DSC0028.JPG
    _DSC0028.JPG
    59.5 KB · Views: 232
  • _DSC0029.JPG
    _DSC0029.JPG
    45 KB · Views: 256

Terryscustom

640cc Uber Pimp
From there we will also install the hard points in the SFG's and fuselage sides. The outer SFG panels are lite ply so they need a hard point, same with fuselage sides. These get installed from the OUTSIDE of the part so they are flush with the inside. Install those with thin CA only from the outside and let cure without accelerator.

Note, there are a bunch of small donuts that are for the cowl joining tabs, these are smaller so if the ones you grab for the fuse sides slip right through the fuse.....you have the wrong ones. These need to be tapped into place, you can't even install them with your fingers.
 

Attachments

  • _DSC0031.JPG
    _DSC0031.JPG
    78.4 KB · Views: 256
  • _DSC0032.JPG
    _DSC0032.JPG
    58.4 KB · Views: 264
  • _DSC0038.JPG
    _DSC0038.JPG
    43.1 KB · Views: 232

Terryscustom

640cc Uber Pimp
Moving on to longerons. There are six spruce longerons included. Two need to be cut in half and scarf jointed to make four long sticks. Scarf joints need to be at least twice as long as the sticks that you are joining together. In this case my miter saw goes just a bit over 60 degrees which is just enough so I used that. You can also use a disk sander or even a hand saw but the cuts need to be perpendicular to form a nice tight joint. If there is any gap sand until there is no gap on the joint.

Now use a straight edge and your choice of glue. I used medium CA for these, but wood glue is also fine, just clamp and let dry completely.

Now cut the longerons to 66 5/8". I cut mine just a hair short since F-1 is at an angle it's nice to have a little gap on the ends.
 

Attachments

  • _DSC0033.JPG
    _DSC0033.JPG
    85 KB · Views: 272
  • _DSC0034.JPG
    _DSC0034.JPG
    47 KB · Views: 273

Terryscustom

640cc Uber Pimp
Next install the longerons. I prefer Gorilla wood glue for all general wood gluing on airplanes. It is not polyurethane foaming glue, it's just normal wood glue. However I find that it dries quick, can be sanded better than most others and does not get as brittle as titebond wood glue after it is dry.

Apply a small bead of glue. There needs to be no squeeze out on the outside at all, and very little on the inside. If you have a bunch of glue squeezed out it does nothing but look ugly and add weight to the plane. Creating any type of fillet with wood glue has no structural integrity.

I get the longeron in place with a few clamps as quickly as possible and wipe off any excess glue with a rag. You can get the rag damp and that helps as well. Then go back and add plenty of clamps. A nice tight fit on the longerons is very important.

Lastly, cut some 1" blocks from the scrap longeron pieces. Glue them over top of the canopy mounting holes. We will drill these back out later. This gives a nice flat surface for the mounting tabs to sit against.
 

Attachments

  • _DSC0035.JPG
    _DSC0035.JPG
    47.4 KB · Views: 244
  • _DSC0036.JPG
    _DSC0036.JPG
    109 KB · Views: 257
  • _DSC0037.JPG
    _DSC0037.JPG
    106.6 KB · Views: 242
  • _DSC0039.JPG
    _DSC0039.JPG
    62.9 KB · Views: 232
  • _DSC0040.JPG
    _DSC0040.JPG
    108.2 KB · Views: 249
  • _DSC0041.JPG
    _DSC0041.JPG
    60 KB · Views: 243
  • _DSC0042.JPG
    _DSC0042.JPG
    26.2 KB · Views: 261
  • _DSC0043.JPG
    _DSC0043.JPG
    58.7 KB · Views: 237
  • _DSC0044.JPG
    _DSC0044.JPG
    58.8 KB · Views: 278
  • _DSC0045.JPG
    _DSC0045.JPG
    63 KB · Views: 251

Terryscustom

640cc Uber Pimp
Time for doublers. I'm using medium CA with a thin tip installed on the bottle top. Again....more glue is NOT better!!! You only need enough to fill the space evenly between the parts.

Also you can sand the slight laser flash off of these if you like. The camera is making it look worse than it is so I'm skipping this step. The laser edges have NO effect at all in gluing (I've done multiple tests). However if the laser edges are black or sooty at all they must be sanded. You will not see black sooty parts from my laser.

In the misc. parts bag there are a bunch of birch plywood fillers. I'm using one rudder servo so determine which side you want it and install the doubler for that. The horizontal stab doubler needs special attention to make sure the holes line up perfectly Take your time and adjust the top with a sanding block if needed. Install all other doublers as shown. I installed my other servo doubler on the inside of my engine box bottom plate. If you used two rudder servos you can also use basswood blocks or more blocks cut from the longerons for the throttle servo.
 

Attachments

  • _DSC0046.JPG
    _DSC0046.JPG
    70.7 KB · Views: 232
  • _DSC0047.JPG
    _DSC0047.JPG
    42.6 KB · Views: 234
  • _DSC0048.JPG
    _DSC0048.JPG
    66 KB · Views: 231
  • _DSC0049.JPG
    _DSC0049.JPG
    65.7 KB · Views: 232
  • _DSC0050.JPG
    _DSC0050.JPG
    58.4 KB · Views: 230
  • _DSC0051.JPG
    _DSC0051.JPG
    63.3 KB · Views: 342
  • _DSC0052.JPG
    _DSC0052.JPG
    68.6 KB · Views: 228
  • _DSC0053.JPG
    _DSC0053.JPG
    70.2 KB · Views: 242
  • _DSC0054.JPG
    _DSC0054.JPG
    59.5 KB · Views: 224
Top