You are using an out of date browser. It may not display this or other websites correctly.
You should upgrade or use an alternative browser.
You should upgrade or use an alternative browser.
Xpress does a BANSHEE build...
- Thread starter Xpress
- Start date
Bushwacker
3DRCF Moderator
I usually buy quality equipment to go along with the airplane so I can transfer it to a new airplane if the inevitable happens. Airframe doesn't cost much by comparison, it's usually the cheapest portion of it..
Yes that really is the only way to go bro and I see your pretty happy about getting your new DA70. Coolness!!!
Bushwacker
3DRCF Moderator
Oh dats so peerrttyy!!! Excellent job X :grrreat:
Xpress
GSN Sponsor Tier 1
Some notes for future builders:
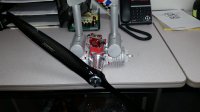
-The included RCGF 55CC plywood drilling template is an exact match to the DA70 mounting plate, so I will be using that to drill my mounting holes.
-I needed a set of 1" standoffs for the engine, this should give me a solid 1/8" of clearance between the cowl and the spinner. I have the SWB standoffs on their way with matching bolts.
-The DA70 EASILY fits inside of the huge cowl with plug caps on- there's at least a nice 5/8" of clearance on each side. You will have to rotate the cowl to fit it onto the airplane, the cowl ring won't clear the caps otherwise.
That's all for tonight, still waiting on parts to come in so I can start moving forward.
Bushwacker
3DRCF Moderator
Time just doesnt move fast enough when your waiting on parts does it.
BTW really good info you shared on the motor/cowl install. Should help take a lot guess work out for those who will be starting this project.
BTW really good info you shared on the motor/cowl install. Should help take a lot guess work out for those who will be starting this project.
Last edited by a moderator:
Xpress
GSN Sponsor Tier 1
As a small update for today, my Thunder Power batteries arrived. Had a bit of a complication with the CC company and ended up not ordering them until late yesterday, when they shipped...  That's some customer service right there, a shout out to Kim at Thunder Power :thumbup:
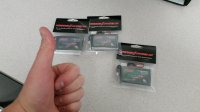
Just waiting on some misc pieces and parts to arrive in the mail and we should be able to complete the puzzle :banana:

Just waiting on some misc pieces and parts to arrive in the mail and we should be able to complete the puzzle :banana:
Bushwacker
3DRCF Moderator
Nice man Nice. So what do you have left for parts to get? Only ask because you said... "I do believe I have mostly everything I need to get her airborne".
Figured you had enough time to determine if you had it all or not. Going to be sick as hell to finally see this thing up in the air tearing it up.
Figured you had enough time to determine if you had it all or not. Going to be sick as hell to finally see this thing up in the air tearing it up.
Xpress
GSN Sponsor Tier 1
I have no clue, not until I get it all together and see what's missing...
---------------------
Got some more work done, pretty much back at a stand still until I get the rest of my parts in the mail.
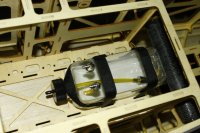
Fuel tank is in. The supplied velcro straps work well to secure it, along with a piece of the foam cut up to be used as a bed for the tank. I also wrap a strip of velcro (there is more than enough) around the front of the tank and butt the rear of it against the wing tube to keep it locked in place.
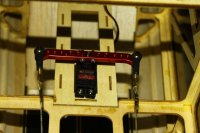
The Secraft Easy Couplers make short and quick work of the rudder cables. Instead of futzing with it for half an hour, I was done in less than 10 minutes, and this allows me to completely remove the rudder from the airplane for transport.
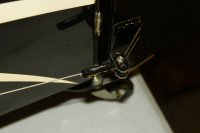
Some minor tensioning of the wires at the servo end and we were finished.
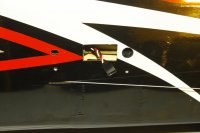
Also ran the elevator extensions through the fuse- the airplane comes with a cardboard tube pre-installed with a pull string inside to make the install super clean.
That was pretty much it for last night. Next up is getting the motor installed, cowl cut up, and figuring out where to place the batteries inside. Where I put the switches will depend on where I place the batteries, but going off of others builds, it looks like I'll be putting them alongside the tank.
---------------------
Got some more work done, pretty much back at a stand still until I get the rest of my parts in the mail.
Fuel tank is in. The supplied velcro straps work well to secure it, along with a piece of the foam cut up to be used as a bed for the tank. I also wrap a strip of velcro (there is more than enough) around the front of the tank and butt the rear of it against the wing tube to keep it locked in place.

The Secraft Easy Couplers make short and quick work of the rudder cables. Instead of futzing with it for half an hour, I was done in less than 10 minutes, and this allows me to completely remove the rudder from the airplane for transport.

Some minor tensioning of the wires at the servo end and we were finished.

Also ran the elevator extensions through the fuse- the airplane comes with a cardboard tube pre-installed with a pull string inside to make the install super clean.

That was pretty much it for last night. Next up is getting the motor installed, cowl cut up, and figuring out where to place the batteries inside. Where I put the switches will depend on where I place the batteries, but going off of others builds, it looks like I'll be putting them alongside the tank.
Last edited by a moderator:

