3dmike
640cc Uber Pimp
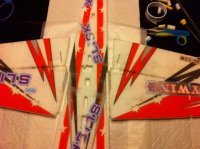
Well I (my son and I) am the proud owner of a new SKYWING RC 32" Slick 540 EPP thanks to Gyro! He sent it as a gift to my son and I which we received in the mail yesterday! I wish I could have captured my son's face on camera when he saw it.... It looked something like this!

Description:

Link: http://usa.wattaplane.com/shop/shopexd.asp?id=145
From the manufacturer:
This is one of Skywing's new fly-anywhere planes. It's made of 8mm EPP sheet, very tough and easy to build. With extra large control surfaces, you will be in absolute command. Fly it in your backyard, fly it during your lunch break, fly it anywhere (safe)!
Here are the specs:
Specifications:
- Wing Span 800 mm (32.5 in)
- Length 960mm (37.8 in)
- Flying Weight 190-220 g (6.7-7.8 oz) with battery
Requires:
- 4+ channel radio
- 2204-2206 size brushless outrunner motor
- 10A ESC
- 1 x g-gram servo for the aileron
- 2 x 5-gram servo for the tail
- 2-cell 450mAh lipo battery
- Propeller GWS 8043
Gary included the everything required for the build.
Unboxing:
The box was pretty bent up and looked like it had been in the tornadoes hitting the country right now but inside everything was in great shape except one area of the EPP that was compressed a bit but it should not be a problem at all.
.jpg")
.jpg")
.jpg")
.jpg")
Thanks Gyro for the 6, yes 6 Glacier 450 mah 25c's!!!
.jpg")
.jpg")
Here is the slightly damaged foam. I don't think it is going to be a structural issue at all and the only reason I mention it is because I can't believe it's the only thing that was effected by the poor USPS handling!
I will get started on this super fun plane this weekend and will log the build here.
Thanks again Gyro!
Description:
Link: http://usa.wattaplane.com/shop/shopexd.asp?id=145
From the manufacturer:
This is one of Skywing's new fly-anywhere planes. It's made of 8mm EPP sheet, very tough and easy to build. With extra large control surfaces, you will be in absolute command. Fly it in your backyard, fly it during your lunch break, fly it anywhere (safe)!
Here are the specs:
Specifications:
- Wing Span 800 mm (32.5 in)
- Length 960mm (37.8 in)
- Flying Weight 190-220 g (6.7-7.8 oz) with battery
Requires:
- 4+ channel radio
- 2204-2206 size brushless outrunner motor
- 10A ESC
- 1 x g-gram servo for the aileron
- 2 x 5-gram servo for the tail
- 2-cell 450mAh lipo battery
- Propeller GWS 8043
Gary included the everything required for the build.
Unboxing:
The box was pretty bent up and looked like it had been in the tornadoes hitting the country right now but inside everything was in great shape except one area of the EPP that was compressed a bit but it should not be a problem at all.
Thanks Gyro for the 6, yes 6 Glacier 450 mah 25c's!!!
Here is the slightly damaged foam. I don't think it is going to be a structural issue at all and the only reason I mention it is because I can't believe it's the only thing that was effected by the poor USPS handling!
I will get started on this super fun plane this weekend and will log the build here.
Thanks again Gyro!
Last edited by a moderator:


.JPG")
.JPG")
.JPG")
.JPG")
.JPG")


