Larry B
70cc twin V2
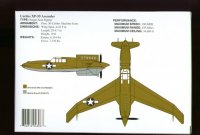
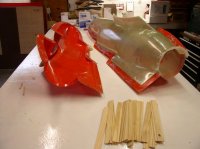
I told myself this would never happen & now here I am doing it again! Several years ago I did the molds for a Curtiss Ascender, it was my first effort at doing a complete glass fuse from scratch, the molds and glass fuse came out just fine but the first flight was very short (read that as a crash). I had done the Ascender as a first glass fuse due to it's wild curves and round shape, it posed a challenge and was a perfect shape to mold in glass.
After the short first flight I threw the remains out in the shed (should have been the dumpster) just in case I ever wanted to re-visit the project.
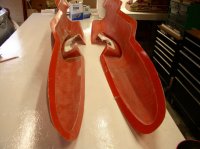
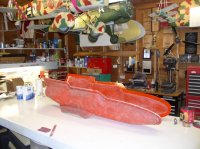
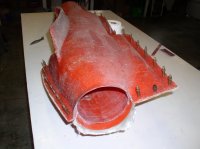
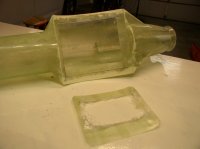
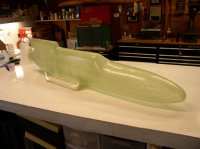
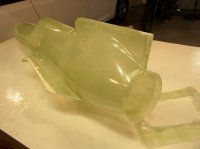
Well last Friday the wife & I did the first half of the fuse lay-up, then Saturday we did the other half of the fuse, and just today I joined the two half's and taped the joint of the two fuse sides. Tomorrow will be like Christmas day when you open that present and see what you got!
The first model was powered with the O.S. Max BGX glow engine and the overall weight of the thing was 26lbs if I remember right, this gave it a wing loading of about 55oz/sq ft with a span of 98" it just does not have much wing area. This new model will be electric & I am doing everything in my power to keep the weight to an absolute minimum!
Anyways, here are a few photo's of the beginning of Ascender #2
Larry B
After the short first flight I threw the remains out in the shed (should have been the dumpster) just in case I ever wanted to re-visit the project.
Well last Friday the wife & I did the first half of the fuse lay-up, then Saturday we did the other half of the fuse, and just today I joined the two half's and taped the joint of the two fuse sides. Tomorrow will be like Christmas day when you open that present and see what you got!
The first model was powered with the O.S. Max BGX glow engine and the overall weight of the thing was 26lbs if I remember right, this gave it a wing loading of about 55oz/sq ft with a span of 98" it just does not have much wing area. This new model will be electric & I am doing everything in my power to keep the weight to an absolute minimum!
Anyways, here are a few photo's of the beginning of Ascender #2
Larry B