• If you are new to GiantScaleNews.com, please register, introduce yourself, and make yourself at home.

    We're 1st in Giant Scale RC because we've got the best membership on the internet! Take a look around and don't forget to register to get all of the benefits of GSN membership!

    Welcome!
  • Unless you are a paid advertiser NO more posting advertisement in the individual vendor forums. You may post in the Manufacturer's Announcements section only but only ONCE a month unless your a paid advertiser.

30% OMP Extra 300 v2 Assembly

Capt.Roll

70cc twin V2
I’ve started the assembly of my new 30% OMP Extra 300 mid-wing ARF. I’m on vacation thru Jan 6th and should have ample opportunity to work on the Extra along with some maintenance on my 100cc Yak SP-55M and 71” electric Slick. It would be nice to have this project completed and ready to maiden should there be some decent flying weather sometime in the next six weeks. For sure want to have the Extra ready to go by March 1st.

Picked up the two shipping boxes (fuse & wings) from the Greyhound terminal the week after Thanksgiving. The outer cartons were heavy corrugated cardboard and seemed to provide ample protection (at least for Greyhound handling) to the inner cartons and ARF components. I did a quick inspection on the Greyhound dock and everything inside was neatly packed, secured from bouncing around, arrived with no obvious visible damage and all parts and pieces present.

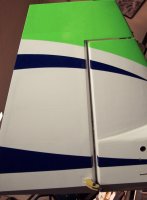
The first thing I usually do is take a sealing iron and go over all the covering and iron out any wrinkles that may have developed and to make sure all the edges are sealed. The covering on this ARF was nicely done; there were some wrinkles but the edges and curved surfaces were cut clean and sealed tight. The trim pieces on the fuse/rudder and top/bottom of the wings, stabilizer and elevators have nice symmetry and clean lines as well. The one area that is a little sloppy is where the vertical stabilizer and fuse come together; that is a tough compound curve to work and have the covering fit in there clean. There is room for improvement here.
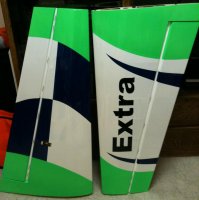
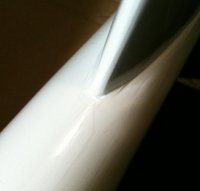
Ironed Wings.jpg Sloppy VS Covering.jpg

On my gas planes I also like to seal the firewall, motor box and fuel deck with Spar varnish. It does a nice job sealing the wood but will still allow the wood to breath with changes in temperature and humidity. The Spar varnish also seems to be resistant to gas/oil spills and exhaust residue.
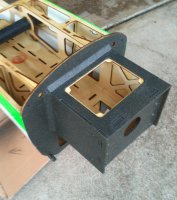
After the Spar varnish I paint the firewall and motor box with Rust-oleum Multicolored Textured spray paint. Even though it’s covered by the cowl I like the look of the uniform color; it’s available in several colors, I like the dark gray. It’s also very resistant to gas and oil.
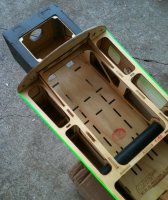
SPAR Fuel Deck.jpg Painted MB.jpg
 

Capt.Roll

70cc twin V2
This doesn't have anything to do with the assembly of the Extra 300 but is related to the finished flying setup.

I have a 100cc Yak that had two 4600mAh 2S2P A123's that supplied the RX, ignition and servo power for the plane. I ran the two large A123's to help with weight aft since my rudder setup was pull/pull and the plane was designed for a 85cc engine, the Yak has a DLE-111. I've been flying the Yak for about a year now and have never been close to using 9200mAh; even after a weekend of flying I can't recall charging back 4600mAh. So yesterday I reconfigured the Yak and moved the rudder servo aft and split the two 4600mAh packs into four 2S1P 2300mAh packs.

There are several positives about doing this.

1. Saved me $60 since I don't have to purchase new A123's for the Extra 300.
2. The Yak is 0.75 pounds lighter, one 4600mAh A123 is about 11.5 ounces.
3. The rudder response on the Yak is much tighter and precise. Even though the pull/pull worked well it seemed a little sloppy.

My biggest concern, not doing this before, was that I screw up two perfectly good A123's and then have to purchase four new packs. The split was not as difficult (but time consuming) as I thought it would be since the reconfigured 2S1P packs test out correctly. However new A123 cells would have been easier to work with since you would not have to deal with existing wiring and previously soldered connection tabs.


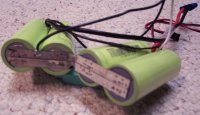
2S2P 4600mAh A123 pack before the reconfiguration.
2S2P A123.jpg


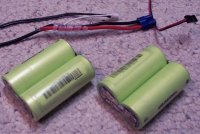
Shrink wrap removed.
2S2P A123 Unwrapped.jpg


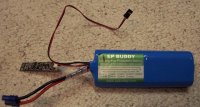
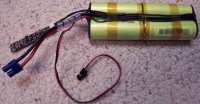
"New" 2S1P 2300mAh A123 packs. The small board with the blue LED on the balance tap is my Fromeco A123 balancer. I use it after several charge/discharge cycles as it is much more precise than the balance charge mode on my charger.
Reconfig 2S1P A123.jpg
 
Last edited by a moderator:

Capt.Roll

70cc twin V2
Below are some additional pics of reconfiguring the A123 packs.

For those of you that build your own A123 packs this is pretty ho-hum stuff. If you’ve been thinking about making your own it’s not overly complicated, especially for a 2S1P configuration. A good soldering station with a chisel tip (approx 0.125” or 3mm width) helps with removing the existing wiring and making the new connections.

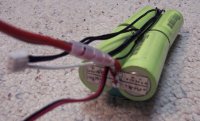
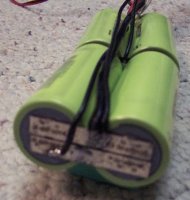
With the blue shrink wrap and end caps removed you can easily see the 2S2P cell arrangement along with the Deans, JST-HX balance and primary discharge lead connections. At this point I heated the solder joints and removed the existing wiring along with the three pieces of yellow tape which left me with four cells that were still connected to each other with metal straps across the negative and positive poles.

2S2P A123 End1.jpg 2S2P A123 End2.jpg 2S2P A123 MidBuss.jpg

I used a Dremel with an abrasive cutoff wheel to separate the cells that were arranged in a parallel configuration; first cut gave me two packs but still in a parallel hook-up; four more cuts and the cells were separated. Remove any sharp edges or burrs with a small jewelers file.

2S2P A123 MidSplit.jpg

From this point it was pretty simple to reconnect the cells into a 2S1P setup. I used glass reinforced packaging tape to hold the cells together. Next, pick one end of the cells and bridge the positive and negative poles together with a commercially available battery bar or something similar. I used a small piece of copper grounding strap (approx 0.25” X 0.5”) that I already had.

Solder your primary discharge leads to the positive and negative poles on the opposite end.

Next, solder the balance connector leads. Since this is a 2S1P arrangement you’ll have three connections. The JST-HX balance tap I used has three colored wires; black, blue and red. Red goes to positive, black goes to negative and the blue lead goes to the battery bar that connects the +/- poles together.

Final steps are to check the discharge and balance tap connections with a multi-meter to make sure everything is correct electrically. If good, cover the poles with the protective end caps, slip the cells into some shrink wrap (I used 70mm and it was a tight fit) and use low heat to tighten up the shrink wrap…………..Done!

Complete 2S1P A123.jpg

Just be careful not to short any of your connections. I don’t think it will ruin the cells if you do but it could mess up your wiring and it will get your attention.

There is a very good "how to" using new A123 cells located at the URL below. It was the guide i used for reworking my packs.

http://www.teamflyingcircus.com/forum/f25/how-a123-packs-2850/
 
Last edited by a moderator:

Capt.Roll

70cc twin V2
Back to assembly of the Extra 300 as I was able to get several things done yesterday.

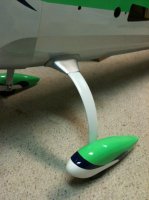
Didn't particularly care for the look of the black CF landing gear on this airframe so I painted it white. I like the look when installed on the fuse with the LG cuffs and wheel pants.

Painted LG.jpg

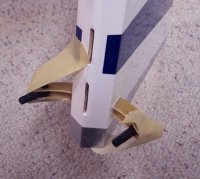
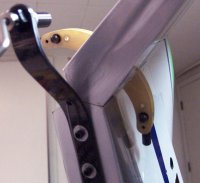
Also was able to glue the rudder control horn. The factory cut slots had about a 3 degree tilt; a little re-work to the slots with a file and some tape to hold the control horns as the epoxy set I was able to get them installed level.

Rudder CH Positioning.jpg Rudder Control Horn.jpg
 

Capt.Roll

70cc twin V2
Made a little more progress this afternoon.

I like to have the rudder removable on my planes. When packing up to head to the field an extra 10 inches of space can sometimes make a difference. I was able to pack a 30cc and 100cc in my mid SUV, I'm hoping to be able to pack the 100cc and 50cc Extra together.

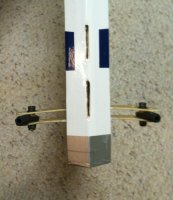
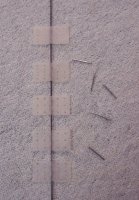
This ARF has the flat hinges; haven't worked with these before. My other planes up to this point had the Robart hinge points and they were very easy to work with. The hinge pins are easy to push out and the new removable pin is 0.047" steel music wire.

Flat Hinges.jpg

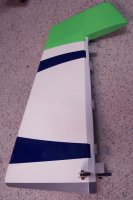
I test fit the wire and hinges just to get an idea of how much vertical play I have in the pre-cut hinge slots and to check the gap along the length of the hinge and to check the gap between the top of the vertical stabilizer and rudder counterbalance. Once you start gluing you don't want any surprises. The wire is cut long right now as it will go thru the CF tail wheel bracket and then be bent back and lay flush with the fuse. I'll make some type of a small latch and attach it to the CF tail wheel bracket via one of the mounting screws. That will keep the pin from working loose and dropping out of the hinges when flying.

Rudder Test Fit.jpg Rudder Test Fit1.jpg

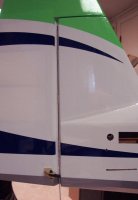
Rudder hinges are epoxied and it looks like a pretty good install. No bind in the alignment as the hinge wire is easy to install and remove and the rudder swings freely. The gap along the length of the hinge line and counterbalance is consistent and not too wide. Also looking at the bottom of the rudder/fuse, the bevel on the fuse and rudder is a nice flush fit. I also like that the the rudder control horns will not be digging into the side of the fuse. I didn't take a picture of the throw to the other side but it is the same. I took a quick measurement and it looks to be in the 40 - 45 degree range. Also if you look close you can also see how the hinge wire comes through the CF tail wheel bracket and is then bent to lay along the CF mounting screws. I haven't made the hinge wire retaining hook but it shouldn't take long.

Rudder Installed.jpg Rudder Throw.jpg
 
Last edited by a moderator:

gyro

GSN Contributor
Loving this build Rex! I'm so impressed with the quality of these OMP airplanes... Will definitely need to get one soon!
 

Capt.Roll

70cc twin V2
Made some good progress yesterday.

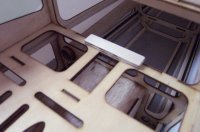
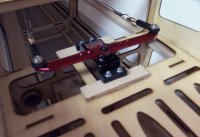
My rudder servo is approx 45mm high and bottomed out on the canister tunnel; I think the typical full size servo is around 39-40mm high. I used some 1/4" ply and made a shelf for the servo mounting ears to sit on. I don't think the added height will cause any operational issues with the pull/pull setup.

Once I make the wire loops in my pull/pull cable and crimp the small brass tubes that keep the wire from slipping I like to put some shrink tube on the assembly.

No pictures but I was able to get the elevator and aileron servos installed and the initial setup configured in the TX for correct orientation, centering, rates, and roughed in the throws/end points for all the servos except throttle.

Rudder Servo Mount.jpg Rudder Servo.jpg Aft Pull Wire.jpg
 

SnowDog

Moderator
that looks like a nice rudder servo install; I'm guessing the added height won't be a problem...good idea on the shrink wrap!
 
Top