• If you are new to GiantScaleNews.com, please register, introduce yourself, and make yourself at home.

    We're 1st in Giant Scale RC because we've got the best membership on the internet! Take a look around and don't forget to register to get all of the benefits of GSN membership!

    Welcome!
  • Unless you are a paid advertiser NO more posting advertisement in the individual vendor forums. You may post in the Manufacturer's Announcements section only but only ONCE a month unless your a paid advertiser.

30% Pilot Carbon EDGE Build & Discussion

bruceman

50cc
Hi BB,

Not using A123's, I agree A123 packs would be very heavy. I'm using Fromeco Lion packs. The carbon EDGE uses all high voltage servos, the power board uses two packs for redundancy and separation of the servo power from the receiver. A third pack is used for the ignition on a smart-fly regulator for ignition isolation through the optic kill in the power board. The fourth pack is used for he smoke pump, I have read that the Sullivan pumps like to suck up mah's. The pump battery is easily removable when not using smoke, which is most of the time. I guess it's personal preference, but I like the confidence of redundancy and isolation even in this size plane. I've seen too many planes take a dirt nap from trying to suck everything out of a couple batteries and one takes a poop.
 

Bbcorvette18

70cc twin V2
Yea that makes since ive got 3 1100 a123s in my 30% sbach but im thinking about jumping up to twp 2300s and a tech aero
 

bruceman

50cc
In post #9, I began discussing the tools necessary to work with carbon fiber. I forgot to mention that when using the adhesive sheeting to bond the carbon fiber, heat can also be used instead of a pressure roller. A covering iron with an old sock works really well too.

In this picture, I am showing the components to laminate a piece of carbon fiber to a piece of thin ply. the adhesive is 3M 468MP sheet adhesive. If ordering your carbon fiber from Protech Composites, you can order the adhesive with the carbon fiber.
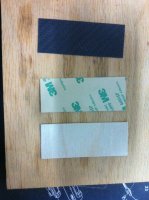
photo 1.JPG

In the next picture I am showing the adhesive applied to the light ply, peel off the un-printed side of the adhesive and apply to either the wood or the carbon fiber. I usually apply it to the carbon fiber, then trim the outline with an exacto knife to remove excess adhesive. after applying the first side of the adhesive, peel off the printed side of the adhesive and apply to the other surface to be laminated. MAKE SURE YOUR ALIGNMENT IS GOOD. Using either heat or a pressure roller, secure the adhesive to the stack.
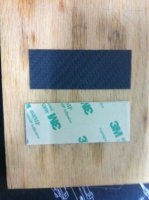
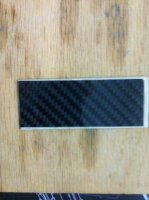
photo 2.JPGphoto 3.JPG
 
Last edited by a moderator:

bruceman

50cc
These are examples of shapes that can be produced from carbon fiber. Cutting and shaping carbon fiber is much the same as working with wood. You can create almost any shape using the tools that I previously listed. Make sure you use a surgical grade mask!

photo.JPG
 

bruceman

50cc
Attached are pictures of the completed work under the cowl. inside the motor box you can see the bellcrank choke design. This design worked out very well to align the choke rod with the cowl opening left of the prop opening.

photo h.jpg photo 2.JPG
 
Top