• If you are new to GiantScaleNews.com, please register, introduce yourself, and make yourself at home.

    We're 1st in Giant Scale RC because we've got the best membership on the internet! Take a look around and don't forget to register to get all of the benefits of GSN membership!

    Welcome!

IMAC Delro 2.5M Raven Build

HRRC Flyer

GSN Sponsor Tier 1
Hey @Wacobipe,

I was on RCSB last night reading a thread by someone building a 1/5 scale and a 1/4 scale Ziroli F9F Panther. The man found hatch covers where the servo actually mounted to the hatch like the one jetpainter shows above. The difference being, the hatch I saw actually had a molded cover over the servo arm so the only thing you saw from the outside was the control rod leaving the hole and connecting to the control surface. The one thing I'm not sure of is the hatch I saw would limit the servo travel to much for your Extra. If you'd like, I will go back through the thread and see if I can find where the hatch covers came from.

I cannot wait to see your raven finished. It's going to be AWESOME. . . . . . . :yesss:
 

Wacobipe

100cc
Hey @Wacobipe,

I was on RCSB last night reading a thread by someone building a 1/5 scale and a 1/4 scale Ziroli F9F Panther. The man found hatch covers where the servo actually mounted to the hatch like the one jetpainter shows above. The difference being, the hatch I saw actually had a molded cover over the servo arm so the only thing you saw from the outside was the control rod leaving the hole and connecting to the control surface. The one thing I'm not sure of is the hatch I saw would limit the servo travel to much for your Extra. If you'd like, I will go back through the thread and see if I can find where the hatch covers came from.

I cannot wait to see your raven finished. It's going to be AWESOME. . . . . . . :yesss:
Interesting idea...I think I'm more comfortable with a full box built into the wing from a strength/rigidity perspective but I'd like to see them if you can find them. One can never have too many ideas to consider!
 
  • Like
Reactions: Jlc

HRRC Flyer

GSN Sponsor Tier 1
Hey @Wacobipe,

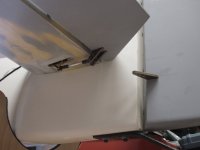
Here they are. They are made for both full size servos and mini servos. The ones in the picture below are the full size servo covers and the man is using JR8411 mounted to them for this application. There is another piece that goes with them that locks the servo in place, but I could not find a picture of it for you. This is just a thought, but you could still build a box and epoxy blocks into the corners to screw this cover to. The link is below the picture, but it is a company in the UK. I'd think a place like McMaster Carr would sell these as well. Maybe someone on this side of the pond knows where you can find them. BTW, the link doesn't work directly, but it does give you the correct web site when you hit it. You will just have to go through the site and find the covers again.
Panther.jpg


http://www.slecuk.com/catalogue/Servo-Mounts.html
 
Last edited:

Wacobipe

100cc
It is with great trepidation that I make this post...given my terrible track record of making any progress at all. However, I've been making some progress and wanted to share!
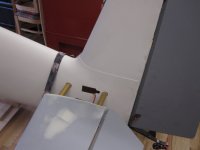
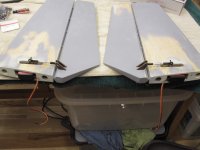
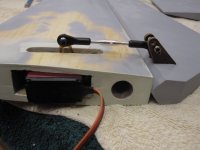
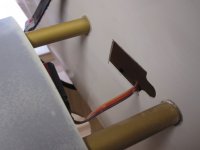
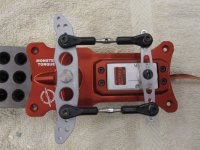
The last couple days I've been working on the servos and control horns/linkages for the tail group. Servos are mounted directly in the root of each elevator, I am using 1" Secraft V3 servo arms, titanium control linkages with Spot-on R/C ball links, and the stock G10 control horns included with the kit.


Tail Control Horns (2).JPG Tail Control Horns (4).JPG Tail Control Horns (1).JPG Tail Control Horns (5).JPG Tail Control Horns (3).JPG
 

Wacobipe

100cc
The rudder tray has not yet been mounted so I haven't cut in the slots for the pull-pull cables to exit the fuselage....but here is a picture of the rudder servo tray for your viewing pleasure! My goal with this is to be able to have a snug (not tight) pull-pull setup without loading the bearings on the servo.

Rudder tray.JPG
 

HRRC Flyer

GSN Sponsor Tier 1
Hey @Wacobipe,

Don't sweat it Buddy. I went to look for my Laser restoration thread a while back and I had to go back to page 3 to find it. . . . :laughing:

It's like my grandmother told me about 30 years ago. She said if you have a BIG job to do, never dwell on how much work you have to do before you're finished. Celebrate the work you've already done. That little piece of advice still helps me out today. . . . :yesss:.
 

Wacobipe

100cc
This is just too stupid not to share for everyone else's amusement!

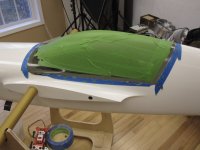
Even though I had fixed the original canopy and it was usable, I decided I could do better and also eliminate the hinged canopy idea in favor of a pin and latch setup. Delro had already sent me a replacement canopy and frame so I decided to go for it.

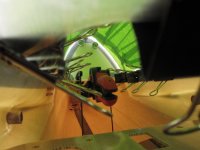
I got everything prepped and this time I clamped the canopy frame to the fuselage very tightly and all the way around the perimeter on the inside to make a very accurate fit...which was easy as it was wide open! Then I glued the canopy to the frame and tightly taped the canopy all the way around to make sure I had a good fit, and left the shop to let the Hysol set. All was well until I came down to the shop this morning to see how the results turned out! I was wondering why the canopy was stuck to the fuse (thinking I had gotten glue overflow ) when I remembered there were about 50 clamps...that are now glued inside the fuselage and not easily accessible! That's an Einstein move!:rolleyes:

Thankfully there is a hatch at the front of the plane for the engine...and I think my arm is ALMOST long enough to reach the clamps! This should only take an hour or 2 to extract them this morning! :woohoo!:

Well-Clamped Canopy (2).JPG Well-Clamped Canopy (1).JPG
 
  • Like
Reactions: Jlc

Jetpainter

640cc Uber Pimp
This is just too stupid not to share for everyone else's amusement!

Even though I had fixed the original canopy and it was usable, I decided I could do better and also eliminate the hinged canopy idea in favor of a pin and latch setup. Delro had already sent me a replacement canopy and frame so I decided to go for it.

I got everything prepped and this time I clamped the canopy frame to the fuselage very tightly and all the way around the perimeter on the inside to make a very accurate fit...which was easy as it was wide open! Then I glued the canopy to the frame and tightly taped the canopy all the way around to make sure I had a good fit, and left the shop to let the Hysol set. All was well until I came down to the shop this morning to see how the results turned out! I was wondering why the canopy was stuck to the fuse (thinking I had gotten glue overflow ) when I remembered there were about 50 clamps...that are now glued inside the fuselage and not easily accessible! That's an Einstein move!:rolleyes:

Thankfully there is a hatch at the front of the plane for the engine...and I think my arm is ALMOST long enough to reach the clamps! This should only take an hour or 2 to extract them this morning! :woohoo!:

View attachment 52909 View attachment 52908
At least you can laugh about it.;)

And since I've made a move or two like that in my life I couldn't resit posting this.
 

Attachments

  • ar131070344825846.jpg
    ar131070344825846.jpg
    113.7 KB · Views: 407
Top