You are using an out of date browser. It may not display this or other websites correctly.
You should upgrade or use an alternative browser.
You should upgrade or use an alternative browser.
Scale Don Smith P-51 Mustang
- Thread starter stangflyer
- Start date
Snoopy1
640cc Uber Pimp
Stang just a question when you build the plane. Are going to build the plane until it is able to fly then test fly it a couple of times and then paint it and spend the next year or so finishing and detailing it. Like my buddy use to say it is never finished you decide to stop working on it and fly it.
stangflyer
I like 'em "BIG"!
It is uncertain as of yet whether I will build it, test fly it then finish it. Or finish it then maiden it. I have seen people do it both ways. My normal practice is no plane goes in the air until it is 100% as it can be at time of maiden. Certainly not everything always goes according to plan. Minor adjustments after maiden, post maiden inspection will sometimes, (though rarely) produce tweaks or alterations. But for the most part, I will not fly a plane until it is done. This Mustang however may take a different turn. I have not completely convinced myself that I want to glass and paint it. I am trying desperately to keep the weight down and looking for alternatives every step of the way. And at the same time, doing some custom reinforcing of the airframe without adding weight. Or at least that's the plan. I want to be able to fly it..."someday". And if I glass it, then paint it and wait until it is 100% complete before maiden, I will probably be pushing up daisies by then. LOL. So to answer your question, I just really don't know yet.Stang just a question when you build the plane. Are going to build the plane until it is able to fly then test fly it a couple of times and then paint it and spend the next year or so finishing and detailing it. Like my buddy use to say it is never finished you decide to stop working on it and fly it.
stangflyer
I like 'em "BIG"!
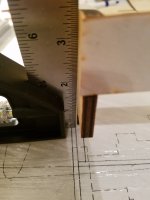
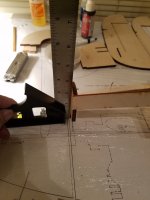
And speaking of building, I have been waiting on glues to cure on the Velox so I have spent the last couple of evenings working on the Mustang. I have done a lot of measuring and test fitting and basically one step at a time. I am going rather slowly with this. Checking myself, then rechecking myself then rechecking myself a third time. So I can say for all sureties, this build is going to take a while. The fuse is not hard at all. In fact, very rapid and easy build. But I am at the same time trying to be meticulous.
I started by laying out the perspective nose formers. F1, F2 and F3 make up the nose section. They are basically glued onto the top fuse crutch and the sides of the motor box.
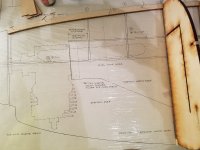
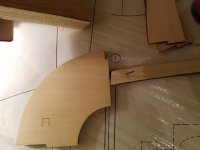
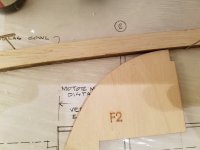
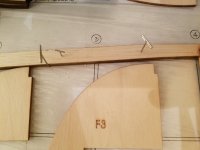
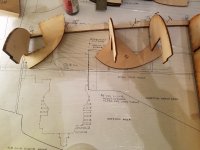
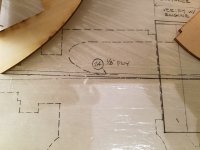
Once I had the formers placed, I started test fitting the motor box supports and spine. I like the "slip" fit of the motor box parts. I feel that the 95cc engine that is recommended for this plane is probably fine an the fuse can handle the weight and the power. But adding the nearly 16 pound Kolm 150 is already beginning to present some issues that have to be worked thorough one at a time.
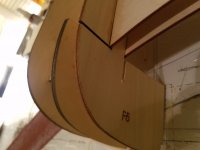
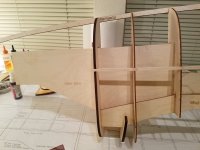
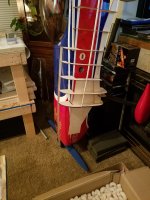
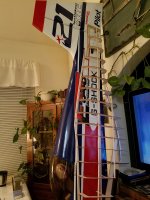
I just had to see what the size comparison of the 1/4 scale Mustang is in relation to a 100cc airframe. Laying the bare bone skeleton against my 107" Pilot Edge gave me a perspective I was not really expecting.
So yeah, she (the Mustang) will definitely be slightly larger than a 100cc airframe.
I needed to trial fit the Kolm 150 in the engine compartment to get an idea of how I needed to proceed with that step. I would have hated to get too far ahead of myself and then have to start cutting things out. The Beast tre cylinder is right at about 14" long and therefore I will need to make the necessary revisions before I get to far.
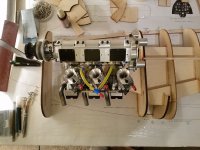
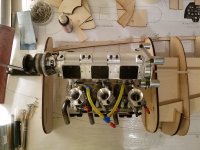
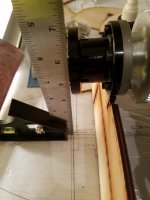
After sizing everything, I have decided that I will "not" glue formers F2 and F3 to the motor box spine. Reason being, most of that spine is going to be cut to allow the Kolm to "snuggle" in beneath those perspective formers.
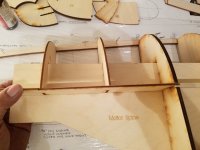
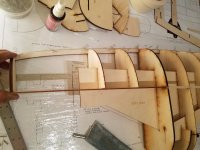
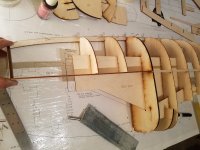
However the motor spine is placed and CA'd to the remaining formers with the proper alignment set.
Now it's on to the next phase. Leap forward to next post...
I started by laying out the perspective nose formers. F1, F2 and F3 make up the nose section. They are basically glued onto the top fuse crutch and the sides of the motor box.


Once I had the formers placed, I started test fitting the motor box supports and spine. I like the "slip" fit of the motor box parts. I feel that the 95cc engine that is recommended for this plane is probably fine an the fuse can handle the weight and the power. But adding the nearly 16 pound Kolm 150 is already beginning to present some issues that have to be worked thorough one at a time.


I just had to see what the size comparison of the 1/4 scale Mustang is in relation to a 100cc airframe. Laying the bare bone skeleton against my 107" Pilot Edge gave me a perspective I was not really expecting.
So yeah, she (the Mustang) will definitely be slightly larger than a 100cc airframe.


I needed to trial fit the Kolm 150 in the engine compartment to get an idea of how I needed to proceed with that step. I would have hated to get too far ahead of myself and then have to start cutting things out. The Beast tre cylinder is right at about 14" long and therefore I will need to make the necessary revisions before I get to far.


After sizing everything, I have decided that I will "not" glue formers F2 and F3 to the motor box spine. Reason being, most of that spine is going to be cut to allow the Kolm to "snuggle" in beneath those perspective formers.


However the motor spine is placed and CA'd to the remaining formers with the proper alignment set.


Now it's on to the next phase. Leap forward to next post...
Last edited:
stangflyer
I like 'em "BIG"!
So, tonight I did the final gluing of the motor spine and added some support to the wing base spine. The Mustang builds very light and very strong....for the size engine recommended. For the beast Kolm, not so much in my opinion.
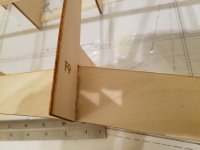
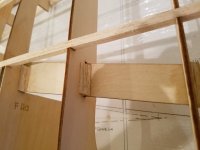
I added 1/4" tri-stock to the back sides of the fuse formers that are attached to the wing base spine. As I have mentioned, I am trying desperately to keep the weight down with this build. Yet at the same time, I know from simple logic, this airframe probably will not withstand the pressure and forces produced by the big three cylinder. So adding the tri-stock should increase the integrity and the strength of the fuselage without adding a butt load of weight. Plus, I guess it will give me a little peace of mind knowing the DS Stang is built durable and reliable.
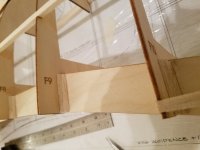
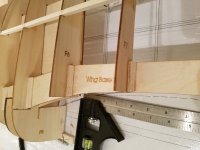
Once I had all the tri-stock glued in, I slid the motor box spine back in for the final gluing process. I'm not using a bunch of exotic glues or technics. Just good ole medium CA as an initial gluing agent.
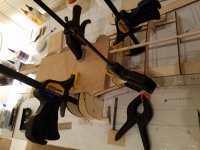
After double checking the alignment of the motor box spine, I set out to reinforce the spine to the formers with 1/2" tri-stock. Again, not originally designed and more than likely not needed..."if" you are using the recommended engines.
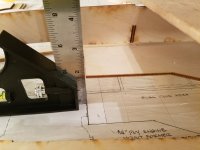
These three formers, (F4, F5 and F6) are the main support for the motor box. So having it beast strong was my only priority. 1/2" tri-stock and epoxy was the call for this step. Again, adding a ton of strength to the longitudinal plane but not increasing the weight a significant measurable amount.
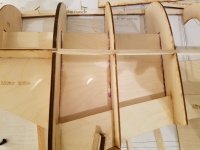
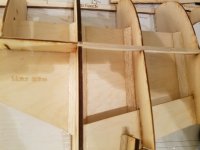
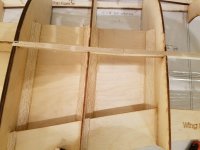
The last thing I need is having that $5000.00 dollar engine falling off the nose of that Mustang. Either because it is powerful enough to rip it right from the plane, or due to a harder than desired landing. I would kill myself if anything happened to that engine. So to prohibit that from happening, (I hope) I plan to add some carbon rods to the structure. Besides the big carbon rods that will eventually support the nose weight of the engine, I wanted something in the plane to support the front of the fuse.
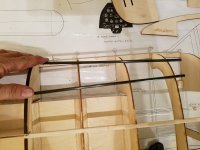
I have been trying to decide exactly how I want to achieve this upgrade. I feel that spanning the distance between F4 through F6 and terminating at F9 should give me exactly what I am looking for.
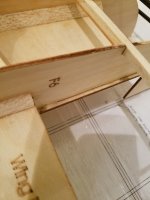
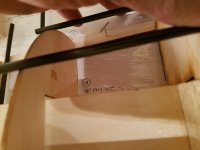
So what I will do is lay a carbon rod "Under" the top fuse crutch to support the top of the fuse to help it bear the weight of the engine. Also, I will be adding three more carbon rods along the sides of the fuse running the same length as mentioned earlier. From F4 straight through to F9. These carbon rods are the same ones I used in wings of the Jtec Pitts build from two years ago. And I can tell you all with absolutely certainty, those wings are strong as an Ox. There is no doubt in my mind, that even though these seven rods, (when placed around the nose of the Fuse) are very light... that fuse will be strong enough to withstand a nuclear blast.
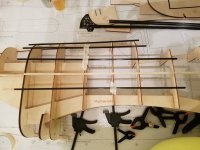
Once these rods are glued in permanently, I believe I will be ready to sheet the middle of the fuse. Then remove it from the board, flip the left fuse side over and build the right fuse side on top of it. I will have to go very slowly, paying attention to detail as I build. I have to take into consideration the tail gear mounts as well as elevator and rudder servo arrangement and location. I need to get the Velox wings out of the press and get some Christmas shopping done tomorrow. So I am really not sure when I will have more to report on the big "Stang". Be patient fellas. More progress is definitely on the way.
I added 1/4" tri-stock to the back sides of the fuse formers that are attached to the wing base spine. As I have mentioned, I am trying desperately to keep the weight down with this build. Yet at the same time, I know from simple logic, this airframe probably will not withstand the pressure and forces produced by the big three cylinder. So adding the tri-stock should increase the integrity and the strength of the fuselage without adding a butt load of weight. Plus, I guess it will give me a little peace of mind knowing the DS Stang is built durable and reliable.


Once I had all the tri-stock glued in, I slid the motor box spine back in for the final gluing process. I'm not using a bunch of exotic glues or technics. Just good ole medium CA as an initial gluing agent.

After double checking the alignment of the motor box spine, I set out to reinforce the spine to the formers with 1/2" tri-stock. Again, not originally designed and more than likely not needed..."if" you are using the recommended engines.

These three formers, (F4, F5 and F6) are the main support for the motor box. So having it beast strong was my only priority. 1/2" tri-stock and epoxy was the call for this step. Again, adding a ton of strength to the longitudinal plane but not increasing the weight a significant measurable amount.


The last thing I need is having that $5000.00 dollar engine falling off the nose of that Mustang. Either because it is powerful enough to rip it right from the plane, or due to a harder than desired landing. I would kill myself if anything happened to that engine. So to prohibit that from happening, (I hope) I plan to add some carbon rods to the structure. Besides the big carbon rods that will eventually support the nose weight of the engine, I wanted something in the plane to support the front of the fuse.

I have been trying to decide exactly how I want to achieve this upgrade. I feel that spanning the distance between F4 through F6 and terminating at F9 should give me exactly what I am looking for.


So what I will do is lay a carbon rod "Under" the top fuse crutch to support the top of the fuse to help it bear the weight of the engine. Also, I will be adding three more carbon rods along the sides of the fuse running the same length as mentioned earlier. From F4 straight through to F9. These carbon rods are the same ones I used in wings of the Jtec Pitts build from two years ago. And I can tell you all with absolutely certainty, those wings are strong as an Ox. There is no doubt in my mind, that even though these seven rods, (when placed around the nose of the Fuse) are very light... that fuse will be strong enough to withstand a nuclear blast.

Once these rods are glued in permanently, I believe I will be ready to sheet the middle of the fuse. Then remove it from the board, flip the left fuse side over and build the right fuse side on top of it. I will have to go very slowly, paying attention to detail as I build. I have to take into consideration the tail gear mounts as well as elevator and rudder servo arrangement and location. I need to get the Velox wings out of the press and get some Christmas shopping done tomorrow. So I am really not sure when I will have more to report on the big "Stang". Be patient fellas. More progress is definitely on the way.
pawnshopmike
Staff member
Wow. You are making short work of this baby! I fully expect a New Year’s Day madien.

Snoopy1
640cc Uber Pimp
Stang just trying to help on my last project I used this instead of epoxy, really liked it and easy to use and light. It is expensive and you can do it in the hose. Take a look and let me know . Just could not get the video copied in GSN but got to work after a while.
Last edited:
stangflyer
I like 'em "BIG"!
Yeah, New Years Day maiden in the snow about 2039.Wow. You are making short work of this baby! I fully expect a New Year’s Day madien.

