• If you are new to GiantScaleNews.com, please register, introduce yourself, and make yourself at home.

    We're 1st in Giant Scale RC because we've got the best membership on the internet! Take a look around and don't forget to register to get all of the benefits of GSN membership!

    Welcome!

Hostetler Cessna 336 Skymaster

Patto

70cc twin V2
What about countersinking your wing bolts and capping the holes with magnet attached plugs?

I'm not sure what you mean by countersinking the wing bolts. I did consider bolting them in from the inside and having blind nuts in the wings. I'd access the inside of the fuse through the door (that I have yet to cut out) and screw in the bolts from inside the fuse.
 

Patto

70cc twin V2
I recently realized that with the actual construction of the airframe complete (except for the struts) it is now time to plan and take care of the final assembly setup tasks:

-Ignition installed for rear engine. Front ignition is ready to be mounted on front firewall after it is glassed

-Autostart control units mounted in the nose

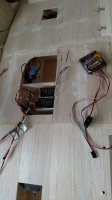
-Both receivers and light controller are mounted in the wing center section. This seemed the simplest place to mount them and made setting up the control surfaces easier for now. Early on I installed the servos for the throttles, chokes, and nose wheel control in the fuselage and they are already programmed into the transmitter

-Lots of soldering and wiring for the plugs for the lights and control surfaces. The right wing and lights are all set up and ready to go

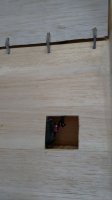
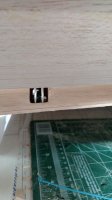
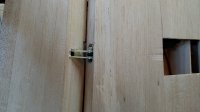
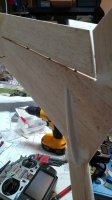
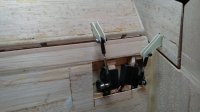
-Control horns are temporarily installed in the right wing for both flaps and the aileron. I used the technique I saw to punch through the trailing edge of the wing and have the horn retract into the wing. It was not the simplest setup, but it hides the control horns and seems to work pretty well. The ailerons may later need to be modified, but only flight will answer whether or not there will be enough leverage at higher speeds to operate them effectively

-Some reinforcing will be needed for the control horns for the ailerons since this was not the original plan, but overall I'm really happy with the way it turned out

Next weekend I hope to finish the left wing surfaces, wiring, etc. All of the soldering took a lot longer than I would have liked. Lots of wires going a lot of places for different purposes. I even found two wires that I could not figure out where they went for a little while.

I decided I'm going to TRY using the balsa that came with the kit to make the struts and strut fairings. My only concern is that the balsa may not be strong enough, but hopefully glassing it will fix that issue.

A big roll of fiberglass arrived at my door this week along with some Z-Poxy finishing resin. Getting close to needing those things! I'm getting excited...
 

Attachments

  • IMG_20170506_172646557.jpg
    IMG_20170506_172646557.jpg
    236.2 KB · Views: 320
  • IMG_20170507_123319848.jpg
    IMG_20170507_123319848.jpg
    155.4 KB · Views: 306
  • IMG_20170507_123330746.jpg
    IMG_20170507_123330746.jpg
    164.5 KB · Views: 295
  • IMG_20170507_151221717.jpg
    IMG_20170507_151221717.jpg
    221.4 KB · Views: 300

mlgclg

New to GSN!
Looking good just remember on this one the wing struts are not functional, they only have to stay on when in flight balsa should be good
 

Patto

70cc twin V2
Looking good just remember on this one the wing struts are not functional, they only have to stay on when in flight balsa should be good

Yes, you're right. I just don't want them to stretch too much and tear off in flight.
 

Patto

70cc twin V2
I've moved onto the elevator and rudder linkage setups.

Early on in the build when I built the horizontal stab, I installed the servos onto plates that would be screwed into the stab. I wasn't completely satisfied with the strength of the setup but didn't want to install the servos inside the stab due to the lack of easy access.

Well, I went ahead and more-or-less permanently installed the servos inside the stab. They could be removed with some surgery, but otherwise they are likely not going anywhere. All I can do is pray that I don't need to replace one. No, it isn't ideal, but it is going to have to do given the lack of an apparent better option. We already went over why the nyrod setup that Hostetler recommended would not be the best option.

That has taken up a lot more time than it should have. I now have one rudder and one side of the stab cut for control horns with push rods made and installed. As you can see in the picture, it took some surgery to get it as close to right as I could.

Routing the wires was a PITA.

The other picture is of the... um, I don't know what it is, but all the Skymasters have them. They're like an extension of the stab, but well forward of the stab.
 

Attachments

  • IMG_20170513_223141560.jpg
    IMG_20170513_223141560.jpg
    218.5 KB · Views: 377
  • IMG_20170513_223220374.jpg
    IMG_20170513_223220374.jpg
    238.1 KB · Views: 286

Patto

70cc twin V2
Need recommendations for a primer. I ordered a quart of Klass Cote and two colors for the finish. I have the glass cloth and Z-Poxy ready to go.

Just gotta finish up the control surface linkages for the left side of the plane, temp install the cowls and cut them as needed, then it's time to sand and smooth the surfaces out.

Again, your recommendations for a primer would be appreciated. The Klass Cote primer is as not-cheap as the paint itself. I'd like a high quality but hopefully less expensive solution if anyone has a recommendation?
 

Bipeguy03

150cc
Well, I've had pretty good luck with the Finish 1 stuff from NAPA. It sticks well and sands good for not being an expensive primer. Not sure what a quart costs, but the last gallon we bought was $60.
 
Top