You are using an out of date browser. It may not display this or other websites correctly.
You should upgrade or use an alternative browser.
You should upgrade or use an alternative browser.
Scale MattyMatt's Exclusiv Modellbau 50% Challenger II
- Thread starter MattyMatt
- Start date
MattyMatt
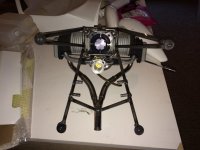
70cc twin V2
Also, all the wiring and servos are in the horizontal stabs and the wings. Running XBus made the wing wiring much easier and will be really easy to put the plane together. I'll go more into the servos and electronic setup later and explain everything.
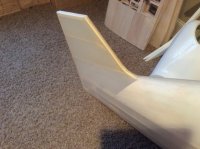
Sunday, I started covering... i have only used Solartex one time for a customers plane several years ago. This stuff is so nice to work with. If you can't cover with this stuff, give up. Lol.
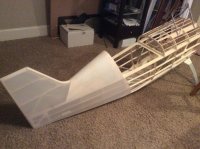
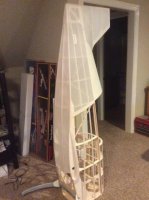
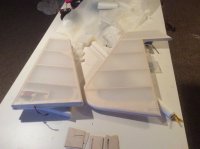
So, the horizontal stabs, elevators, Rudder, Vertical stab and back of the fuse are covered. Here's a few shots:


Wacobipe
100cc
Awesome work MattyMattHere's some shots of it going together:
View attachment 13833 View attachment 13834 View attachment 13835 View attachment 13836 View attachment 13837 View attachment 13838 View attachment 13839 View attachment 13840 View attachment 13841 View attachment 13842 View attachment 13843 View attachment 13844 View attachment 13845 View attachment 13846 View attachment 13847 View attachment 13848 View attachment 13849 View attachment 13850 View attachment 13851
MattyMatt
70cc twin V2
I covered these parts first, so i can pink the fuse and then put the front glass panels on, and then get the canopy mounted.
The scale rib stitch should be here any day, and i already received the correct scale pinking material from Pink-it. I'll give links and more information when i get to that part.
The scale rib stitch should be here any day, and i already received the correct scale pinking material from Pink-it. I'll give links and more information when i get to that part.
Terryscustom
640cc Uber Pimp
Very inspiring work Matt. Thanks for sharing with us!
MattyMatt
70cc twin V2
Ok so the next step is the details... Rib stitch and pinking.
I'm not an expert, but here's what I know. On a typical aerobatic plane, the stitching is every two inches, and 1" wide. The pinking is two inches wide over the ribs, and 4" wide around the leading and training edges.
So, on my 1/2 scale Challenger II, the stitching will need to be every 1" and 1/2" wide. The pinking over the ribs will be 1" and around the leading and trailing edge 2".
MattyMatt
70cc twin V2
There are many ways to make this look real, including using stits and actually stitching it.
For my finish, I'm using natural solartex as covering.
There are two products that I will be using for the stitching and pinking. I've never used them before.... But the two company owners were very great to work with.
For the stitching: Scale Rib Stitch, http://www3.telus.net/alb2157/index.htm It is a stick on rib stitch. I ordered his half scale kit, which is what I measured that I needed. Stitching is 1" apart and comes with 36" x 2" wide strips that you need to cut the width you want.
For the Pinking: http://pink-it.net/new_pink-it_2012_002.htm It is pinking made from Solartex. I got 1" and 2" wide, and Gary Seth the correct number of pink cuts.

