You are using an out of date browser. It may not display this or other websites correctly.
You should upgrade or use an alternative browser.
You should upgrade or use an alternative browser.
Sport The 182 gets "Gassed"
- Thread starter stangflyer
- Start date
ChickenBalls
"Cool Guy"
I like FAT girls
stangflyer
I like 'em "BIG"!
Indeed! The five pounds was actually a sarcastic number, but probably not too far off the truth. The Saito 180 outweighs the DLA by a good fair amount, loose the weight of the starter system, (1.3 pounds) the huge 8.4 Nimh battery that was used for the starting system, (just shy of a pound) the weight of the on board glow battery, (another 6 ounces) all the supports for the starter, starter switch, glow switch, starter and glow servos and all the wiring crap, (probably at least another 6 or 8 ounces). And the extra lead I had to put in the ass to balance it, When ya add it all up, it's a fair amount. I think if I remember correctly, I weighed every component before installing it. Just can't remember the exact numbers. But one tiny lil LiIon for the ignition that weighs like nothing. The only real dead weight is the 3300 mah sub "C" Nimh pack. For the weight savings of about 8 ounces, (which is the extent of the only weight difference of rx. batteries) it wasn't enough of an advantage to put HV servos throughout the plane. Originally it weighed over 19 and a half pounds. It flew awesome, but could feel the weight upon landings. I'll weigh it again once all done.5 lbs? Quite the diet you put this plane on.
dhal22
GSN Sponsor Tier 1
I like FAT girls
Where's the 'don't like' button?
dhal22
GSN Sponsor Tier 1
Indeed! The five pounds was actually a sarcastic number, but probably not too far off the truth. The Saito 180 outweighs the DLA by a good fair amount, loose the weight of the starter system, (1.3 pounds) the huge 8.4 Nimh battery that was used for the starting system, (just shy of a pound) the weight of the on board glow battery, (another 6 ounces) all the supports for the starter, starter switch, glow switch, starter and glow servos and all the wiring crap, (probably at least another 6 or 8 ounces). And the extra lead I had to put in the ass to balance it, When ya add it all up, it's a fair amount. I think if I remember correctly, I weighed every component before installing it. Just can't remember the exact numbers. But one tiny lil LiIon for the ignition that weighs like nothing. The only real dead weight is the 3300 mah sub "C" Nimh pack. For the weight savings of about 8 ounces, (which is the extent of the only weight difference of rx. batteries) it wasn't enough of an advantage to put HV servos throughout the plane. Originally it weighed over 19 and a half pounds. It flew awesome, but could feel the weight upon landings. I'll weigh it again once all done.
Sounds like it will fly even better now.
stangflyer
I like 'em "BIG"!
I'm sure it will. Not that it was any sort of a slouch before. The Saito 180 is a beast of a glow motor. Loved my Saito's. They were my 3w answer to nitro.Sounds like it will fly even better now.
Last edited:
stangflyer
I like 'em "BIG"!
Twin 70 hour weeks have kept me from getting much accomplished on the Cessna. It looks as though we have rain for the next five days and no flying in this part of Idaho, so I will be attacking the Cessna full force this weekend. Pretty sure it will be done today or later this afternoon.
HRRC Flyer
GSN Sponsor Tier 1
I feel your pain, Buddy. I have been off work since Wednesday and it's rained at least a little bit every day so no flying for me either. . . . .It looks as though we have rain for the next five days and no flying in this part of Idaho.
 . That's OK though, I am getting some R&R so it's all good.
stangflyer
I like 'em "BIG"!
Well here I am again. What a surprise huh? LOL... I am just almost done with the Cessna. Lets see what I got done today.
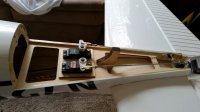
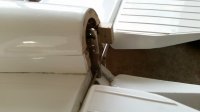
I started out by making sure the servos in the tail were still all good to go. Once that was done, I slipped on the bottom tail section. I noticed that in the two plus years that she has been standing in the corner, apparently the tail cone got bumped and knocked one of the tail cone bolt blocks loose. No big...nothing a little CA won't fix.
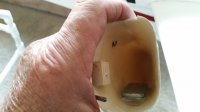
After I re-attached the block, it was time to break out the new cowl that has been hiding in the box for almost three years.
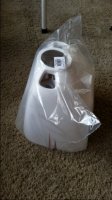
Since I used the original cowl that was cut for the Saito 180, then adapted to fit the 32 gasser, I used it as a pattern for the new cowl. This is one of those jobs that I just "LOVE" to do. It's always fun to whack up a brand new cowl.
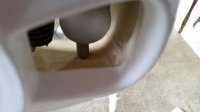
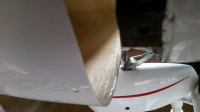
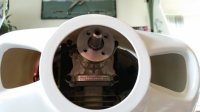
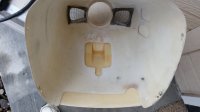
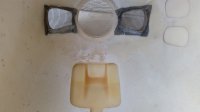
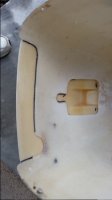
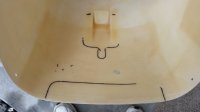
I figured this would expedite the cutting process and leave more margin for error. I never seem happy with cutting a cowl, but what ya gonna do right?
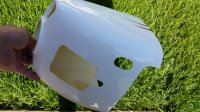
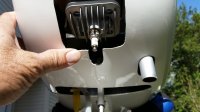
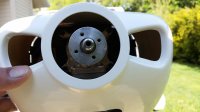
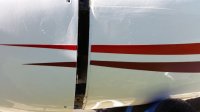
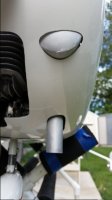
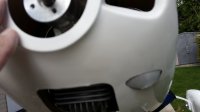

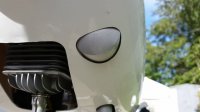
Cut-fit, cut-fit, cut-fit...wow, tedious. Ugh... but it's coming along.
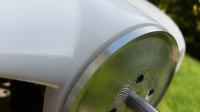
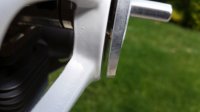
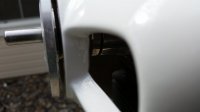
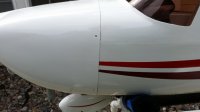
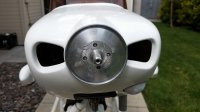
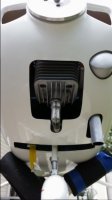
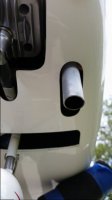
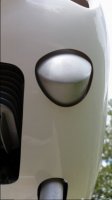
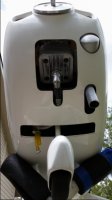
Although lots of cutting and fitting needed to be done, the cowl came out looking pretty good. Now to attach it to the fuse and drill the holes for mounting.
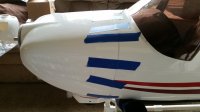
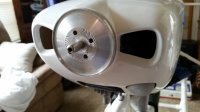
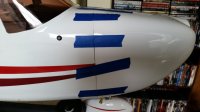
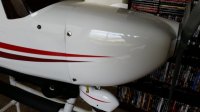
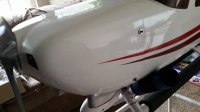
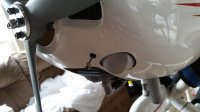
Once the mounting holes were drilled and the cowl was attached, I restriped the cowl to match the stripes on the fuse. After that, I made provisions for the choke rod. I like using the older style servo grommies for the choke rod holes. It cleans up the look a tad and helps eliminate the vibration of the rod on the cowl. I also added my normal little touch of screen door material to simulate radiators in the cowl openings.
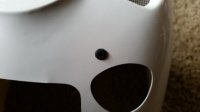
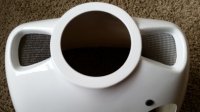
Now with all this done, all that is left is to finish up the servos in the wing. I got started this afternoon but then realized two of my servos are not programmable so I will need to order two for the ailerons. I will take the HS 5625's I was using on the ailerons and shift them over to the flaps since they need to be programmable servos as well. Also still waiting on the spinner to arrive. I sure hope it makes it this week. I am just so close to be done. It would suck to not be able to do a maiden simply because a spinner is holding me up. I guess I could always forgo the spinner and fly it the way it is, but that just wouldn't be right.
I will try to get the start up of the motor video posted shortly. And tomorrow I will get the flaps taken care of. Then it's just bolt in the aileron servos, put on the spinner, balance and flyyyyyyyyy!!
Stay tuned... more to come.
I started out by making sure the servos in the tail were still all good to go. Once that was done, I slipped on the bottom tail section. I noticed that in the two plus years that she has been standing in the corner, apparently the tail cone got bumped and knocked one of the tail cone bolt blocks loose. No big...nothing a little CA won't fix.


After I re-attached the block, it was time to break out the new cowl that has been hiding in the box for almost three years.

Since I used the original cowl that was cut for the Saito 180, then adapted to fit the 32 gasser, I used it as a pattern for the new cowl. This is one of those jobs that I just "LOVE" to do. It's always fun to whack up a brand new cowl.


I figured this would expedite the cutting process and leave more margin for error. I never seem happy with cutting a cowl, but what ya gonna do right?


Cut-fit, cut-fit, cut-fit...wow, tedious. Ugh... but it's coming along.


Although lots of cutting and fitting needed to be done, the cowl came out looking pretty good. Now to attach it to the fuse and drill the holes for mounting.


Once the mounting holes were drilled and the cowl was attached, I restriped the cowl to match the stripes on the fuse. After that, I made provisions for the choke rod. I like using the older style servo grommies for the choke rod holes. It cleans up the look a tad and helps eliminate the vibration of the rod on the cowl. I also added my normal little touch of screen door material to simulate radiators in the cowl openings.


Now with all this done, all that is left is to finish up the servos in the wing. I got started this afternoon but then realized two of my servos are not programmable so I will need to order two for the ailerons. I will take the HS 5625's I was using on the ailerons and shift them over to the flaps since they need to be programmable servos as well. Also still waiting on the spinner to arrive. I sure hope it makes it this week. I am just so close to be done. It would suck to not be able to do a maiden simply because a spinner is holding me up. I guess I could always forgo the spinner and fly it the way it is, but that just wouldn't be right.
I will try to get the start up of the motor video posted shortly. And tomorrow I will get the flaps taken care of. Then it's just bolt in the aileron servos, put on the spinner, balance and flyyyyyyyyy!!
Stay tuned... more to come.
Last edited:
