• If you are new to GiantScaleNews.com, please register, introduce yourself, and make yourself at home.

    We're 1st in Giant Scale RC because we've got the best membership on the internet! Take a look around and don't forget to register to get all of the benefits of GSN membership!

    Welcome!

Sport The Behemoth Yak gets a Behemoth Brother/129" Pilot Yak (2)

stangflyer

I like 'em "BIG"!
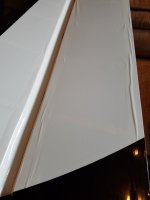
Just like its counterpart, the right wing panel. The left wing panel was just as wrinkled. Again, nothing to be excited about.
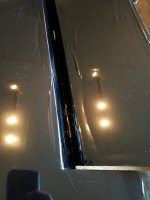
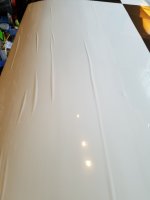
20170715_194318.jpg 20170715_194321.jpg 20170715_194327.jpg 20170715_194424.jpg

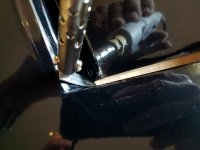
I really like the Top Flite sealing iron for many reasons. One I have found that works superb is getting into tight areas that could normally not be reached. Those pesky inboard surfaces of a pre-installed control surface. (Aileron, Elevator and Rudder) Counter balances. It works terrific on sealing covering back down in the hinge line too.
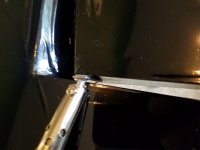
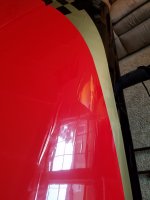
20170715_194451.jpg 20170715_194516.jpg

It took me about an hour on the left wing panel. Other than a small mishap, it turned out really well. Mishap you ask? Weeell.... what a dumb pile o poo.png I was. Ugh!!! So I am just coasting along and somehow....I don't know how, I bumped the knob on my iron to the full hottest setting and before I realized it, I over heated a seam where the gold meets the red with a black checker over the top. Yup...you guessed it. Pulled that sucker apart faster than a yolk spilling from a broken egg. Grrrr!!!
swearing-rage-smiley-emoticon.gif
Ah heck, I can fix that. Fortunately I was able to retrieve enough gold to get a small section placed back in. Then recut the black checker that warped and distorted from the excessive heat and wa-laa. Fixed. Unless a trained eye is looking for it, it can't be seen. (Even up close) I hate it when things like this happen. Note to self: (and everyone else) Keep a constant eye on your knobs. LOL. The wing panel turned out pretty nice all in all.

20170715_225329.jpg
20170715_225404.jpg


And finally, the last of the shrinking. The Fuse. Yay......
 
Last edited:

stangflyer

I like 'em "BIG"!
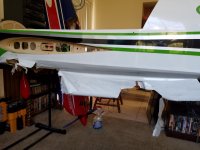
Now as for the fuse, it really was not too bad at all. Perhaps because it has more open structure???? Not really sure. But the only place it was actually wrinkled, (and not severely) was back where the turtle deck meets the vertical fin. That always seems to be a problem area. Probably because of all the compound curvatures. I had to be particularly careful however because the seams on Pilot RC airframes are generally very minimal, they pull apart so quick it will make your head spin. I really don't think it is just Pilot RC that does this. I have seen other manufacturers airframes and wonder how in the heck do their seams stay together. That being said, where the black and the gold meet the red on the fuse, it was incredibly dangerous territory. So I warmed the seams....just "warmed", not heated. While applying pressure with my iron, I worked those seams into a welded seam that should not pull apart ever. Then with my heat gun and my iron turned all the way "OFF", I worked the open structure of the fuse. It all pulled tight and wrinkle free. The rear turtle deck was another story in itself. I had a very huge wrinkle right across the top. Stretching the span from where the canopy sits all the way to the vertical fin. That one was a bear to work out. But I showed it who was boss. Got it sealed down and looking pretty danged good. I decided to get a bit of a sneak peak of how she is going to look. Hmmm, I think....I like.

20170716_012816.jpg
20170716_012836.jpg


The G-Force pilot is just sitting there for mock up purposes. I won't permanently attach him until the dash panels arrive and the cockpit is complete. I also "temporarily" taped those "BAD ASS" Northwest RC decals into the general location of where I would like them to sit. I have not yet decided on the "G-Force" pilots decal. But that is the least of my worries at this point. What do you guys think? Got any suggestions? I guess I could go with the fresh clean uncluttered look like my Sukhoi? But damn, I like those NWRC decals.

20170716_013658.jpg


Yes!!! It really was 1:30 a.m. when these photos were taken. LOL.... Geez, talk about a sickness. Today, my plan is to remove all the wiring harnesses from the original Yak, remove the snakeskin that matches the covering...then re-snakeskin the harnesses in the "carbon fiber" colored looming I just received. I may try to get the wings and the stabs wired and served today. We'll see how it goes.

Stay tuned fellas....
 

stangflyer

I like 'em "BIG"!
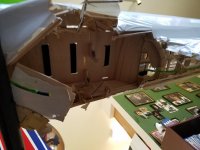
Time to strip out the big Yak. So I can install everything in the big Yak. Yes, you read that correct. And if that doesn't confuse you, riddle me this? How (why) is it that it takes so long to put our equipment into our planes and make them flight ready? When a perfectly reliable and well flying plane can be diluted to a pile of sticks and plastic film in a matter of seconds. In addition, gearing up an airframe is a lengthy drawn out process. Stripping it takes only a minute. Oh well, time to put the Yak off to the side until I get all the replacement wood to rebuild her. Time now to start outfitting the Yak with all the necessary equipment to make her fly.

20170716_114941.jpg 20170716_114951.jpg 20170716_114958.jpg
 

dhal22

GSN Sponsor Tier 1
Time to strip out the big Yak. So I can install everything in the big Yak. Yes, you read that correct. And if that doesn't confuse you, riddle me this? How (why) is it that it takes so long to put our equipment into our planes and make them flight ready? When a perfectly reliable and well flying plane can be diluted to a pile of sticks and plastic film in a matter of seconds. In addition, gearing up an airframe is a lengthy drawn out process. Stripping it takes only a minute. Oh well, time to put the Yak off to the side until I get all the replacement wood to rebuild her. Time now to start outfitting the Yak with all the necessary equipment to make her fly.

Working on my Sukhoi today, mounted the fuel tank, secured a few wires. I even rolled it into my trailer for a test fit. I have had this plane for 4 years, why does it take so long to make them flight ready? :mad:
 

stangflyer

I like 'em "BIG"!
Thought I better give ya all a little update before I find my bed for the night. I spent a little time after work finishing up the snakeskin on the wiring harnesses. They look pretty good but a little disappointed in the Carbon Fiber color. If one harness is loomed through them, they look really nice. But when you slide two elevator harnesses and one rudder harness down the same loom, they stretch out and it is difficult to see the color. Oh well, they look pretty good I guess. We'll see how they look inside the plane. I also loomed the fuel tubing on the behemoth tank. This time I went with red on the fuel tubing. I looks ok. Kind of offsets the tubing from the rest of the plane. That's about all I had time for this evening. I will get some photos posted probably tomorrow.

Oh yeah, I did speak to Gerhard at Aircraft International today. He had just finished test running the 212. He says it idles like a kitty cat just purring away at around 800 or so. And sounds like a Lion at WOT. 6107 rpm. Apparently when the crank busted, it sent shrapnel into the engine and was injested by one of the cylinders. Though the cylinder was not hurt, it did scar a piston. So a new piston assembly, (piston, ring, wrist pin and roller bearing and two "c" clips) was the prescription. The 212 along with the replacement L80's that got mangled in the incident will be shipped out tomorrow. They should arrive Friday. Just in time to be mounted to the new Pilot 129" Yak. I had hoped for a maiden this weekend, but definitely not going to happen. We can shoot for the following weekend. But a lot of that will depend on my determination level.
 

stangflyer

I like 'em "BIG"!
Just for a little fun. I got curious of the origin of the Yak and its primary purpose. Now I know.

yak-54.jpg


Despite its earlier number, the Yak-54 was actually developed from the Yak-55M, to replace the Yak-56. It is the OKB's latest aerobatic trainer, with the airframe of the Yak-55M modified with an instructor cockpit added at the rear, and with redesigned undercarriage main legs raked further forward, a taller fin, redesigned rudder and elevators, three-blade propeller and minor changes to the engine installation (for example, additional coolingair exit louvres). The cockpits are covered by a single canopy hinged to the right, behind a smaller fixed windscreen. Remarkably, the structure is stressed to the even higher negative load factor of —7.

Project manager is D K Drach, chief engineer V M Popkov and the OKB test pilots are A S Vyatkin and A A Sinitsyn (chief Yak-141 test pilot). Painted in a new scheme of white, green and red, the unflown prototype was shown at the 1993 Paris airshow, bearing no marking but the airshow number 310. Later it was given the cryptic registration 01001 and first flown on 24 December 1993, the pilot not being one of those assigned to the programme but Sh Z Khamidulin. Production will be at Saratov.

Bill Gunston & Yefim Gordon "Yakovlev Aircraft since 1924", 1997


3-View

A three-view drawing (800 x 592)


Specification
WEIGHTS
Take-off weight 990 kg 2183 lb
Empty weight 700 kg 1543 lb
DIMENSIONS
Wingspan 8.16 m 27 ft 9 in
Length 6.91 m 23 ft 8 in
Wing area 12.89 m2 138.75 sq ft
PERFORMANCE
Max. speed 360 km/h 224 mph
Ceiling 4500 m 14750 ft
 
Top